

Installation of a Proman PTO Hydraulic Power Take-Off on a 2010 Polaris Ranger Crew
I have added a Proman PTO Hydraulic Power Take-Off to my 2010 Polaris Ranger Crew. The Proman PTO adds some additional “Utility” purpose to your UTV or ATV. Proman has a whole array of accessories either already developed or in the development process for UTV or ATV.
Unlike my John Deere Tractor, the benefit of a Hydraulic PTO is being able to drive attachments without a Rotating PTO shaft. I have run my PTO shaft with damaged PTO guards in the past, its dumb, but I have done it, in between PTO guard repairs.
Some of the items accessories Proman currently offers are a Rough Cut Mower Deck, Finish Mower Deck, Rotary Broom, Flail Mower, Log Splitter, etc. The Proman definitely offers the ability for your ATV or UTV to replace several other pieces of ground keeping equipment.
Polaris is now manufacturing a Pure Utility Workhorse UTV in the Brutus, which offers onboard hydraulics as well. However, for those that may be interested in a UTV with the work functionality of the Brutus, but don’t want to buy a new UTV, the addition of the Proman PTO may just be your answer.
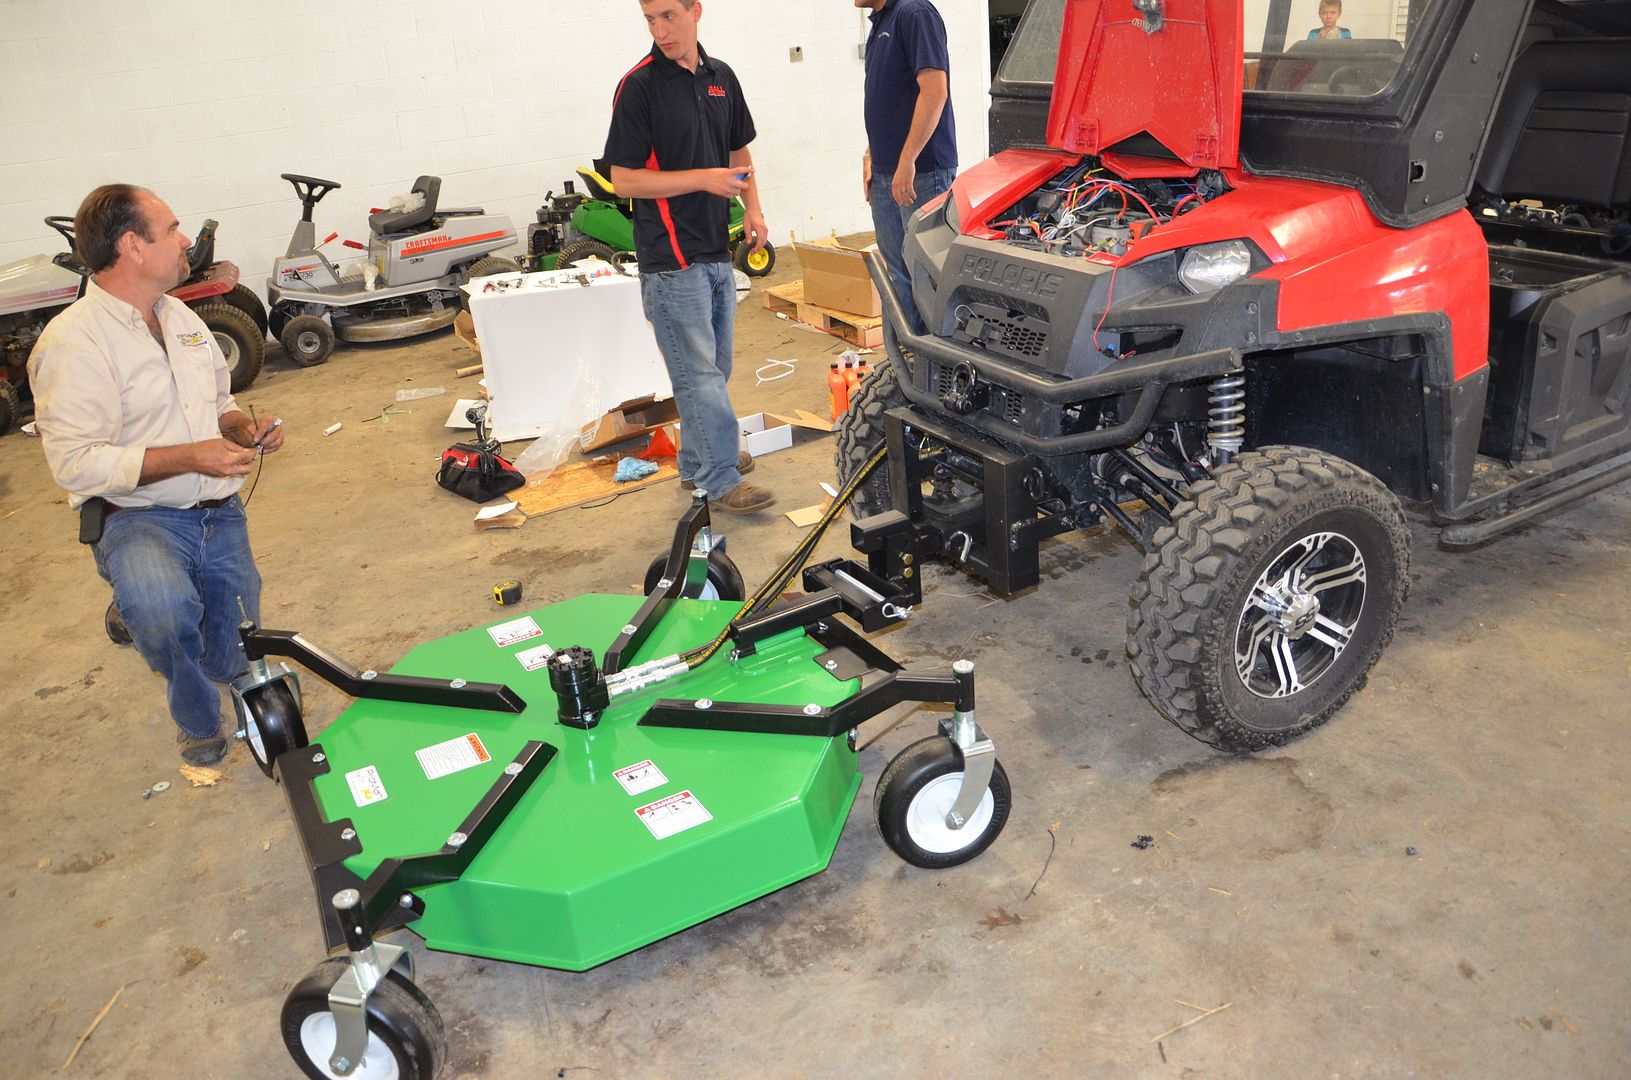
Since I was the first Proman PTO installation by my dealer (Ball Equipment) I had the opportunity to meet Kirk Jones, the owner of Proman, who traveled to Ball Equipment to walk everyone through the installation of PTO unit.
The installation requires some basic mechanical knowledge, but it is not difficult at all. I would say that if you have enough knowledge to change your UTV clutch belt, you could install the Proman PTO. All and all it will likely take about 2 to 3 hours to install by yourself. After you have done one of them, you could probably cut the time down to 1 or 2 hours.
The big bonus is that it does not require any special tools. You just need some basic wrenches, power drill, and drill bit. Proman also includes a DVD that will walk you through the installation step by step. In my opinion a video is better than an instruction manual any day of the week.
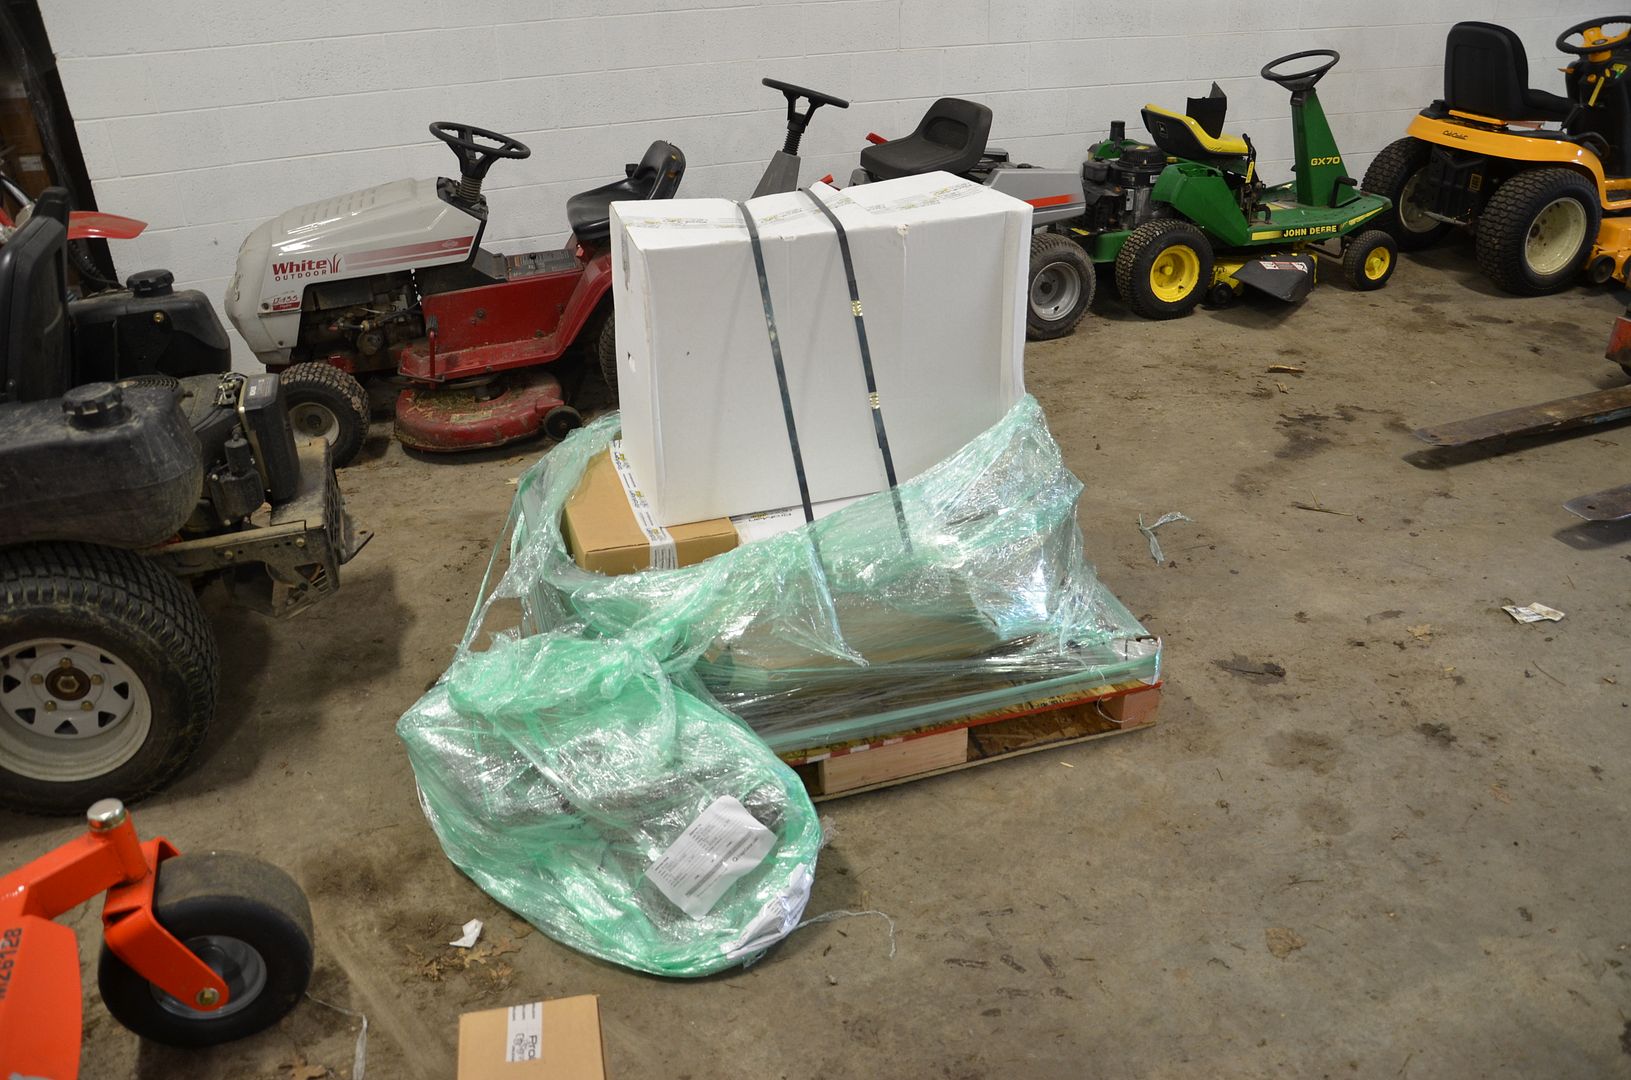
The Proman PTO with a Rough Cut Mower Deck arrived securely packaged and strapped to a pallet.
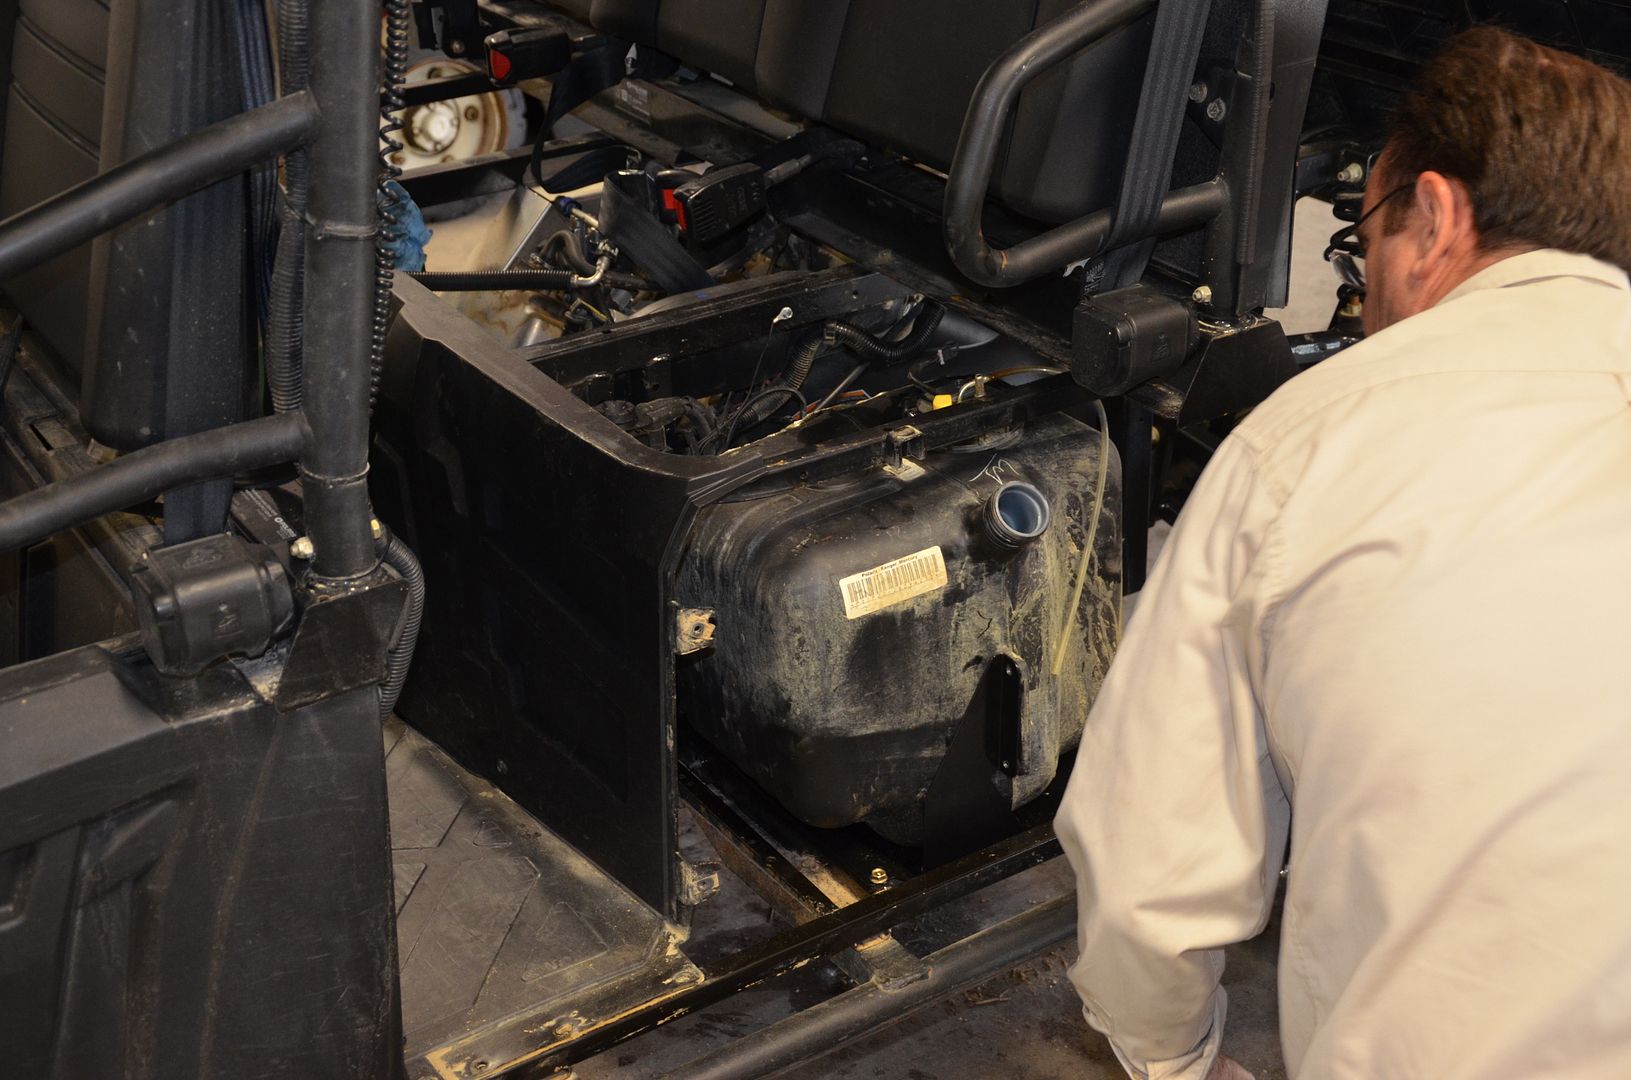
The first step in the installation of the PTO unit was to prepare to relocate the gas tank to the opposite side of the Ranger Crew. Fortunately the underseat side of the Ranger is essentially symmetrical. So this is very easy to do.
To begin, you need to disconnect your battery to prevent any stray electrical currents while working on relocating the fuel tank. In addition, it is highly recommended to either syphon your gas out of the tank or wait until there is a fairly empty tank prior to the tank relocation. It definitely makes it easier to move if there is less fuel in the tank.
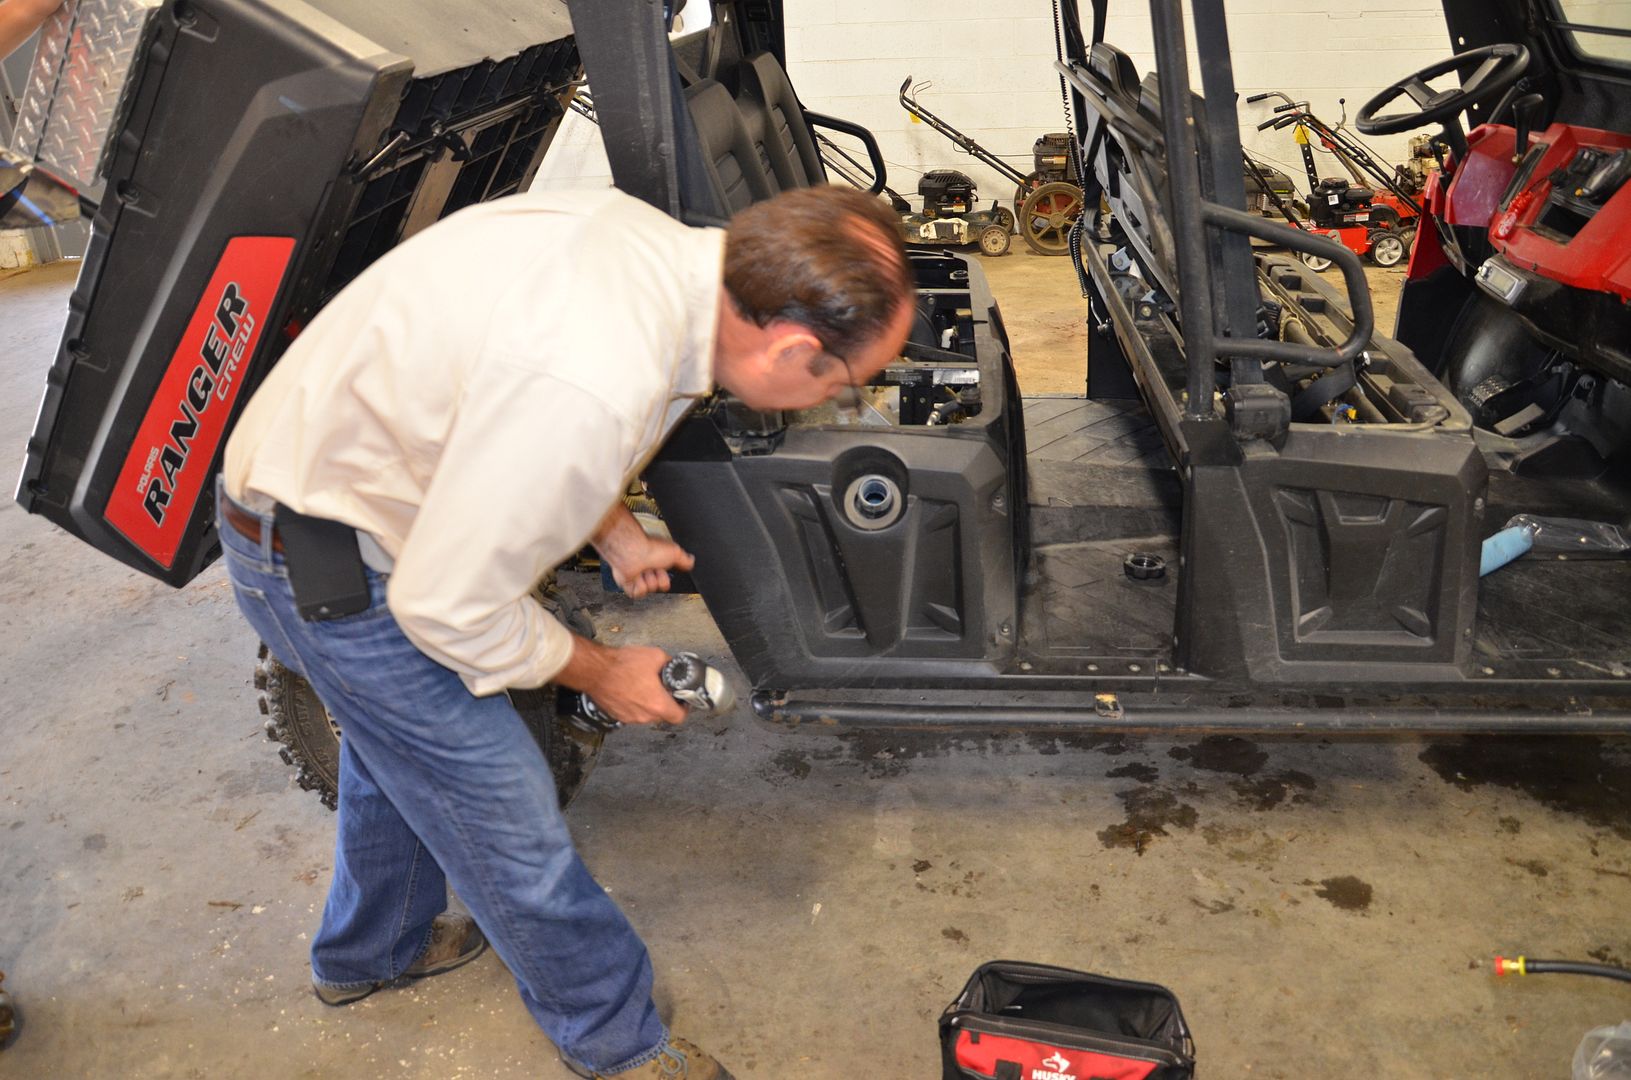
Next, the rear seat was removed, the bed dump tilted, gas cap removed and plastic body side panels removed with a Torx wrench.
Once the plastic panels were removed, it was time to begin to remove the gas tank. However, before the gas tank was removed, the air-resonator box was removed. For my installation I chose to keep the air-resonator box removed. I just coupled the air-intake together with a metal coupler. I am not sure what the purpose of the resonator box is and don’t notice any issues without it. This could be reconnected if desired, but some additional plumbing parts would have been required.
Now that the air-resonator box has been removed, the gas tank is all set to come out. It is only held in by two screws and the fuel line connection on the fuel pump. However before physically removing the fuel tank, the drivers side of the Ranger was prepped for the tank installation.
To facilitate the tank relocation, Proman provide a Fuel Tank relocation floor plate which is identical to the one in the factory tank location. The part is precision fit and drops right in like it was made from the factory.
The installation of the floor plate requires a drill, to install a self-tapping screw provided by Proman. The hardware Proman uses is the same hardware as found elsewhere on the Ranger, so it looks like it was from the factory.
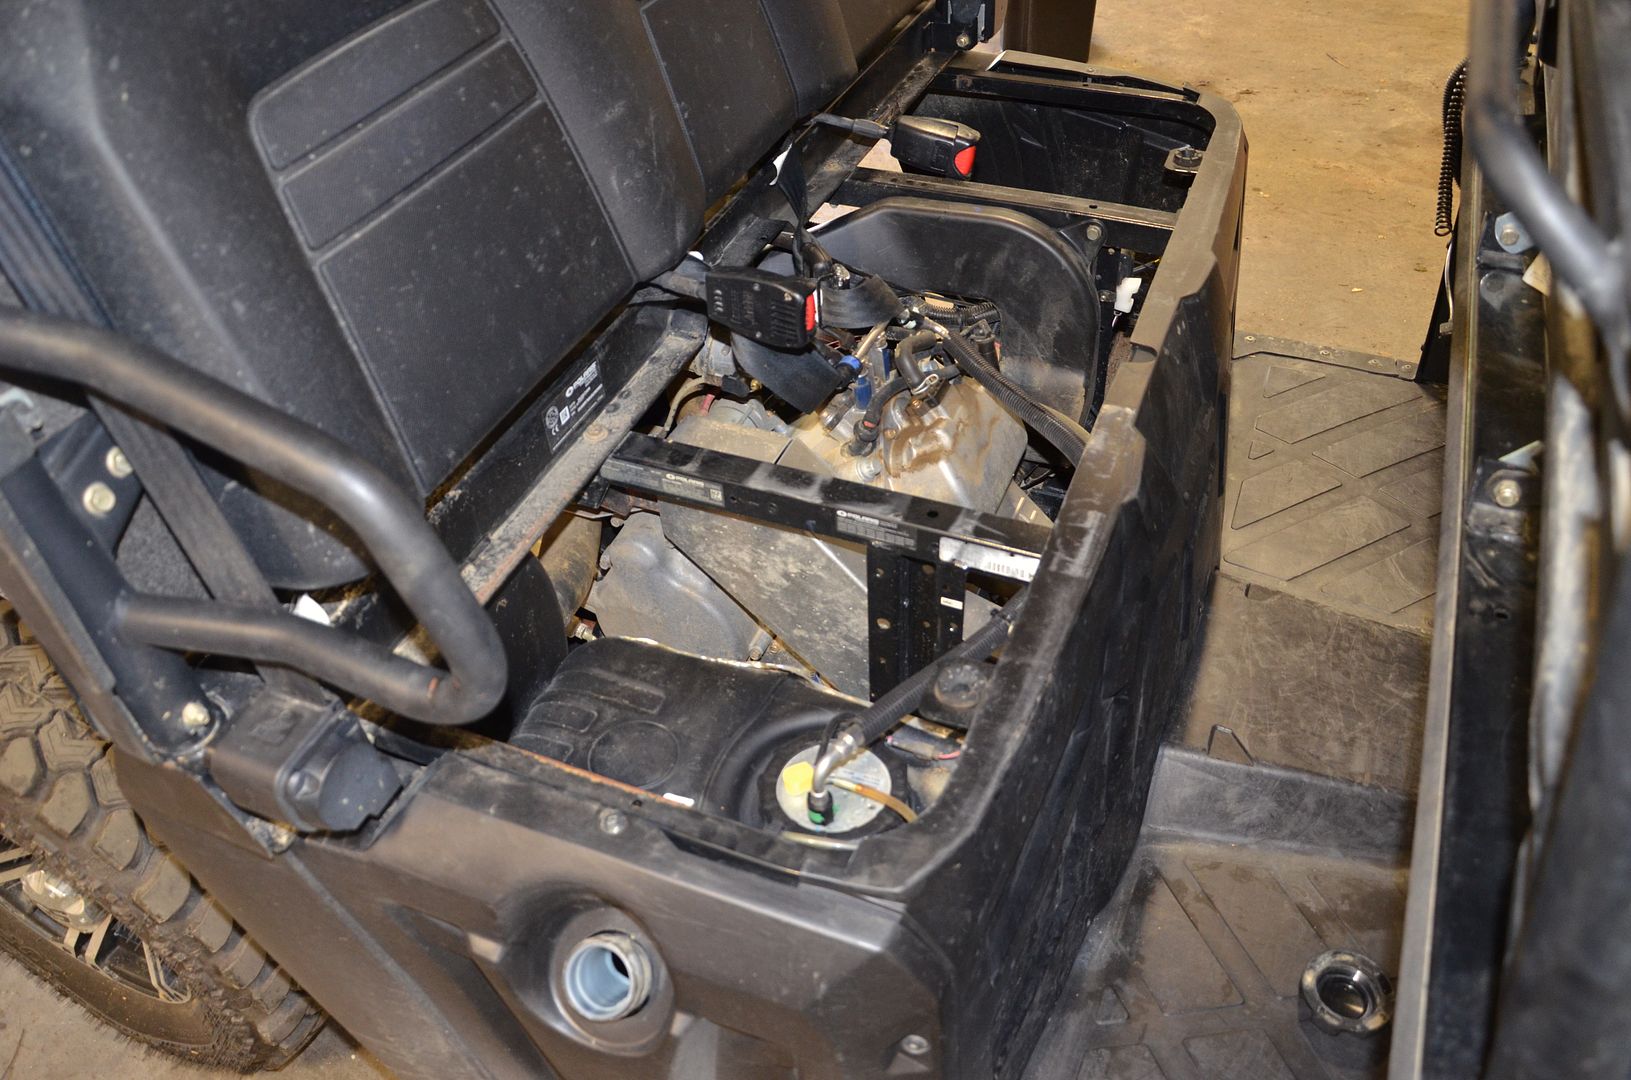
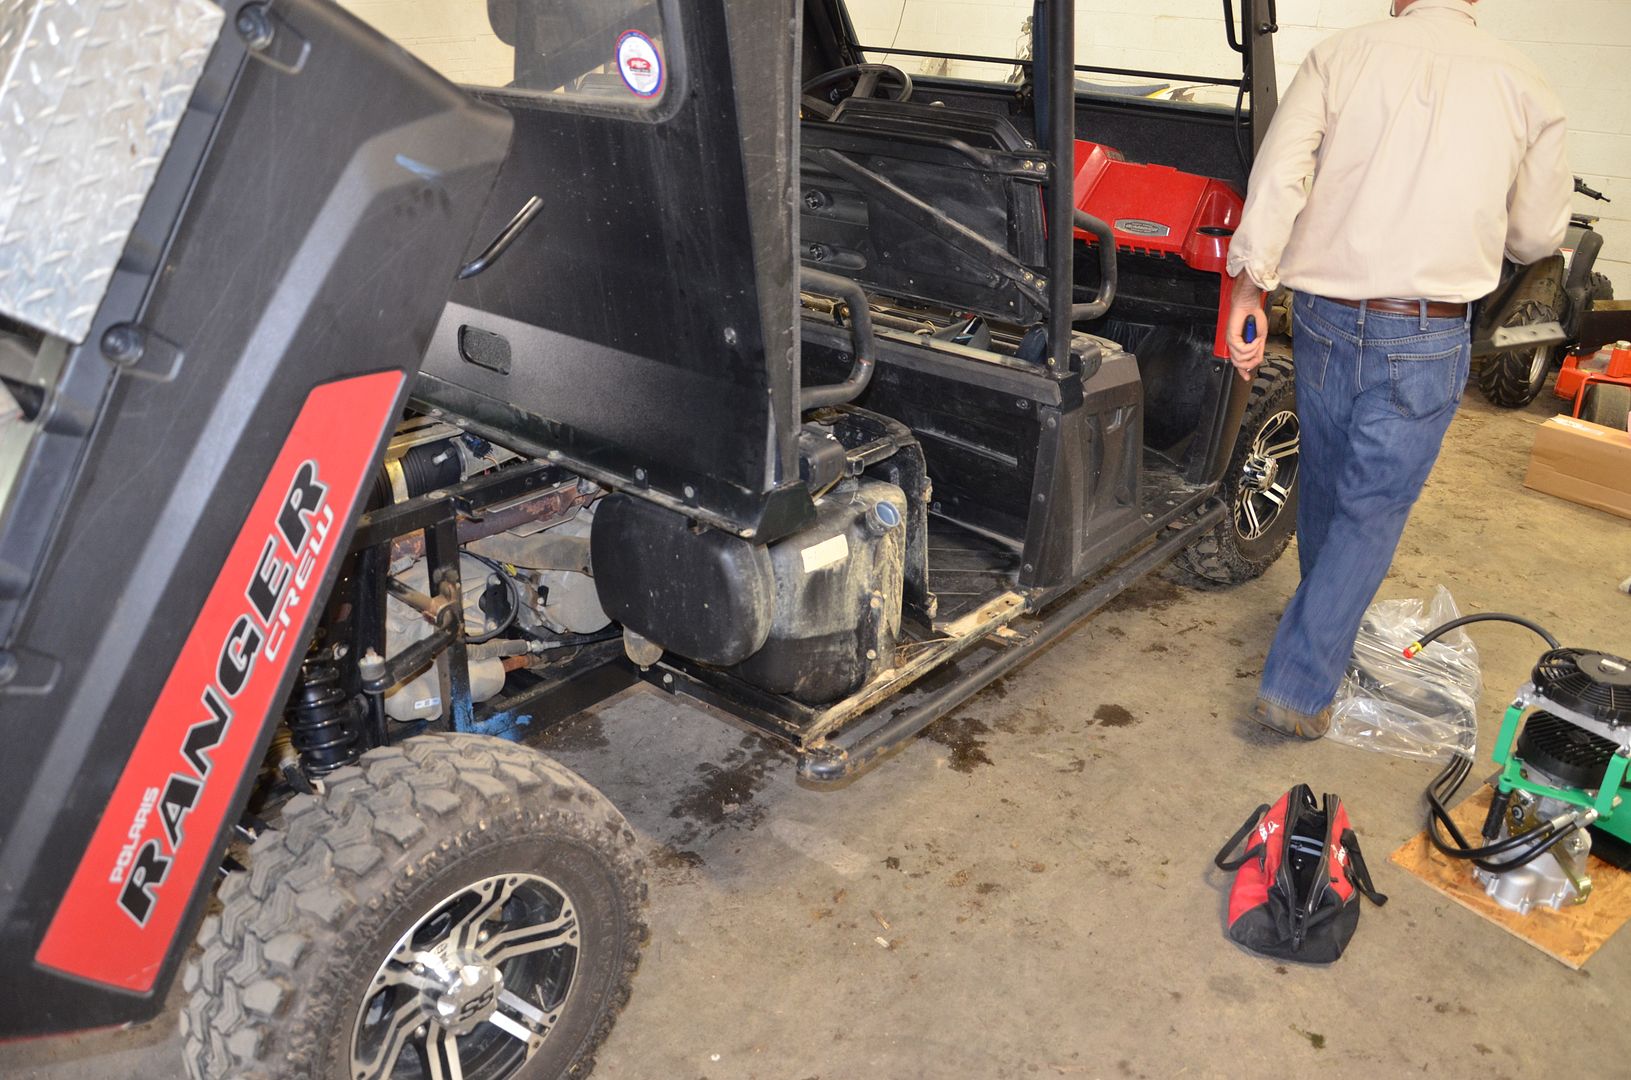
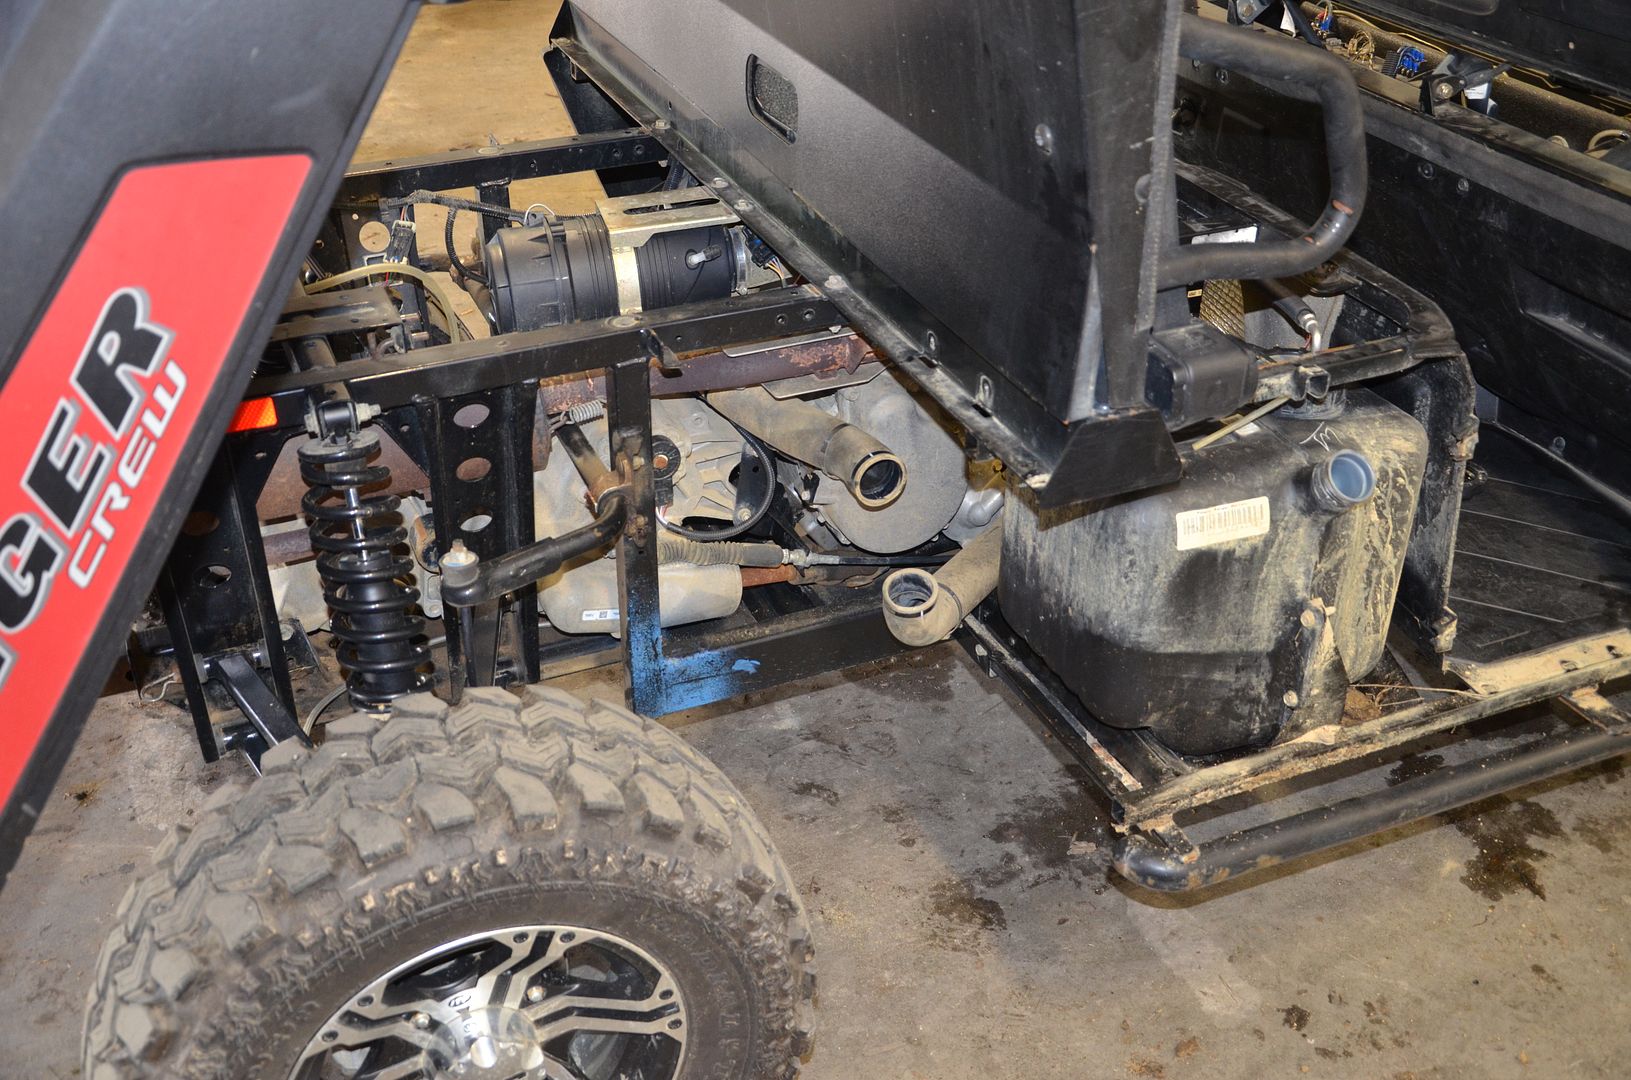
Once the floor mount is installed, the Gas tank is disconnected and relocated to the drivers side of the Ranger.

The fuel line very easily pivots to the opposite side of the Ranger which again makes relocation of the fuel tank very easy.
The down side to the tank relocation is that you have to take a 4” hole saw and drill a hole in your drivers side seat panel to accommodate access to the fuel tank. Proman does provide a plastic plug to fill the original fuel tank access hole on the passenger side of the machine.
PTO Installation
Now that the fuel tank is relocated, the PTO installation can begin.
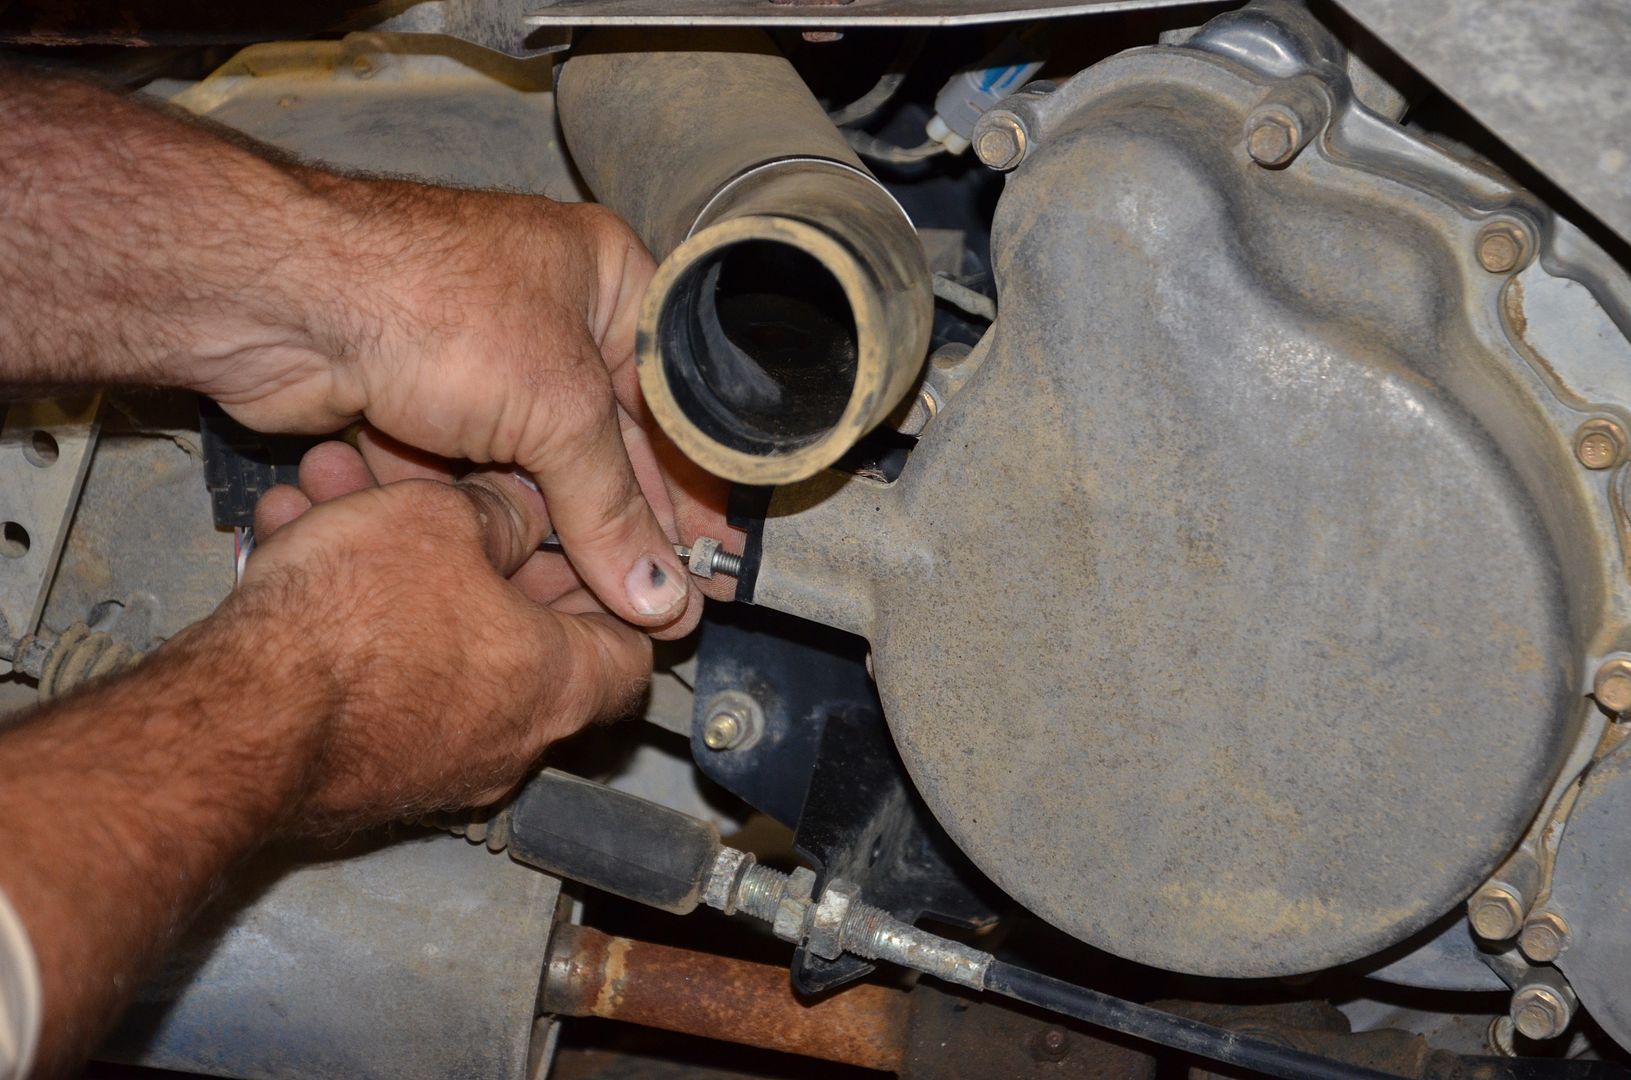
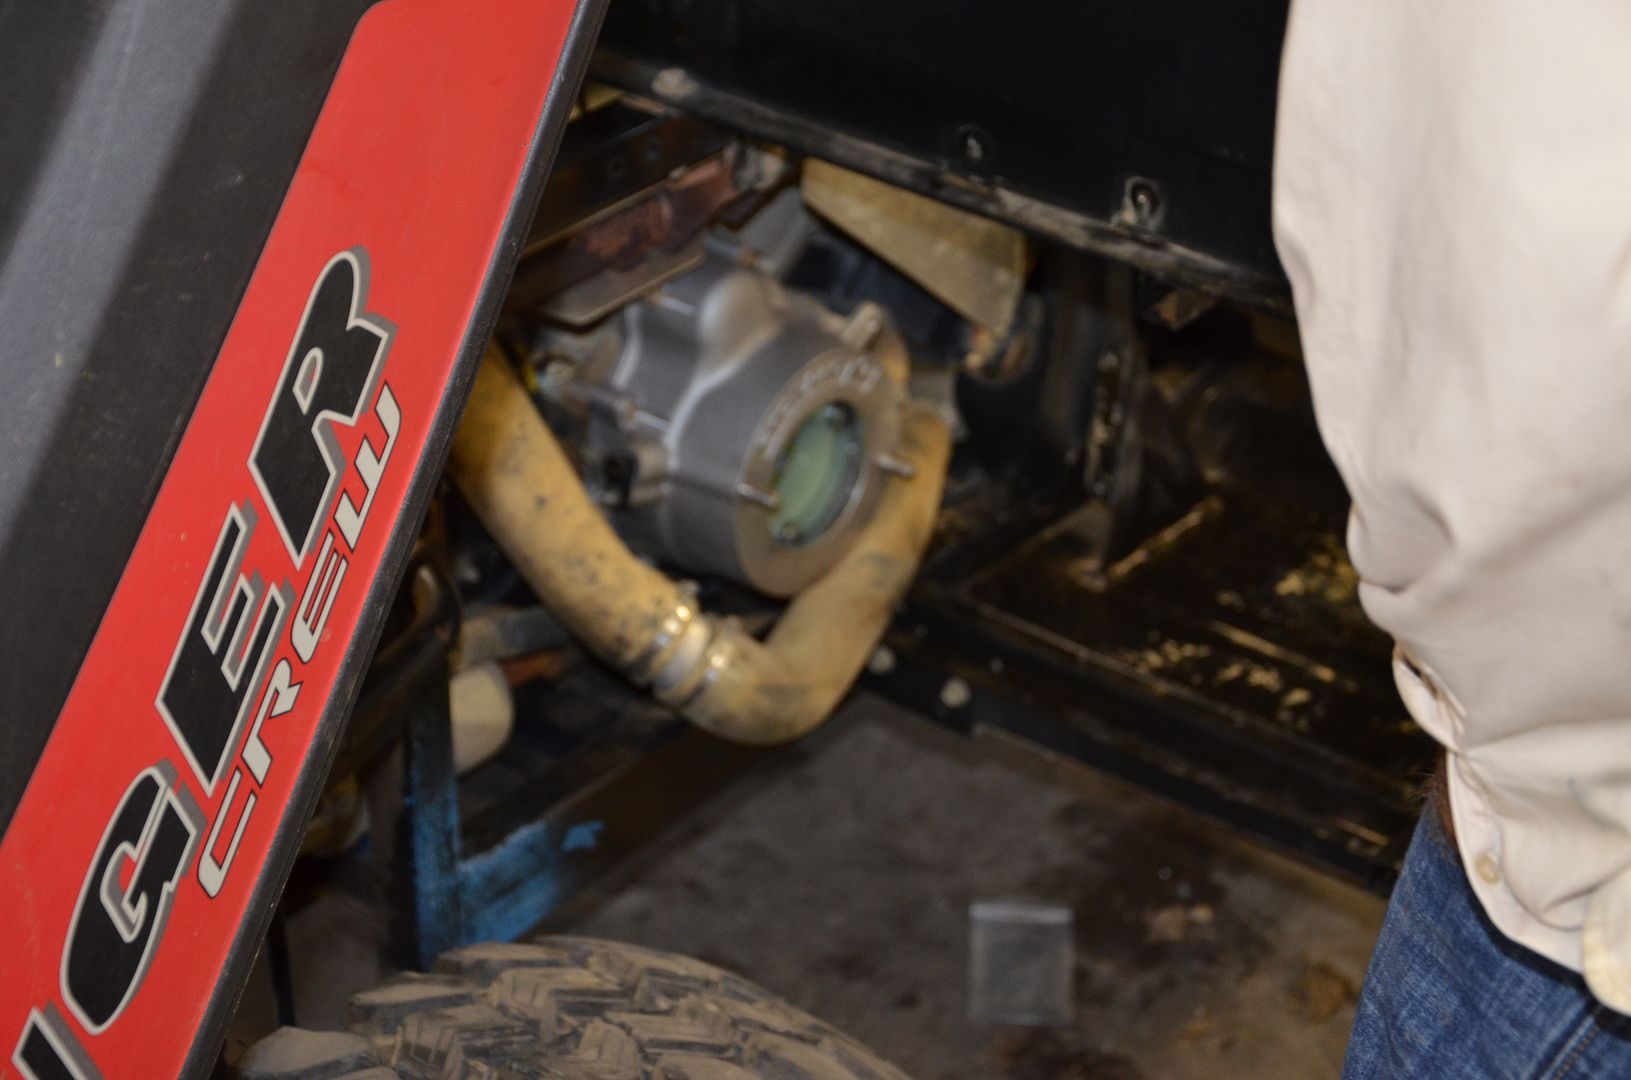
The Proman PTO is actually driven off of the flywheel on the Ranger. In order to install the PTO Adapter Bracket, the Ranger Crankcase Cover needs to be removed and replaced with the Proman Crankcase Cover. The first step in this process is to remove the Crank Position Sensor (CPS) from the Crank Case Cover.
Once that is done the CPS is removed, the screws in the crank case cover can also be removed.

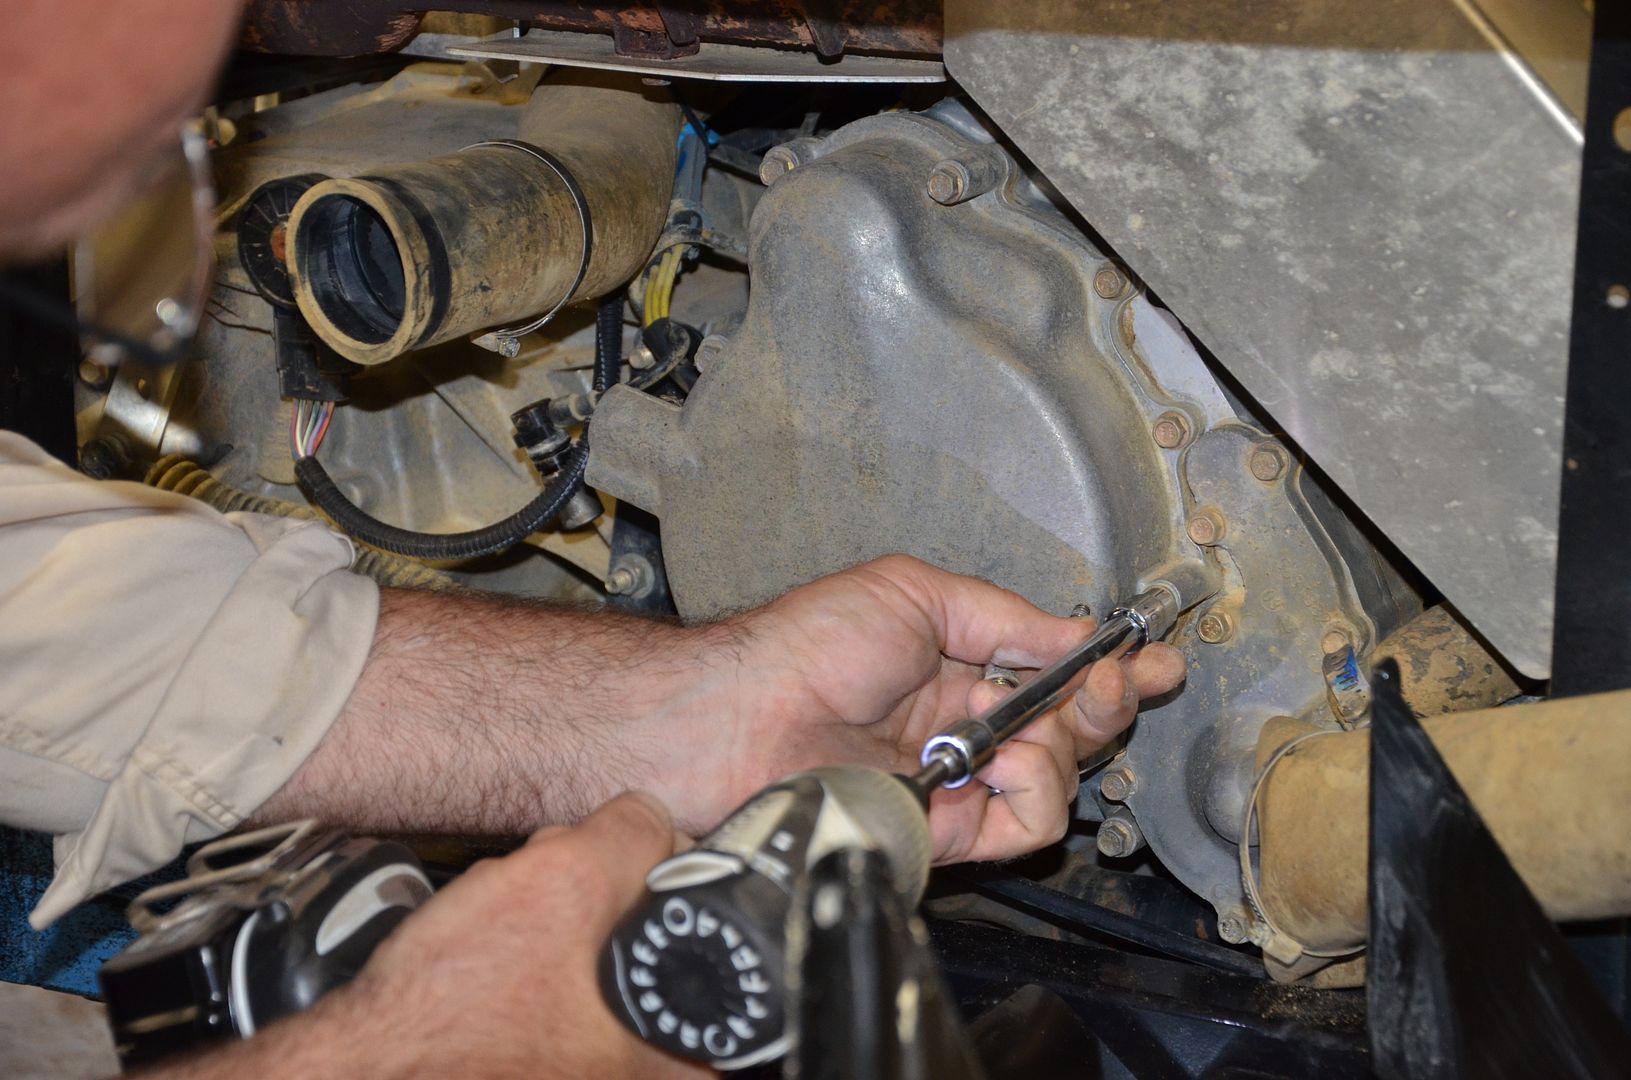
Once the Crankcase cover is removed it is time to install the Proman PTO flywheel adapter. This is a ring that attaches to the existing flywheel puller holes.
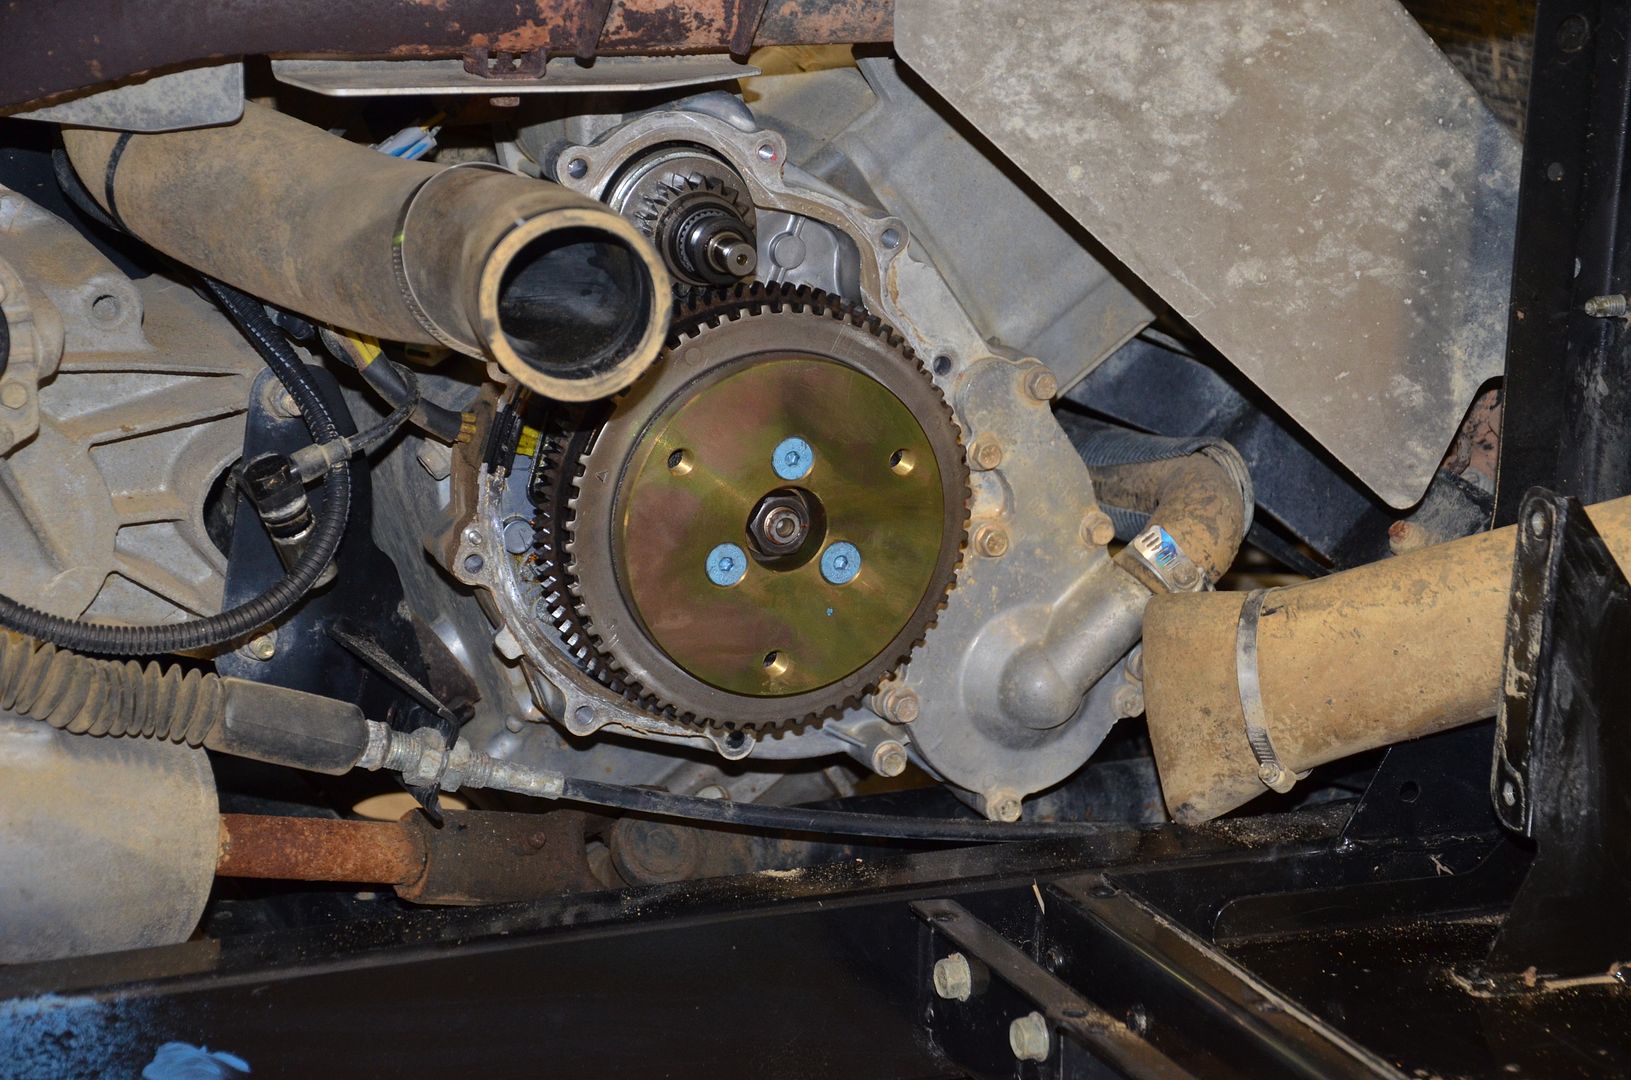
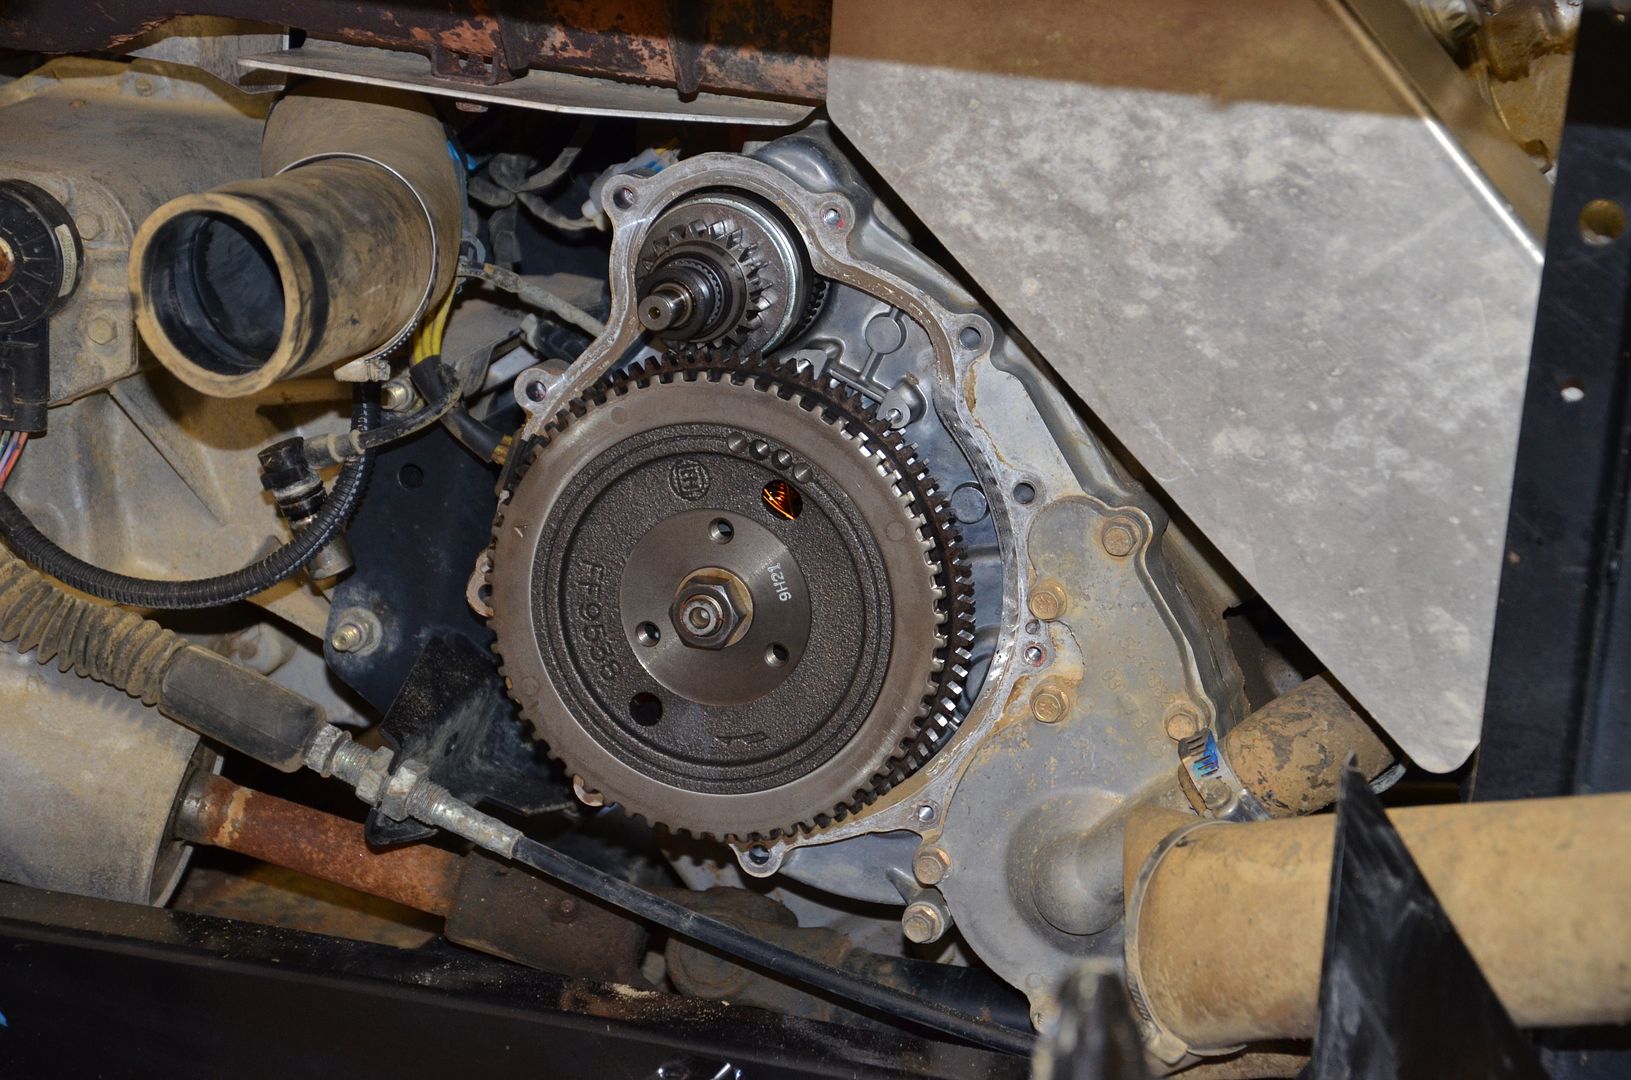
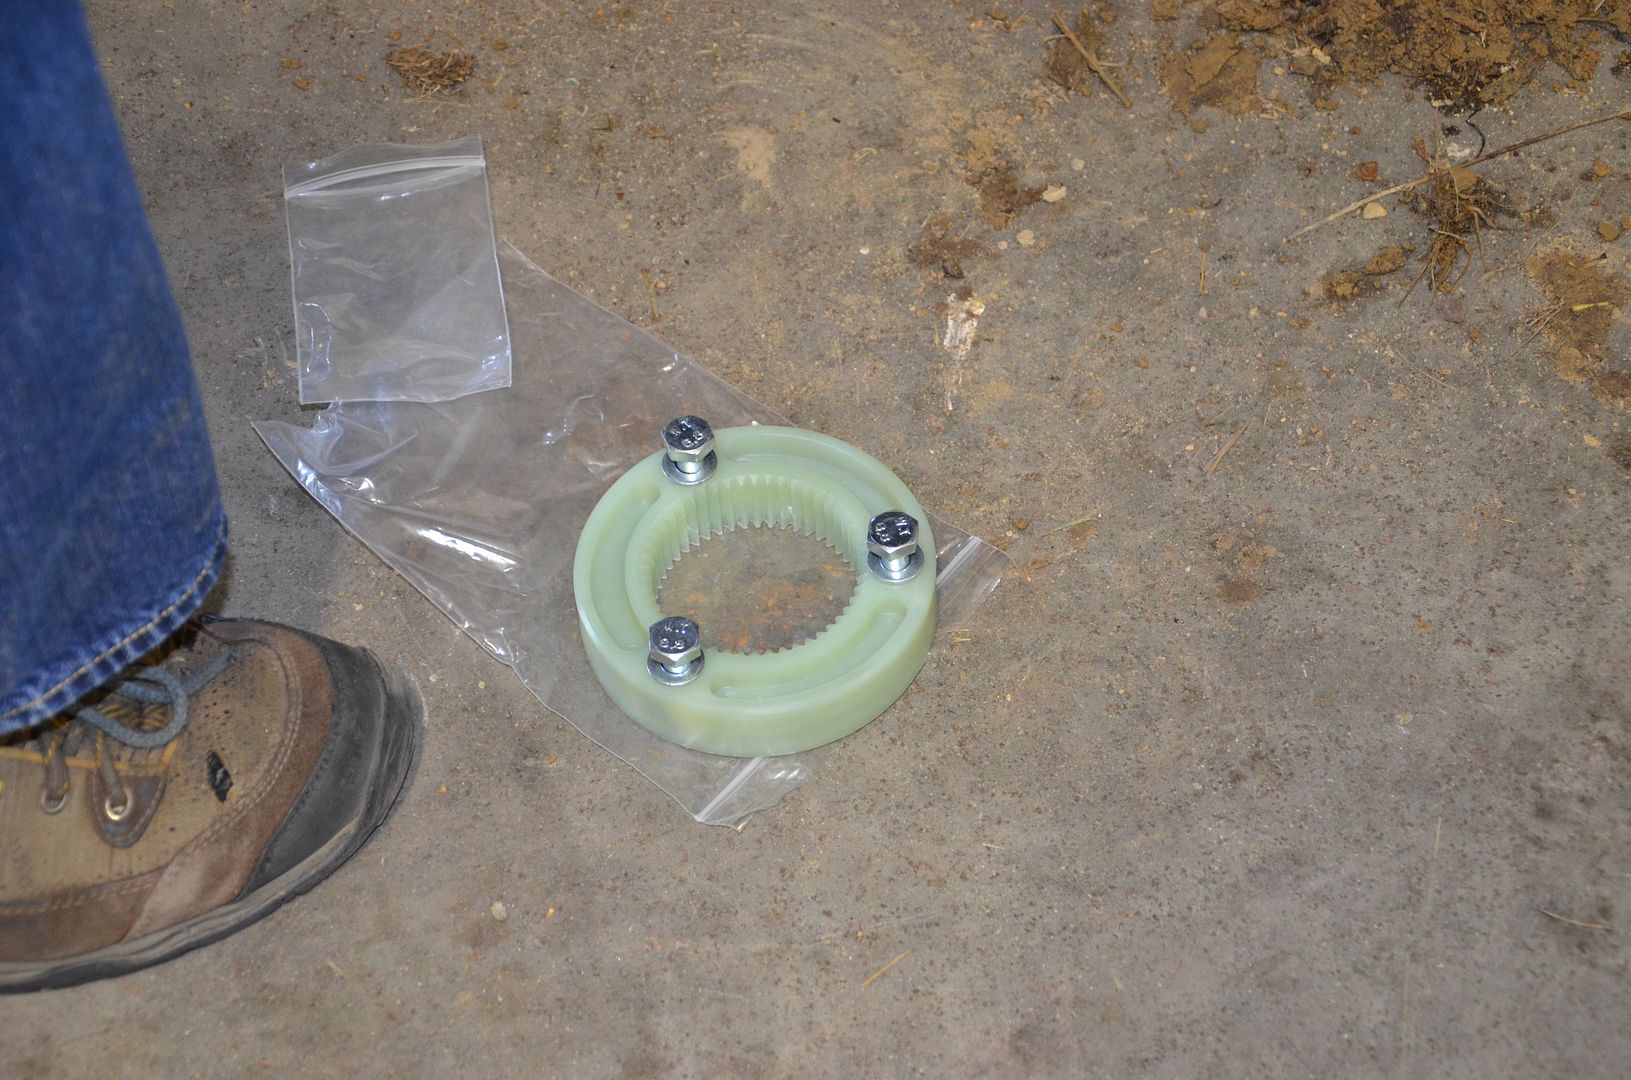
Once the Proman PTO flywheel adapter is installed, it is time to install the actual PTO coupler. The PTO coupler is a composite ring that has teeth that engage the and drive the PTO pump
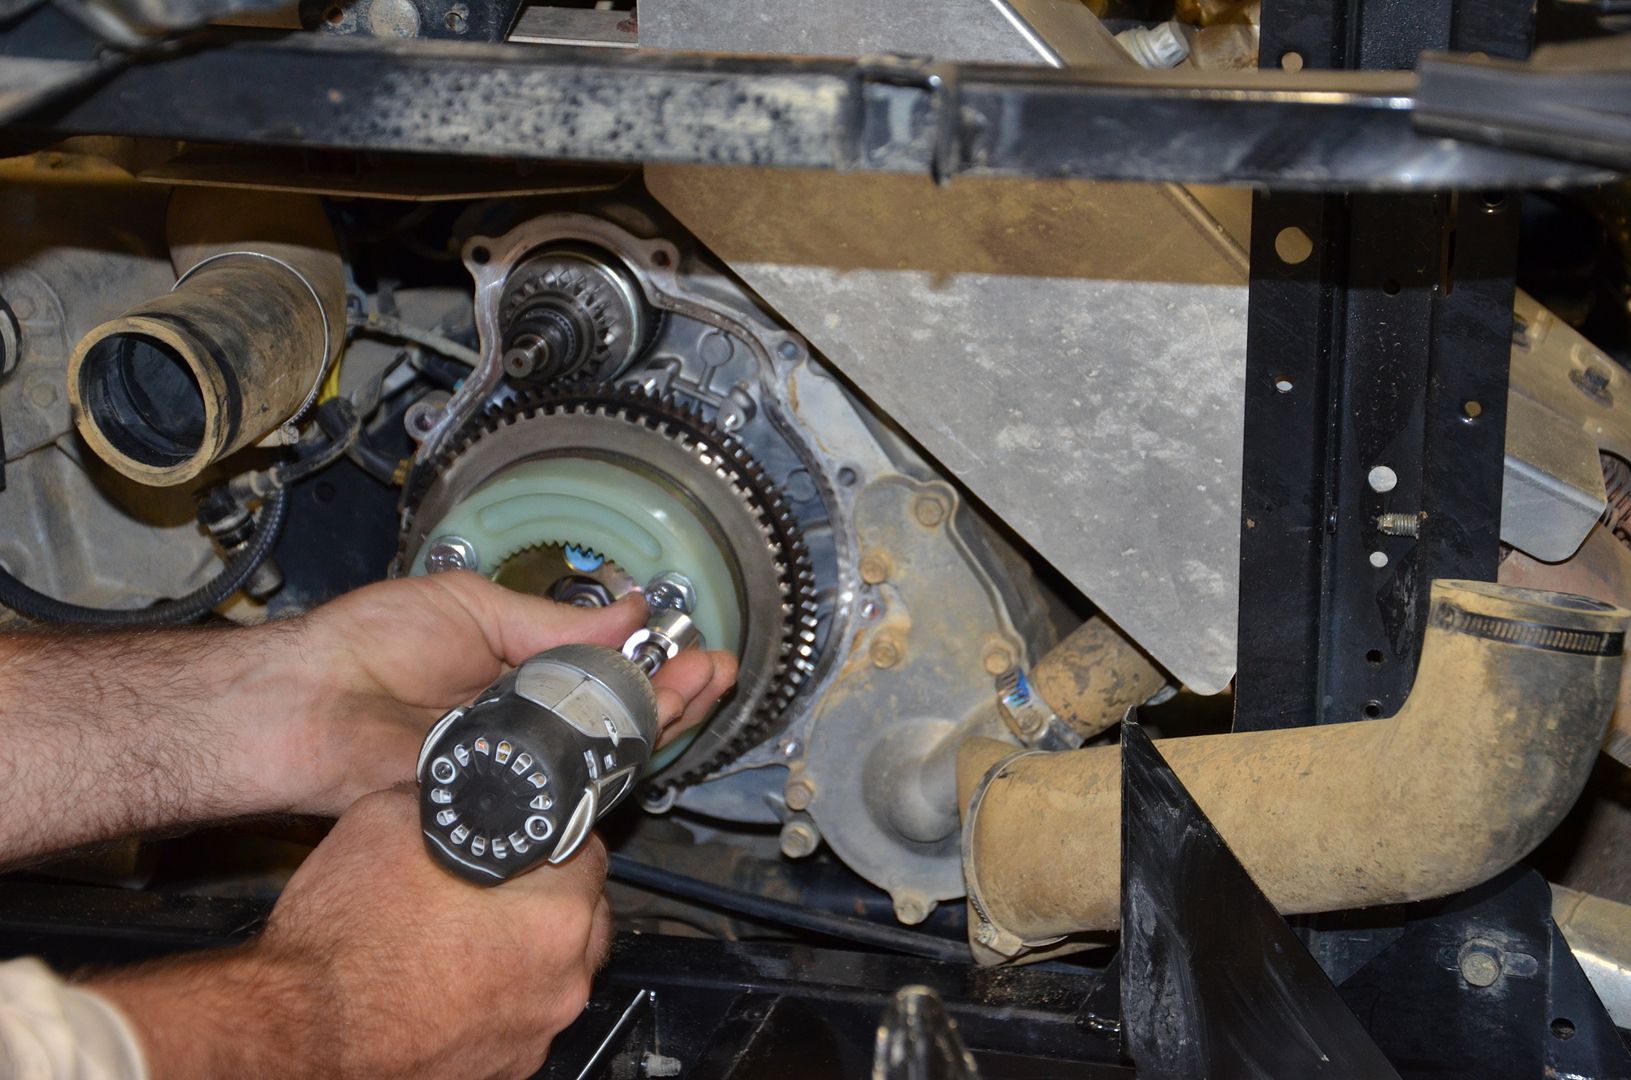
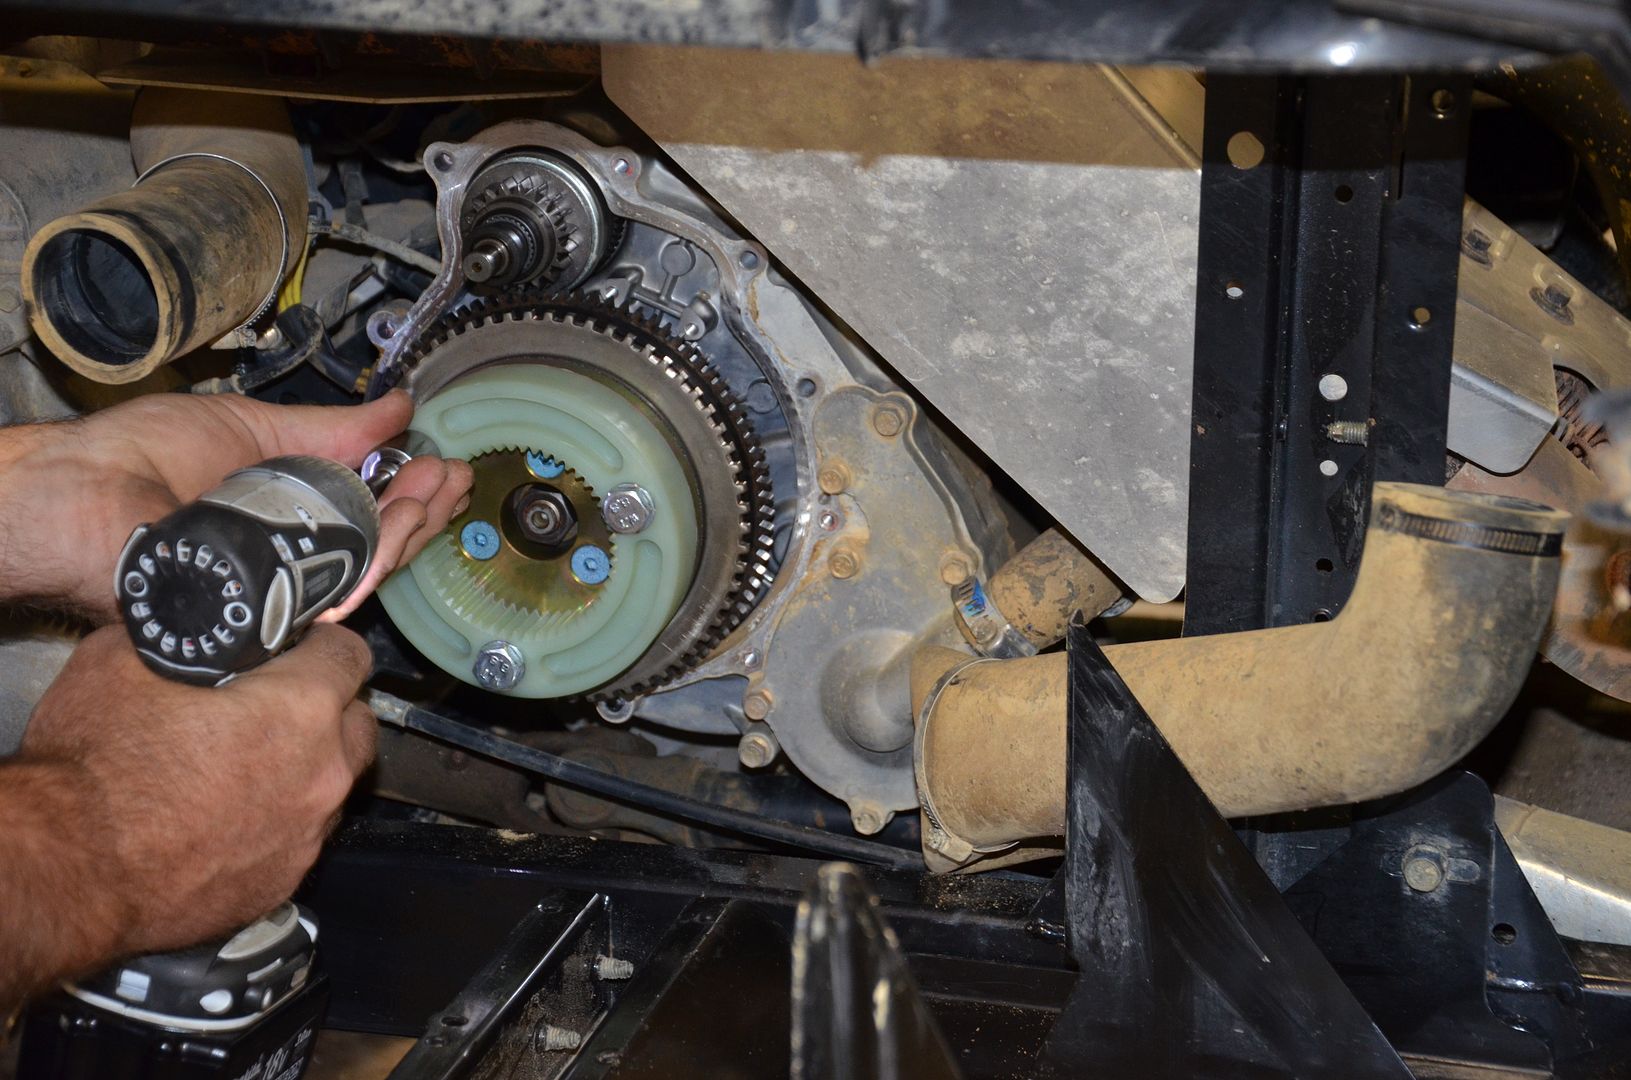
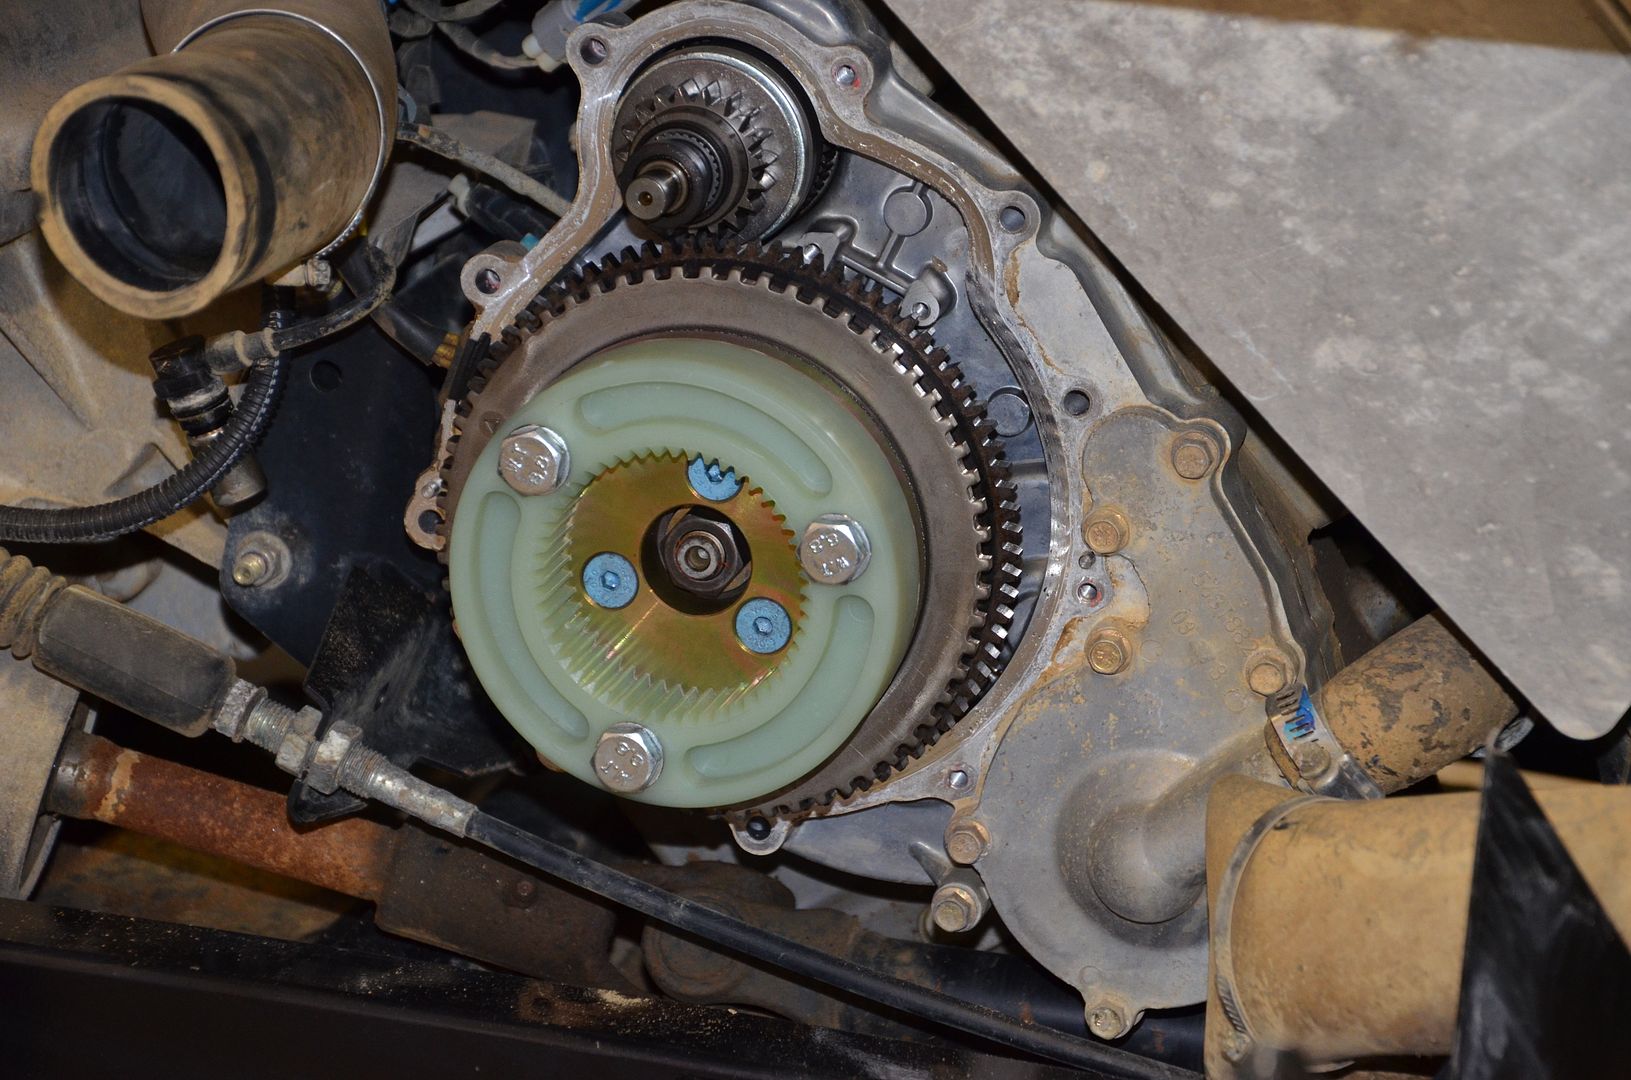
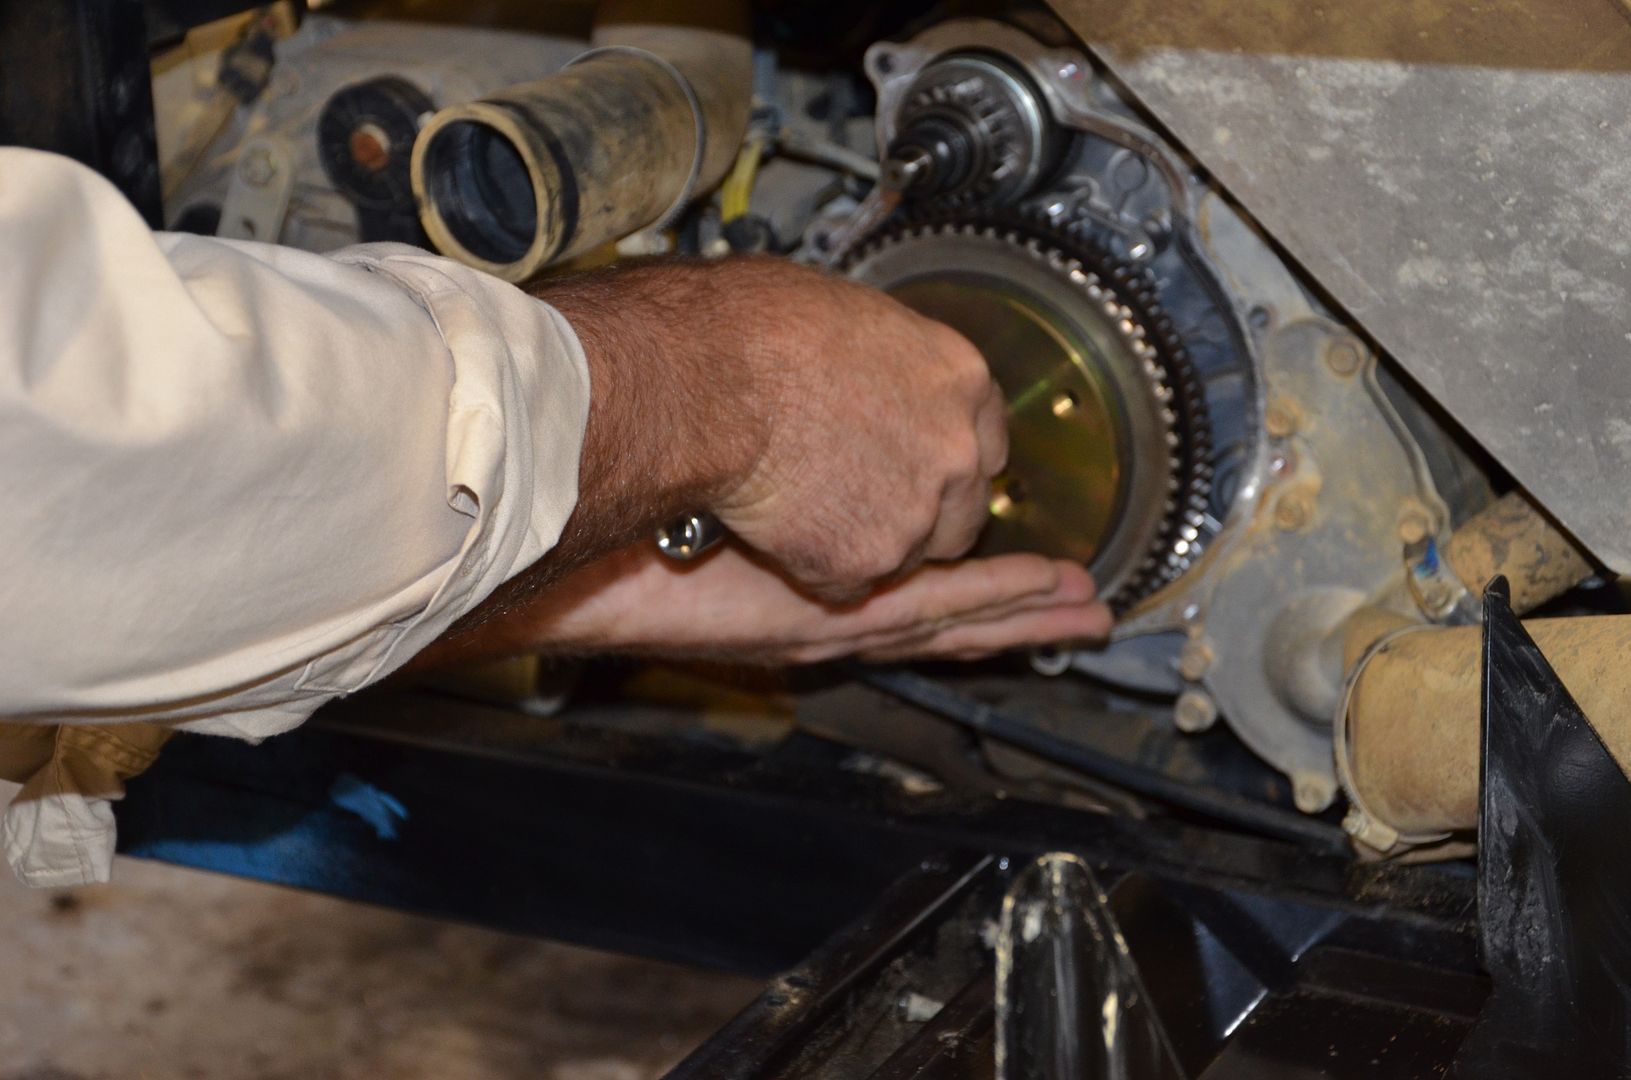
Now that the PTO Adapter & Coupler have been installed on the flywheel, the Proman PTO Crank Case cover can be installed in place of the factory crank case cover. It is critical to remove the crank case cover gasket from the original crank case and re-install it on the Proman crank case cover. Once the gasket is in place, the cover is re-installed and torqued.
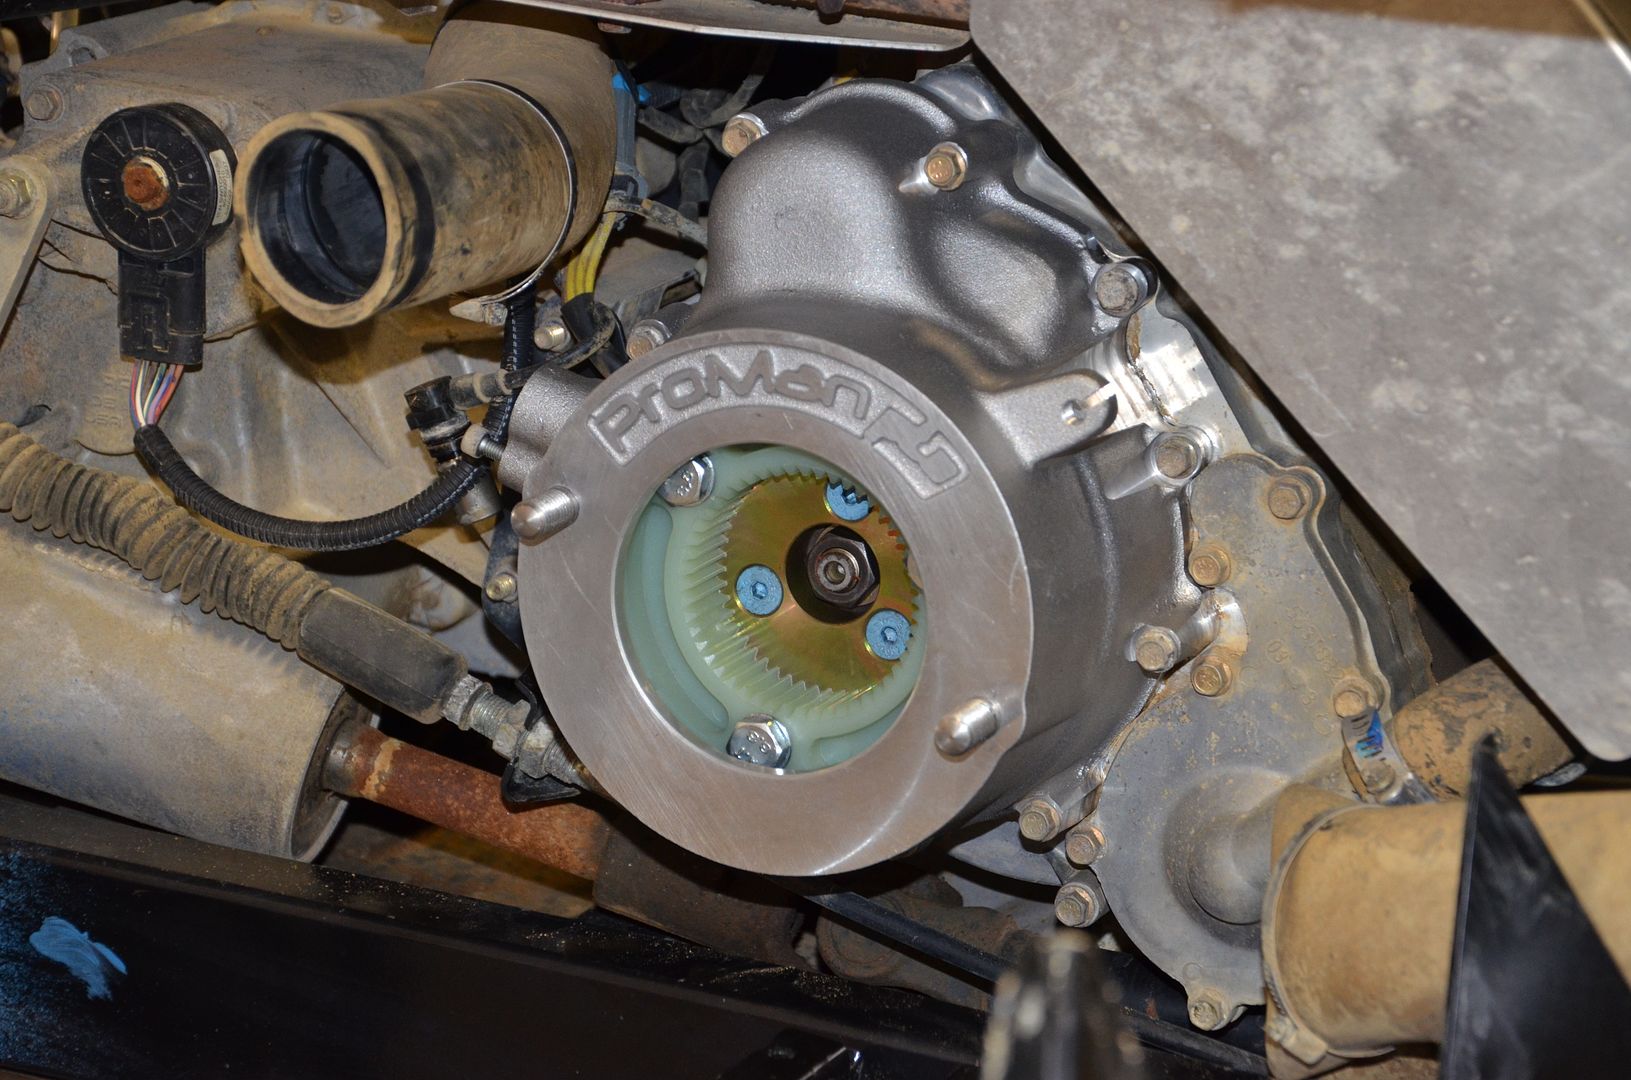
After the Proman Crank Case cover was installed, it was time to reconnect/splice together the air intake line. Proman provides a metal coupler for doing this. If it is desired to use the factory air resonator box that was removed, some additional plumbing fittings would be required.
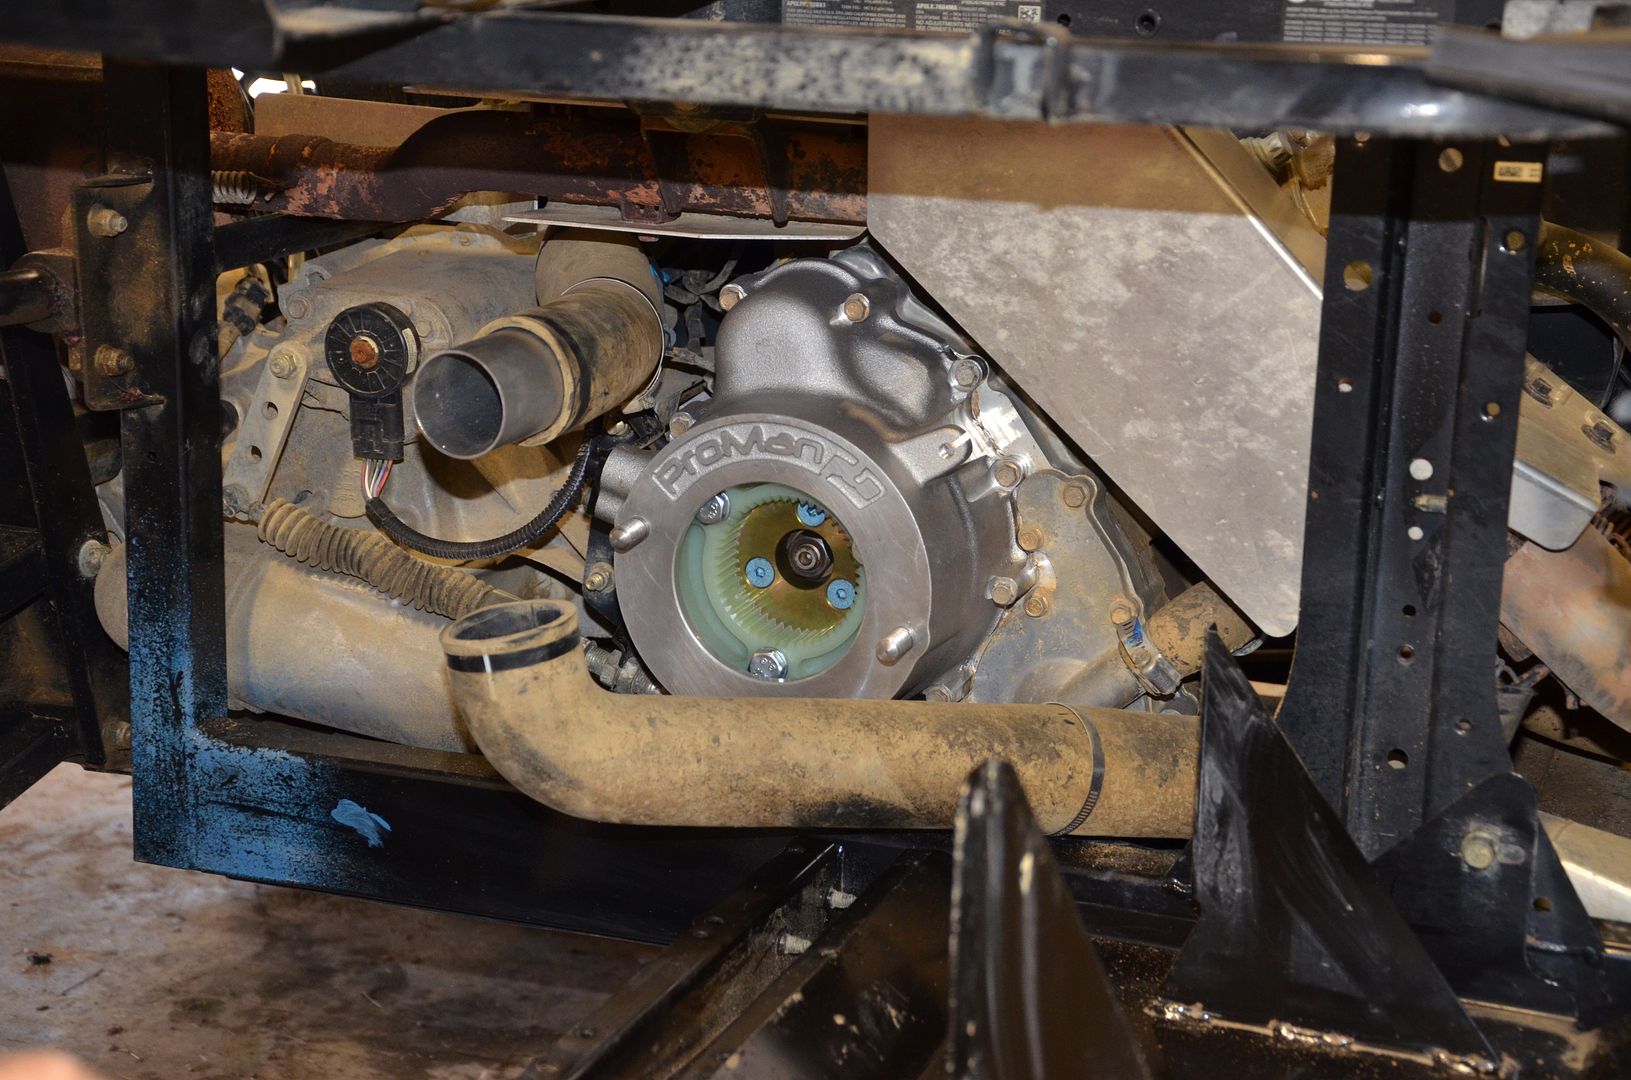
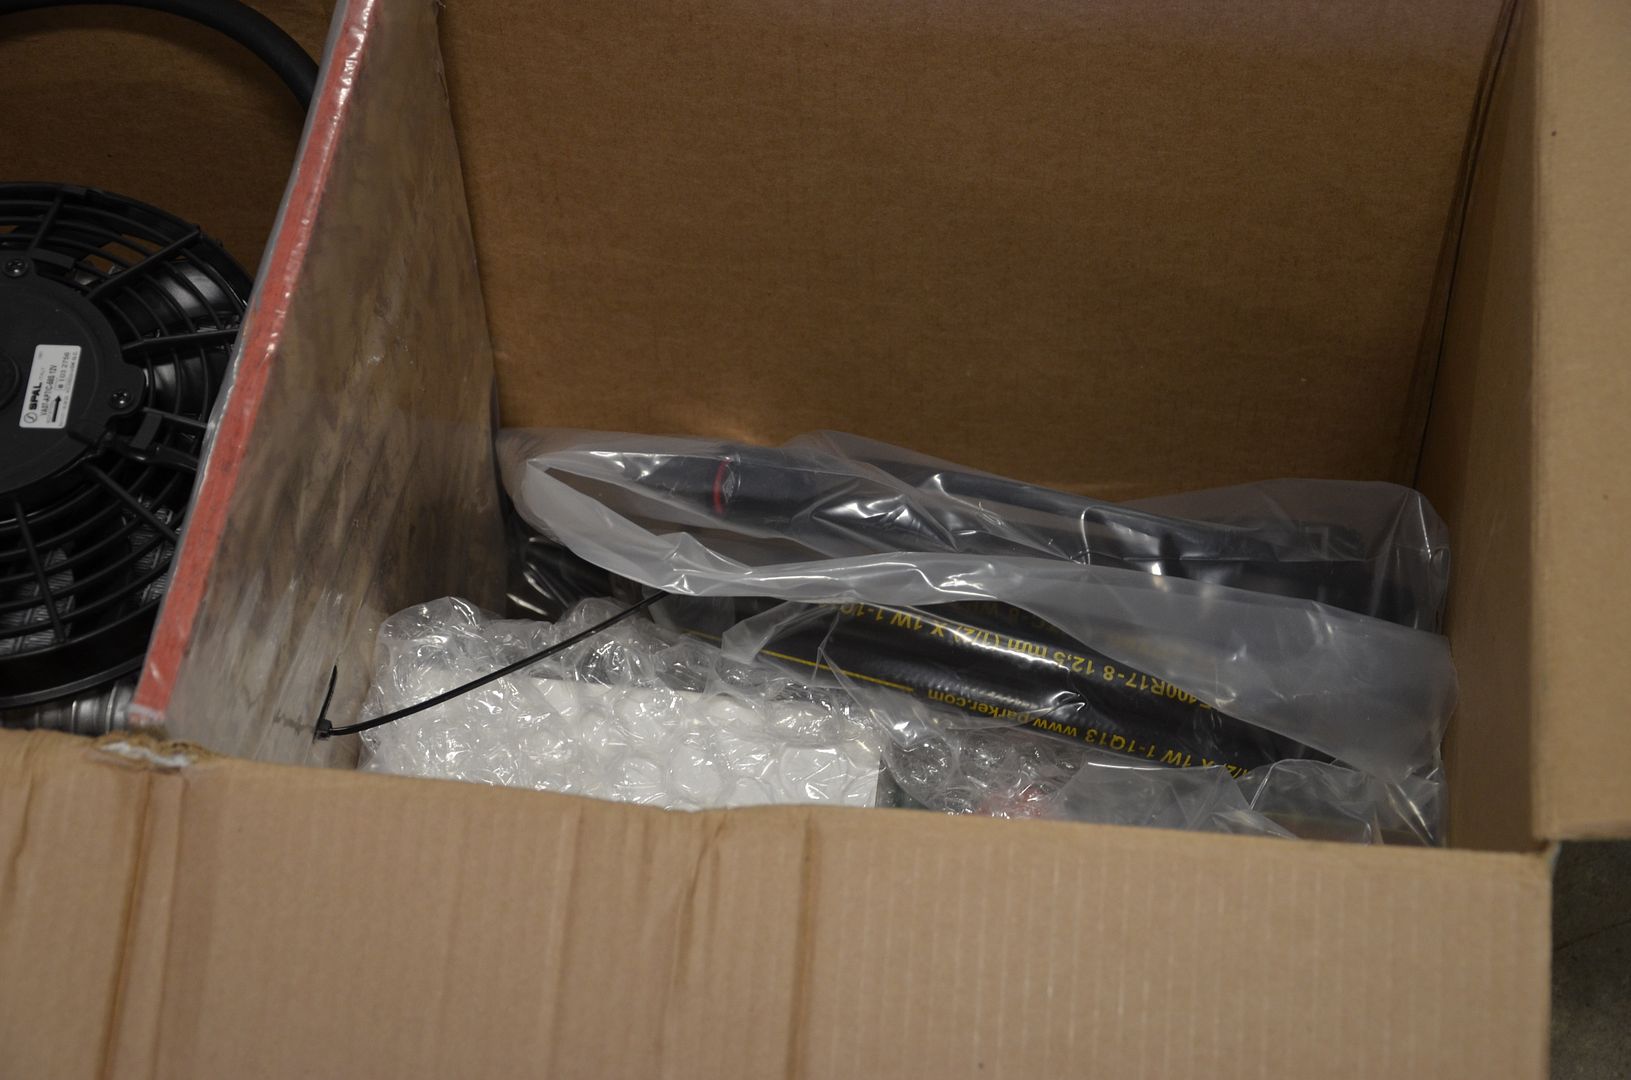
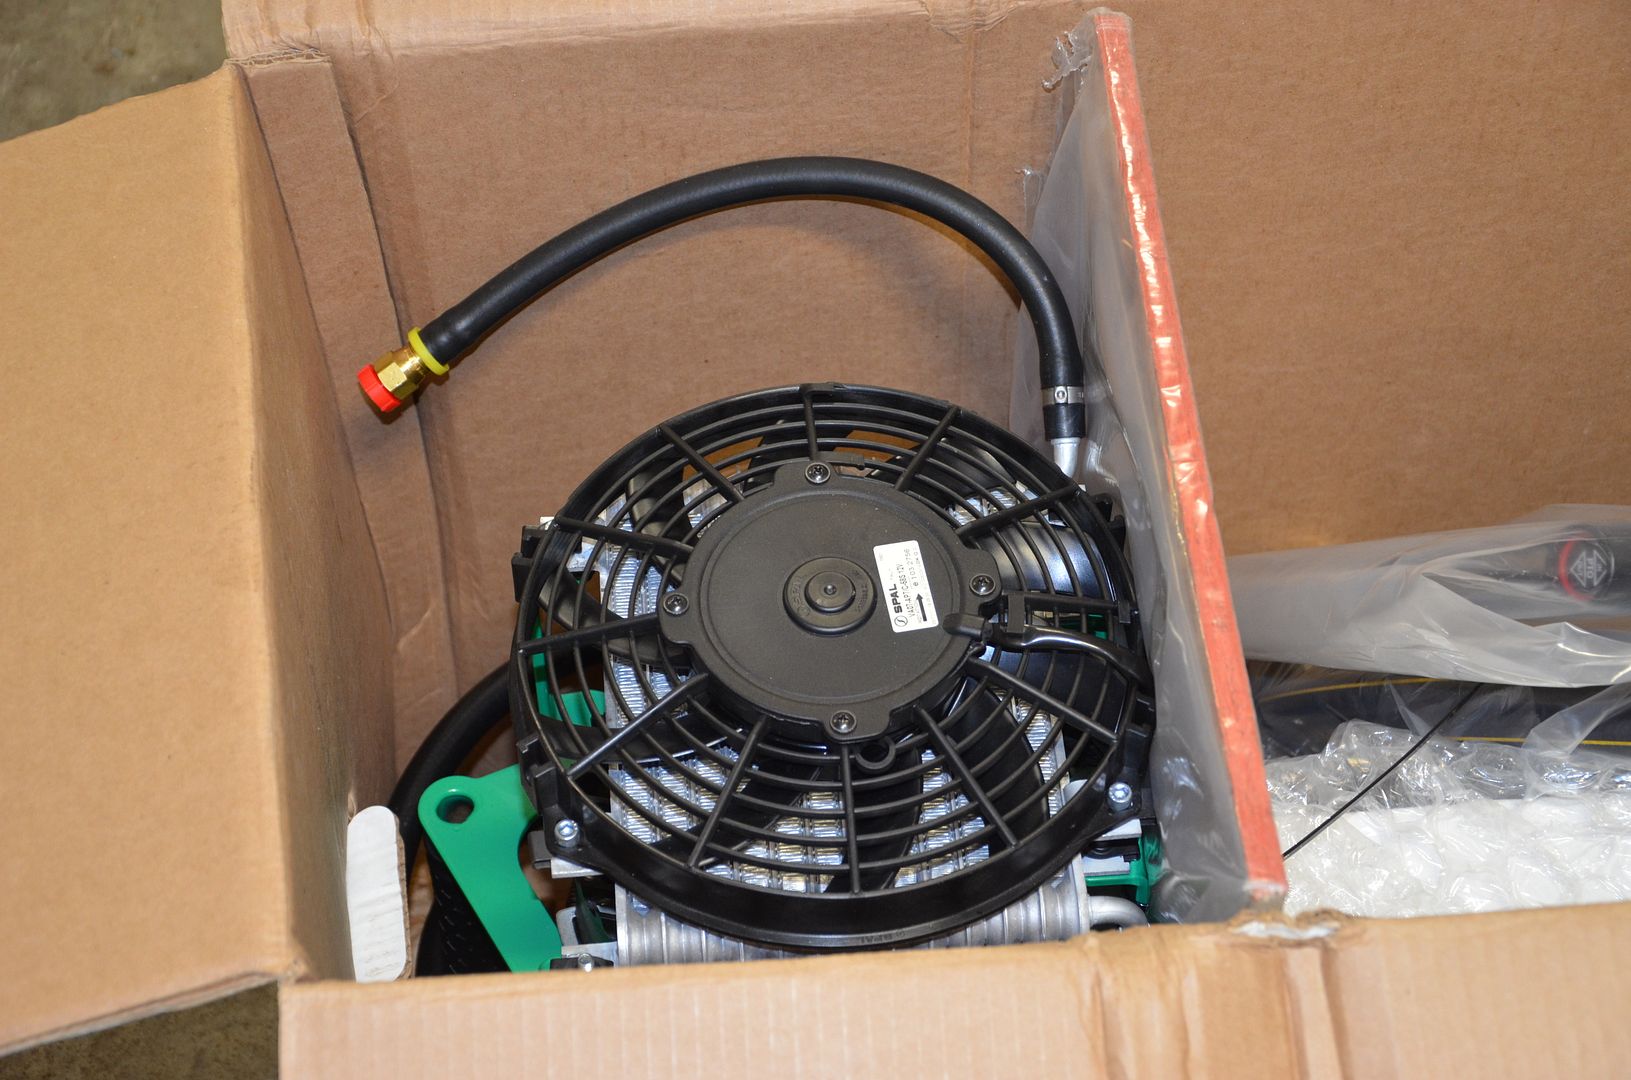
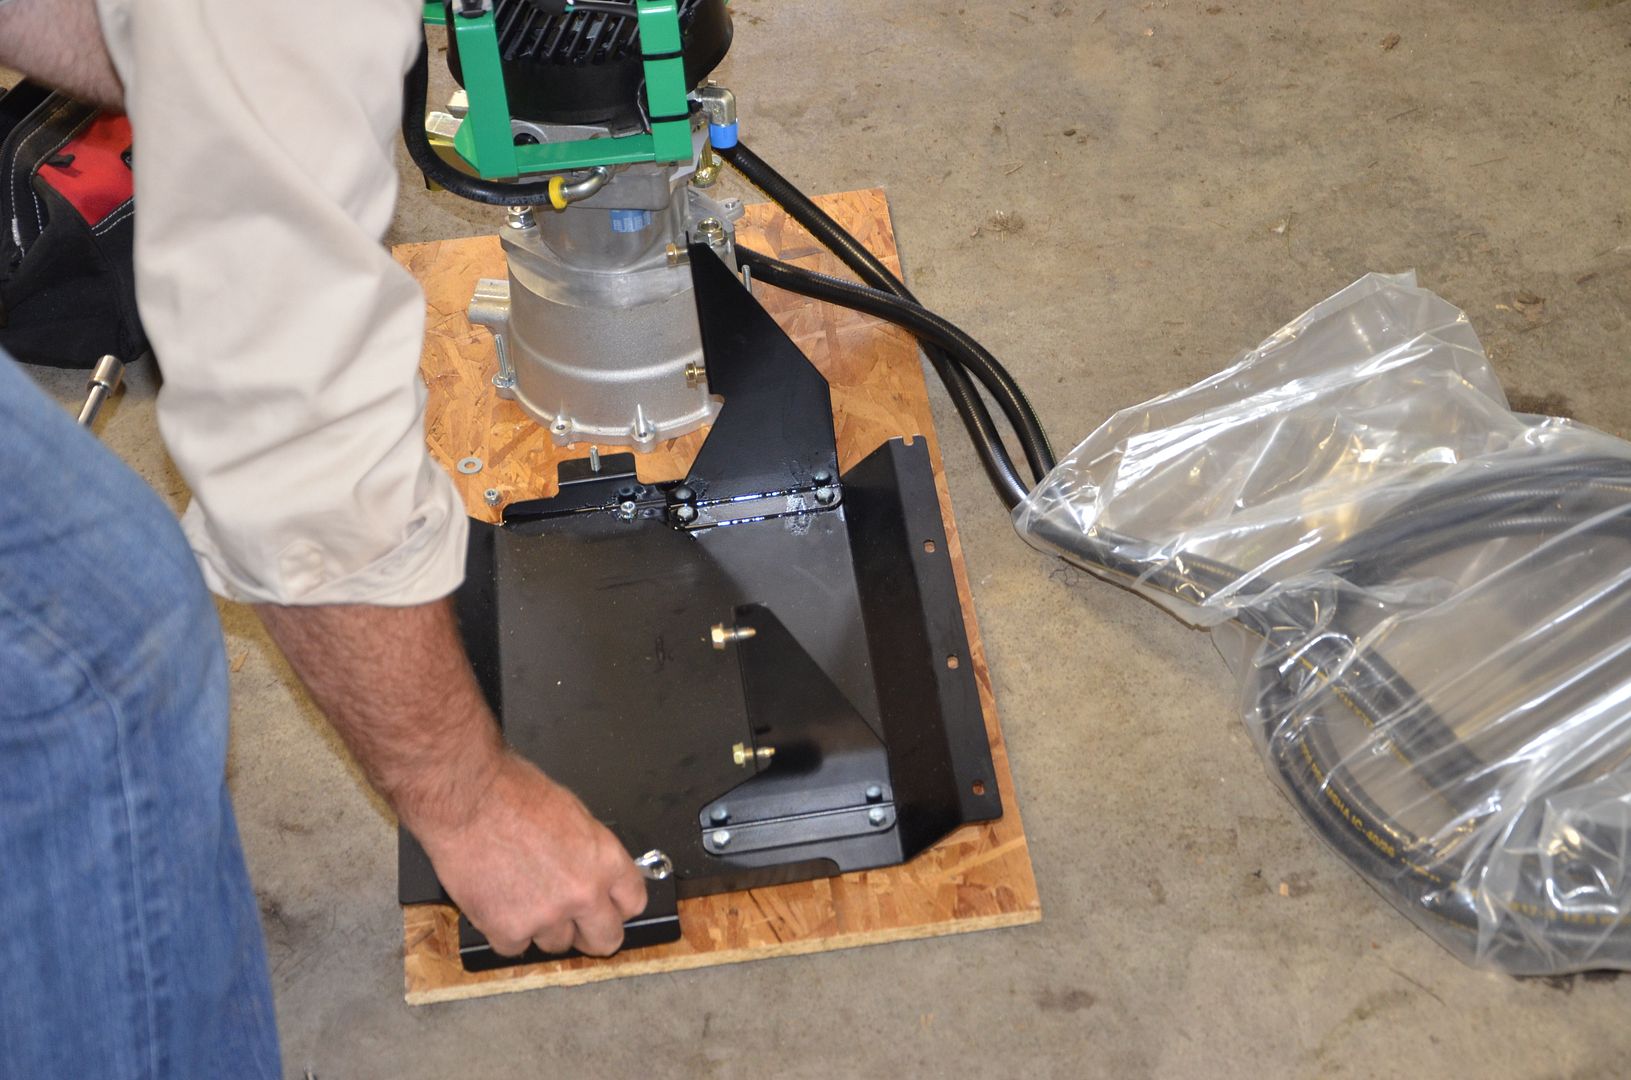
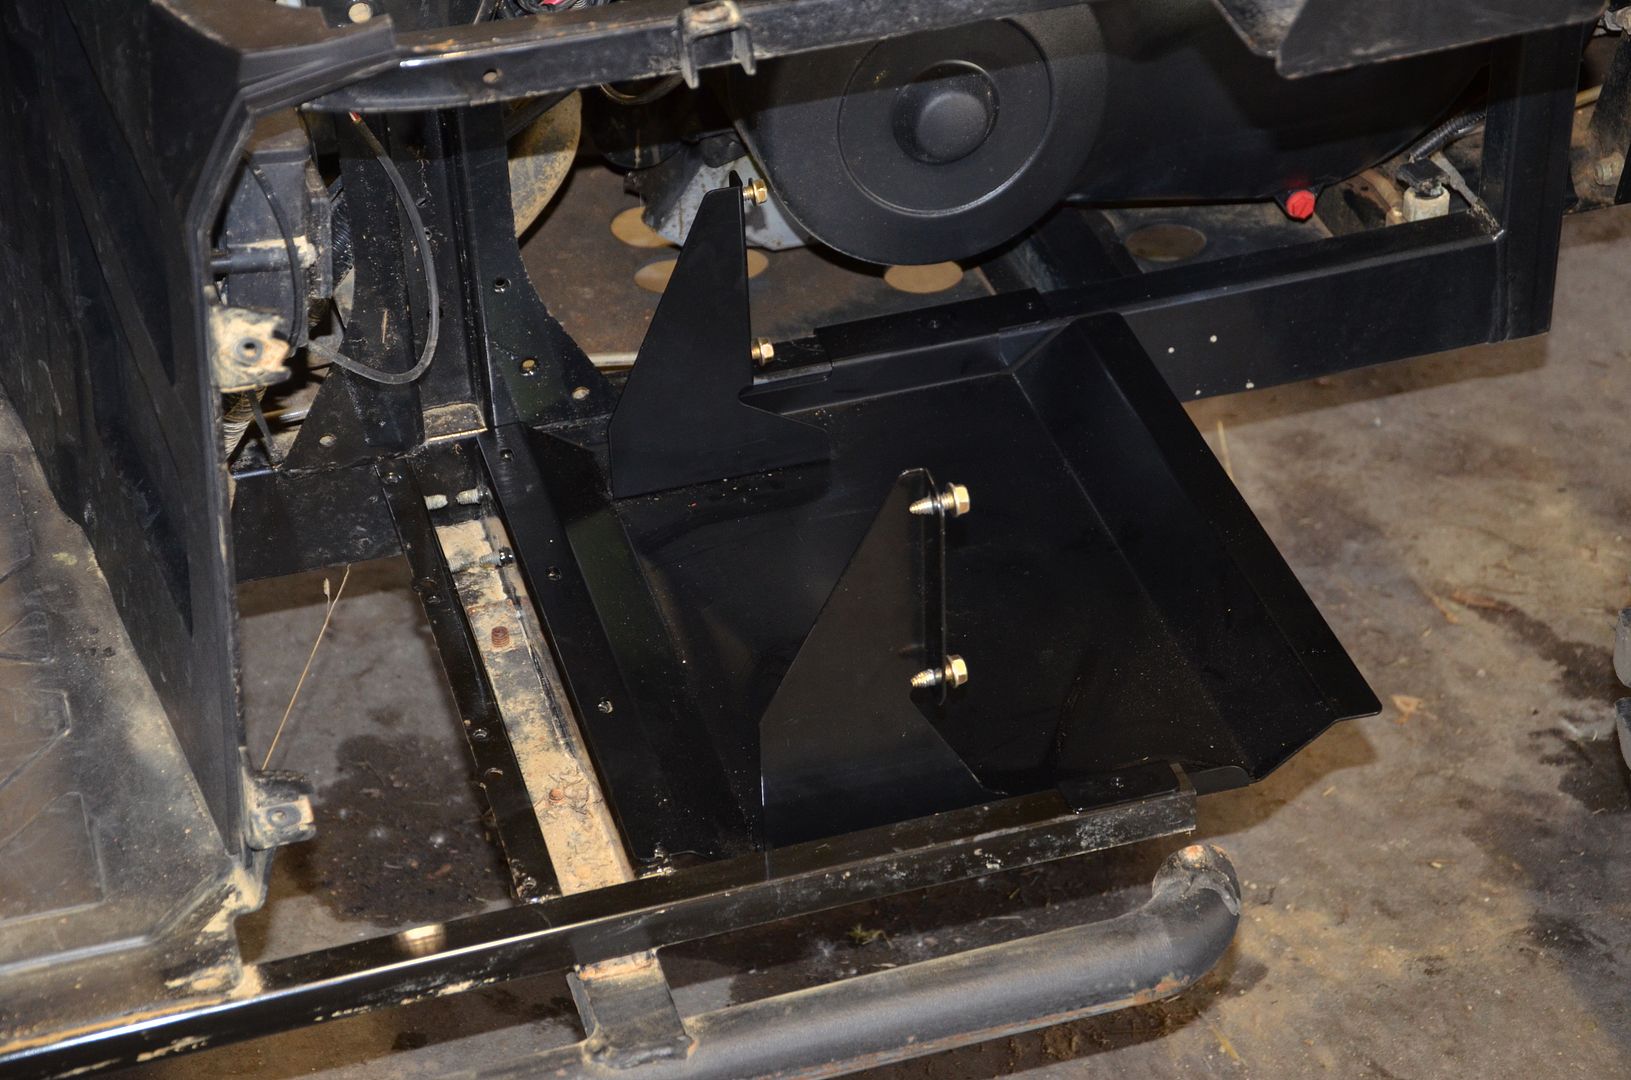
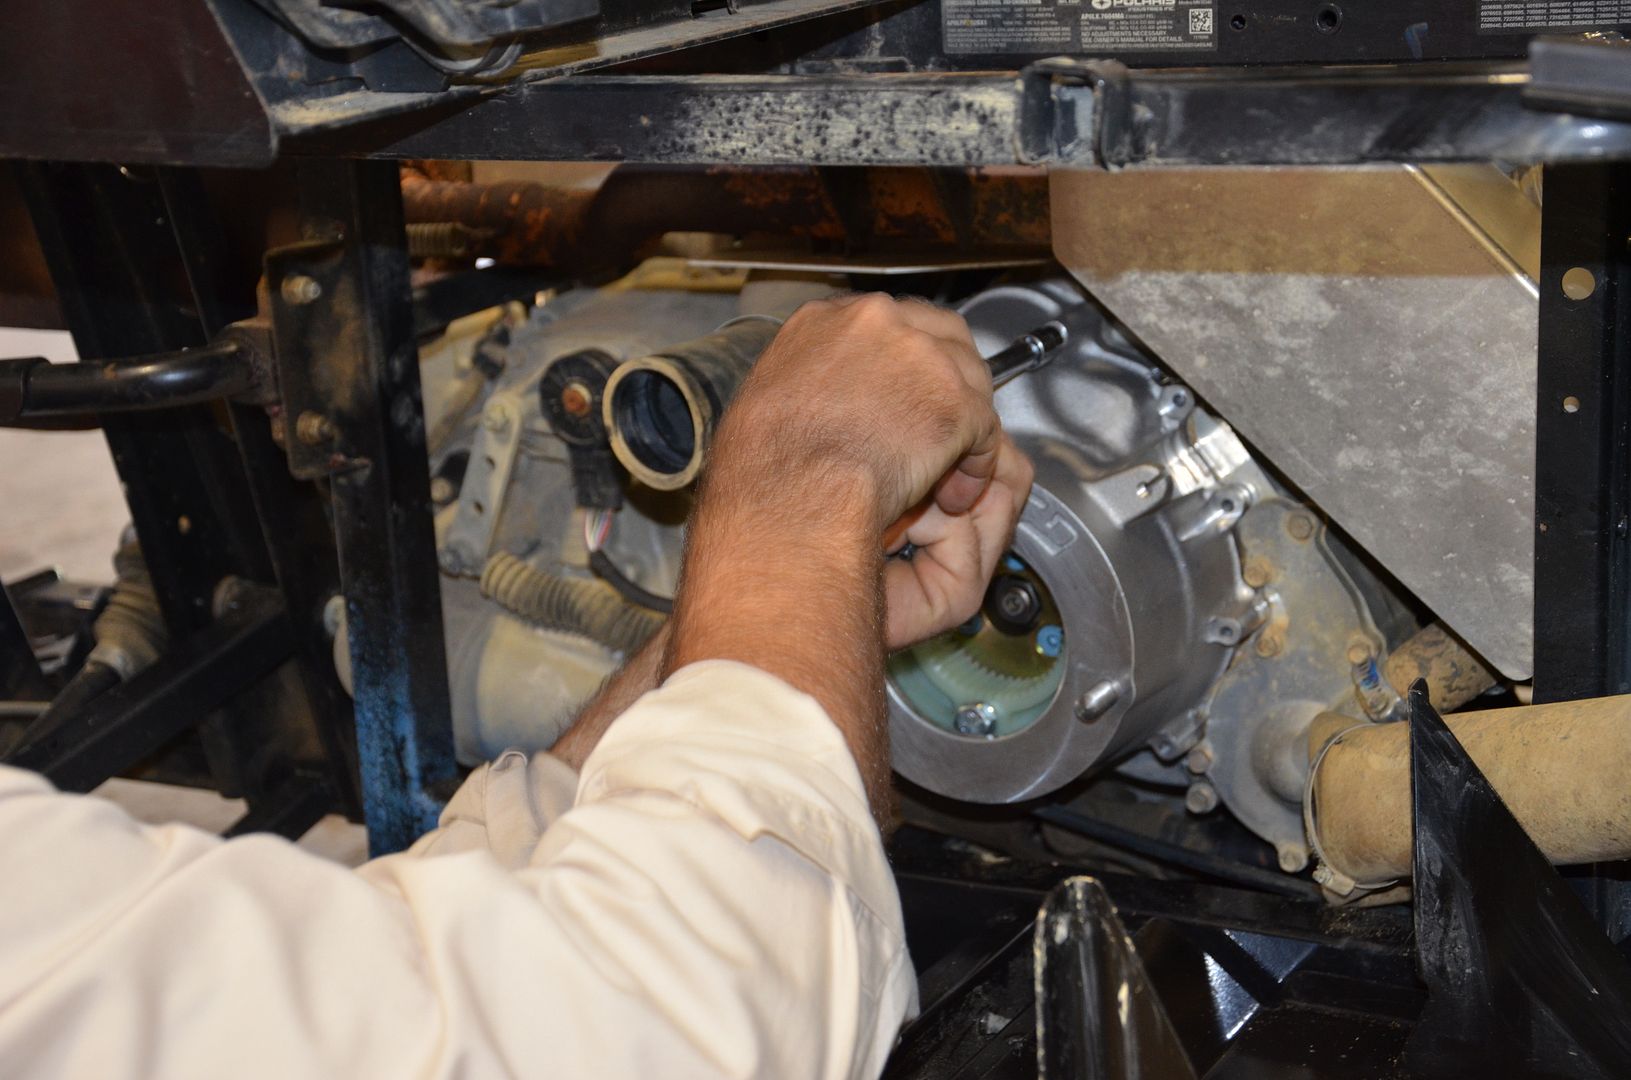
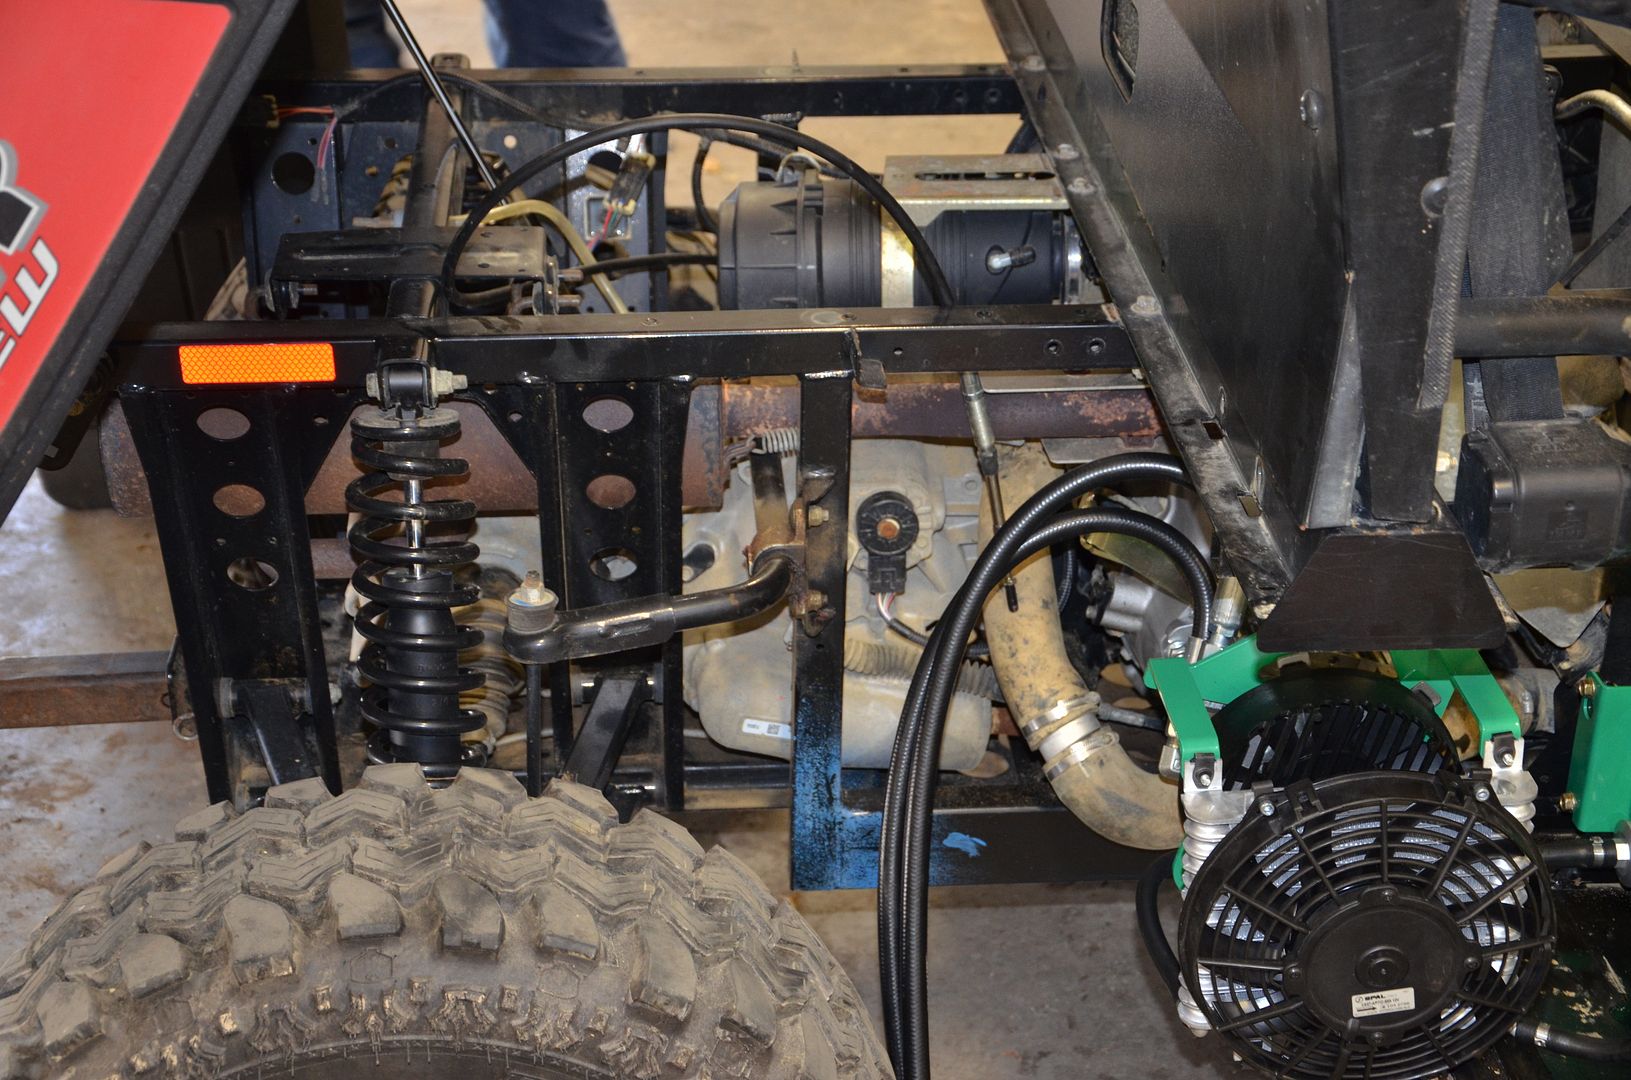
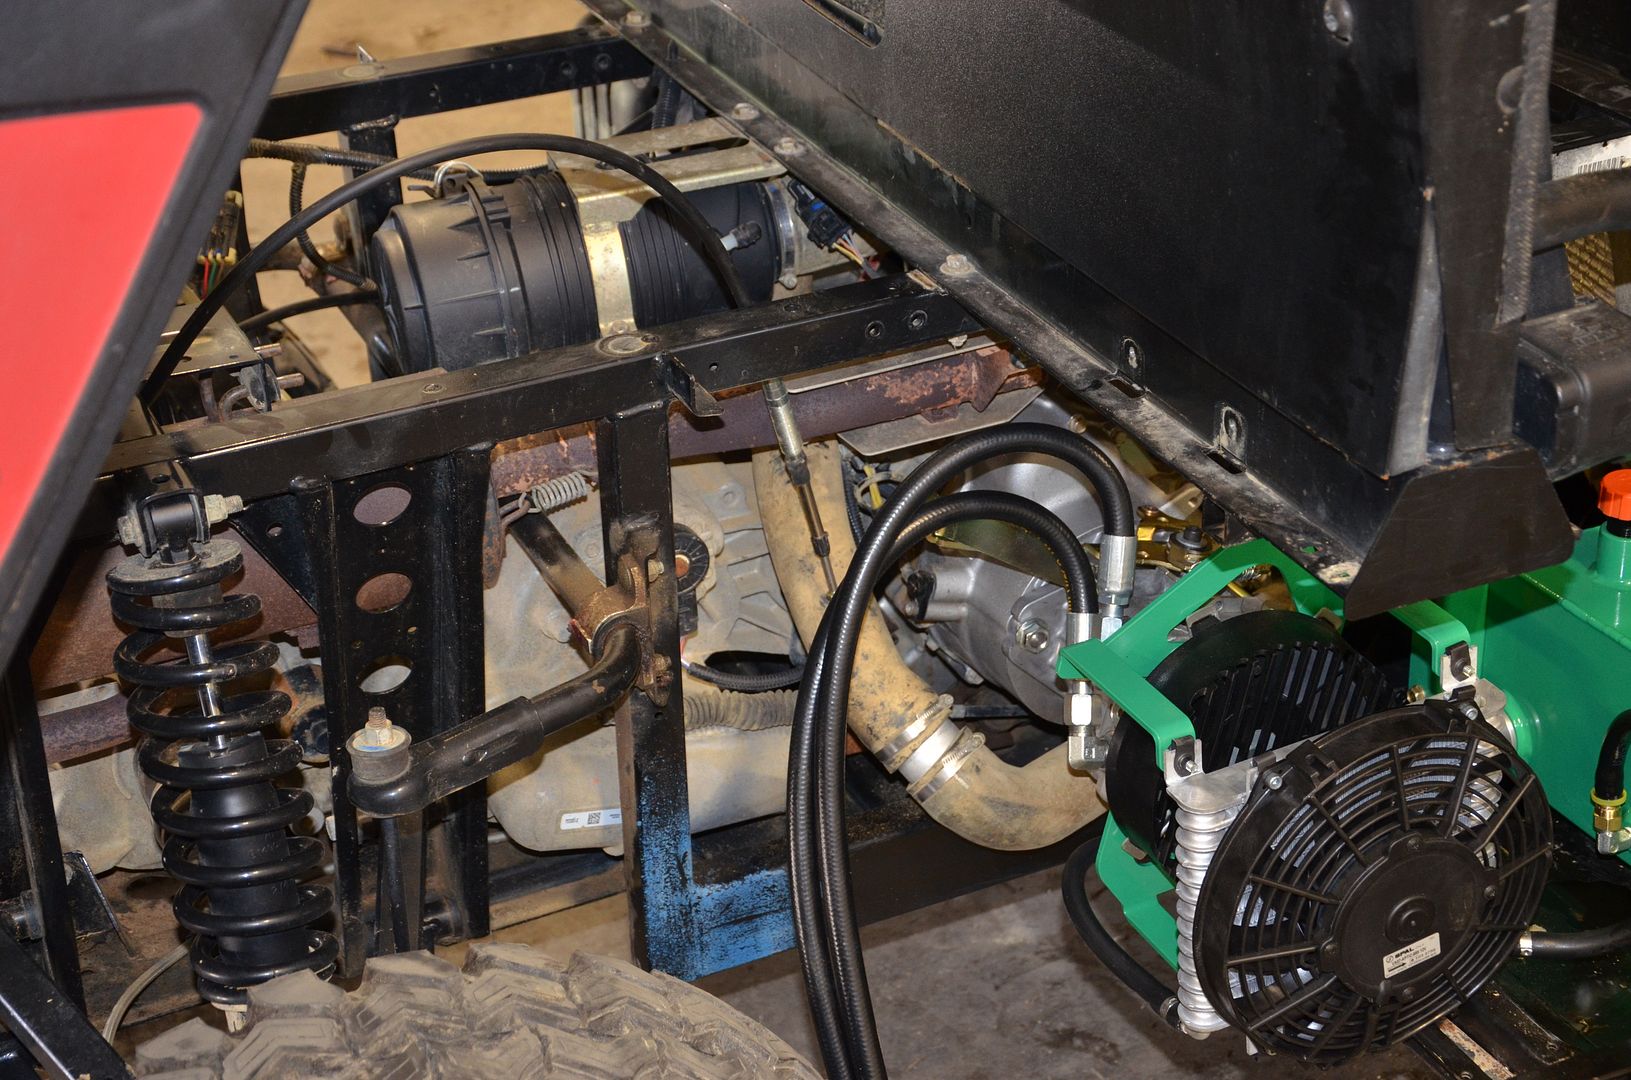
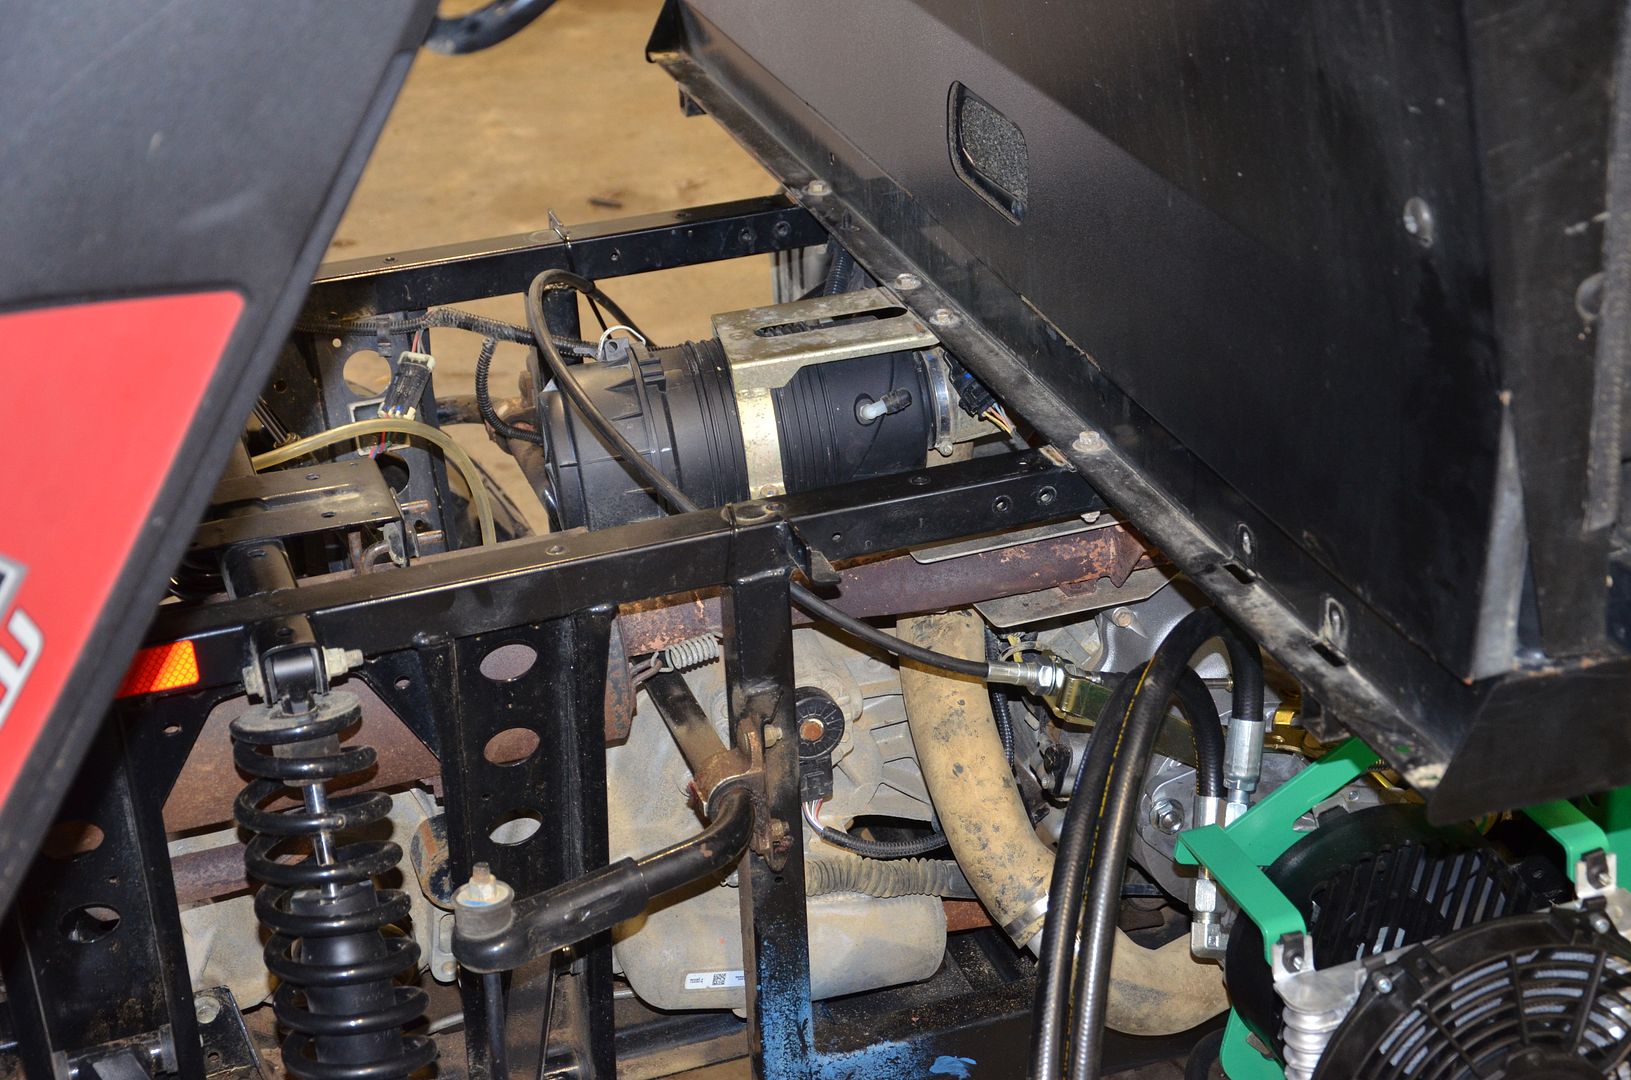
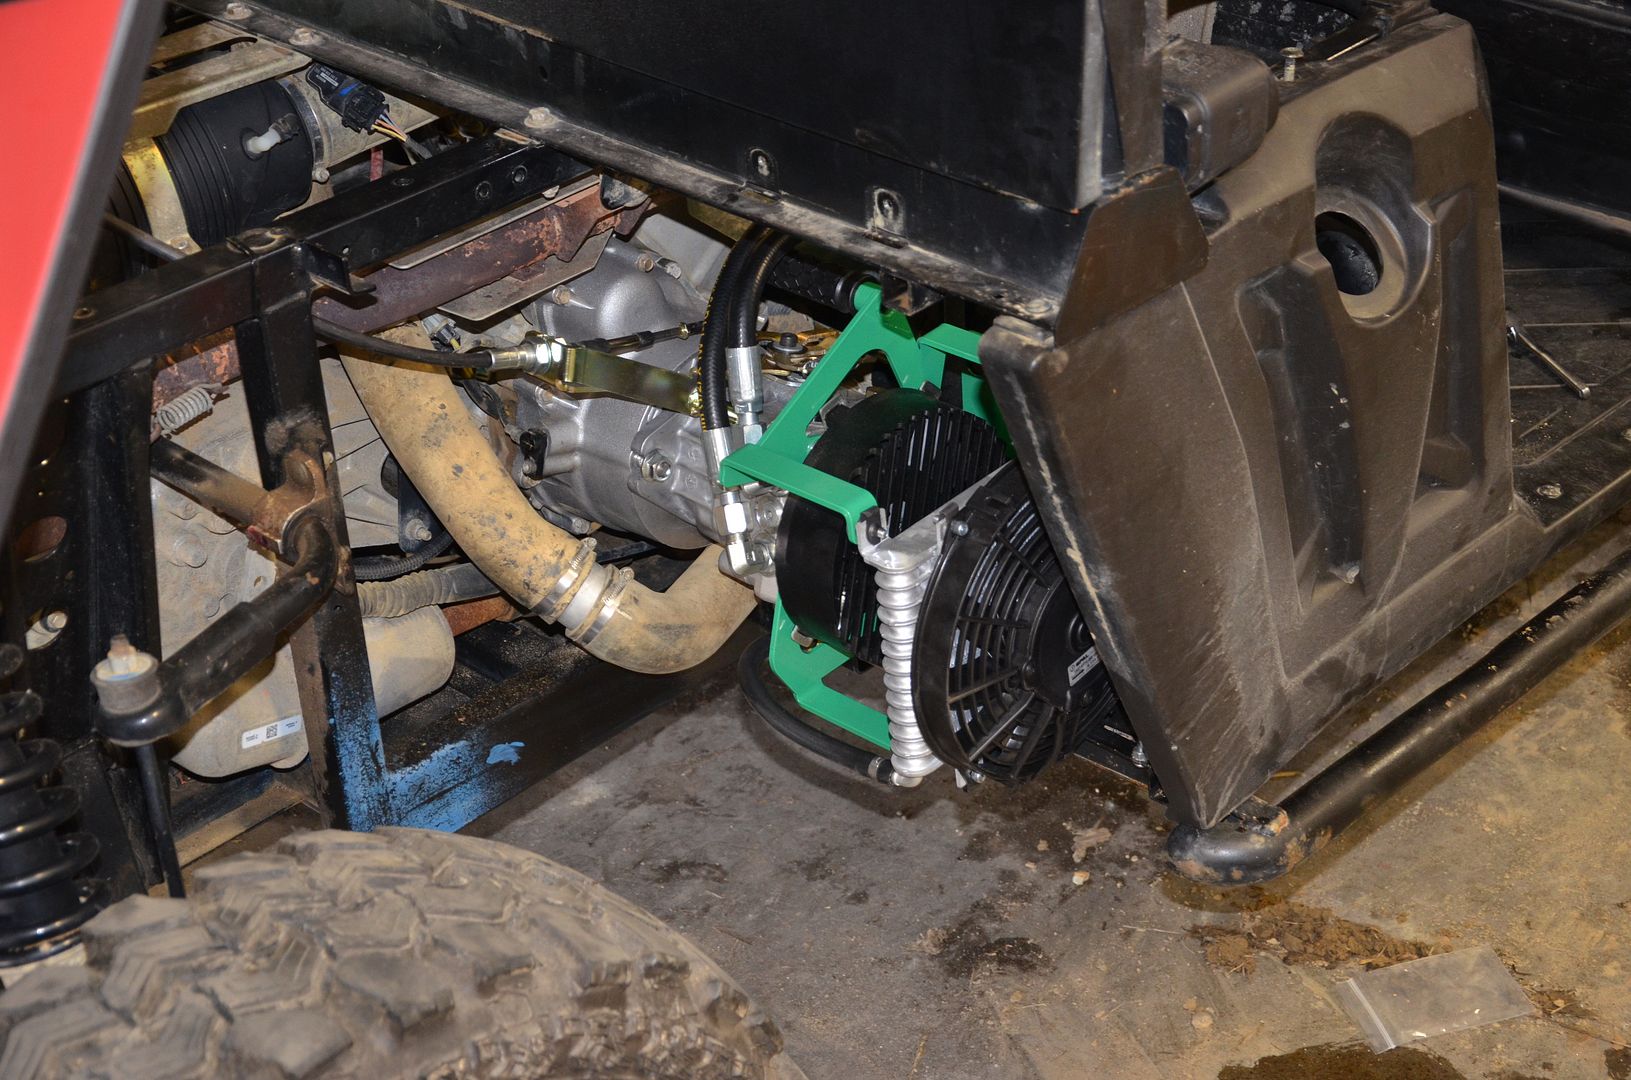
Once the air intake is reconnected, the Proman PTO Hydraulic Pump is all set to be mounted. The actual Pump unit itself is designed to be quick removable should you desire to take it off of your ATV or UTV. There are two nuts that secure the pump unit to the Proman crank case mounting bracket. In the event that you want to run your Ranger with the Pump Removed, there is a cover plate that fits over the opening on the crank case cover and is secured by the two nuts. The cover is also gasketed so it has a tight seal.
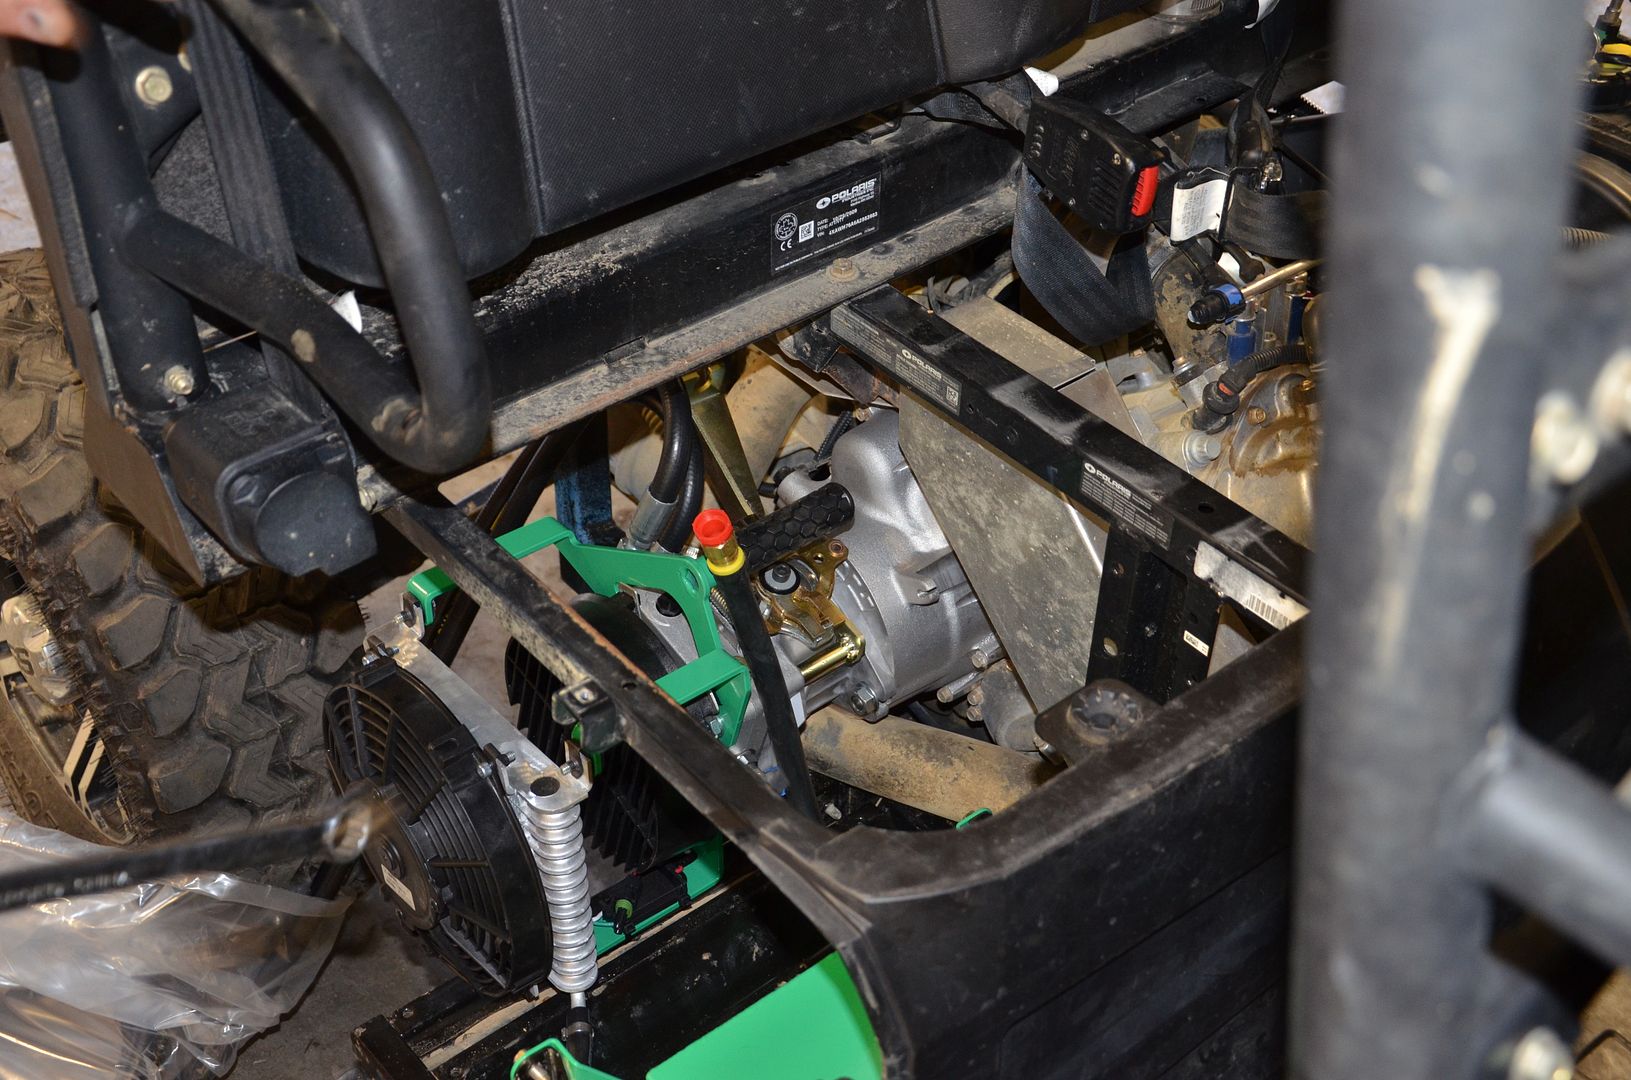
The hydraulic fluid reservoir is also installed in front of the hydraulic pump.
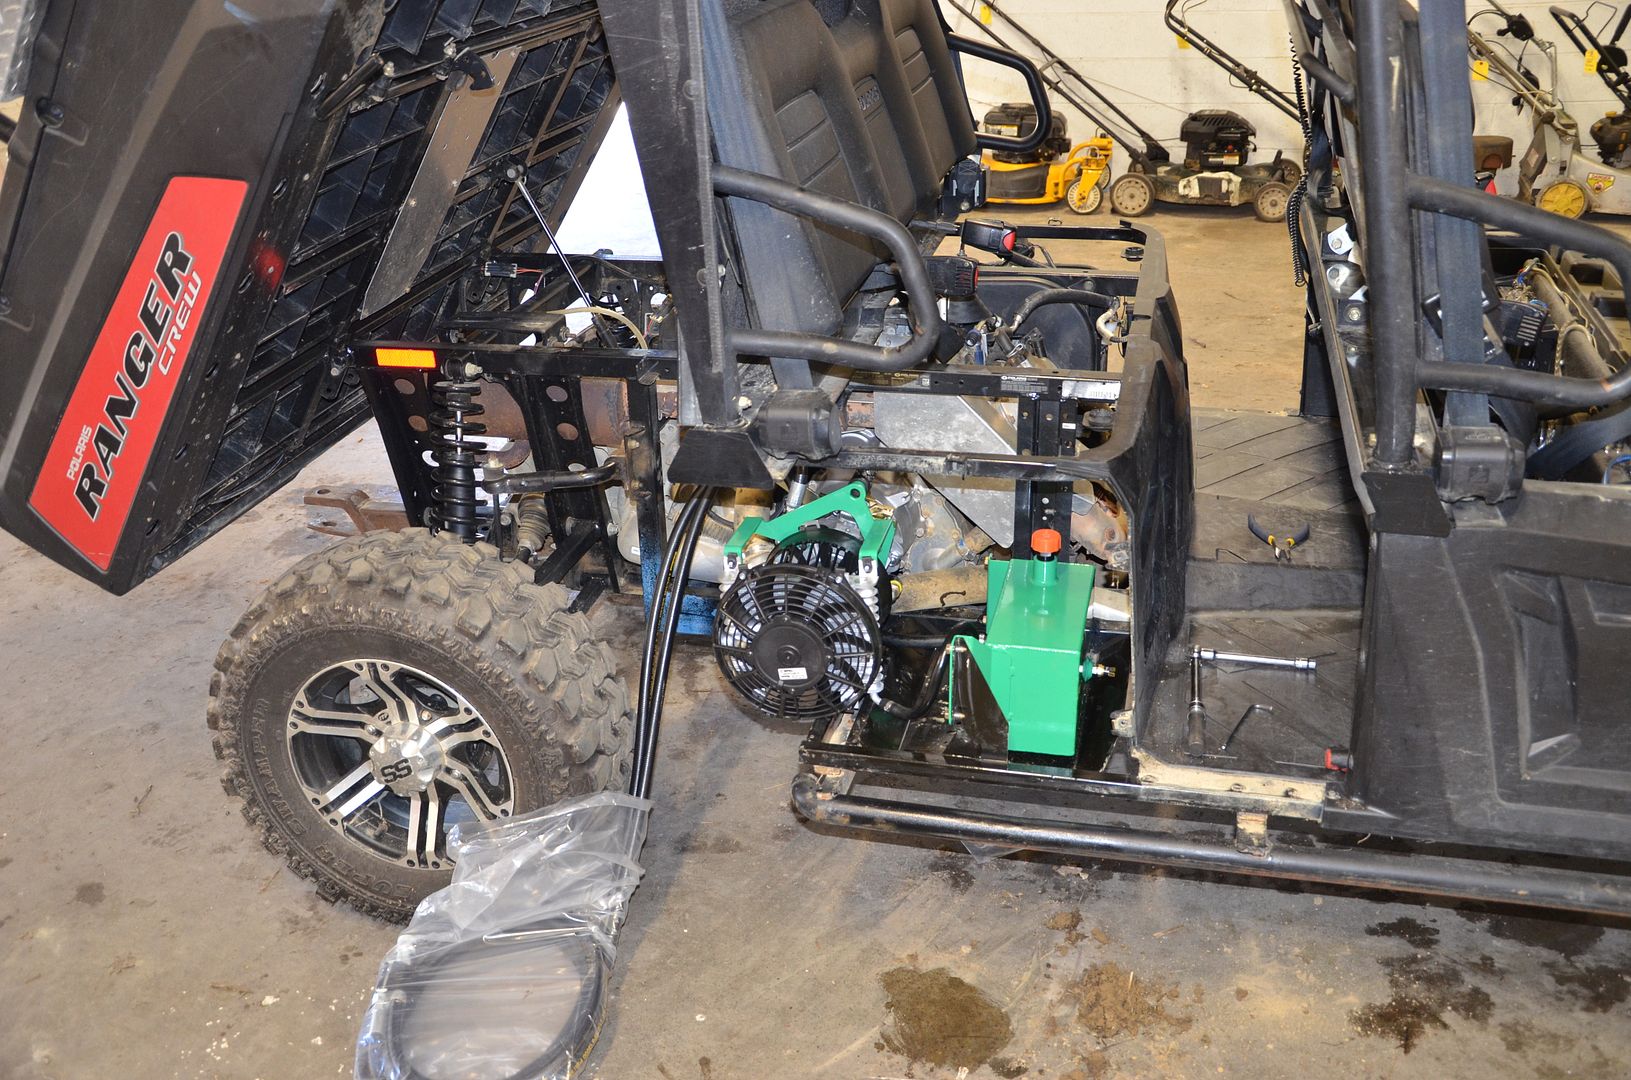
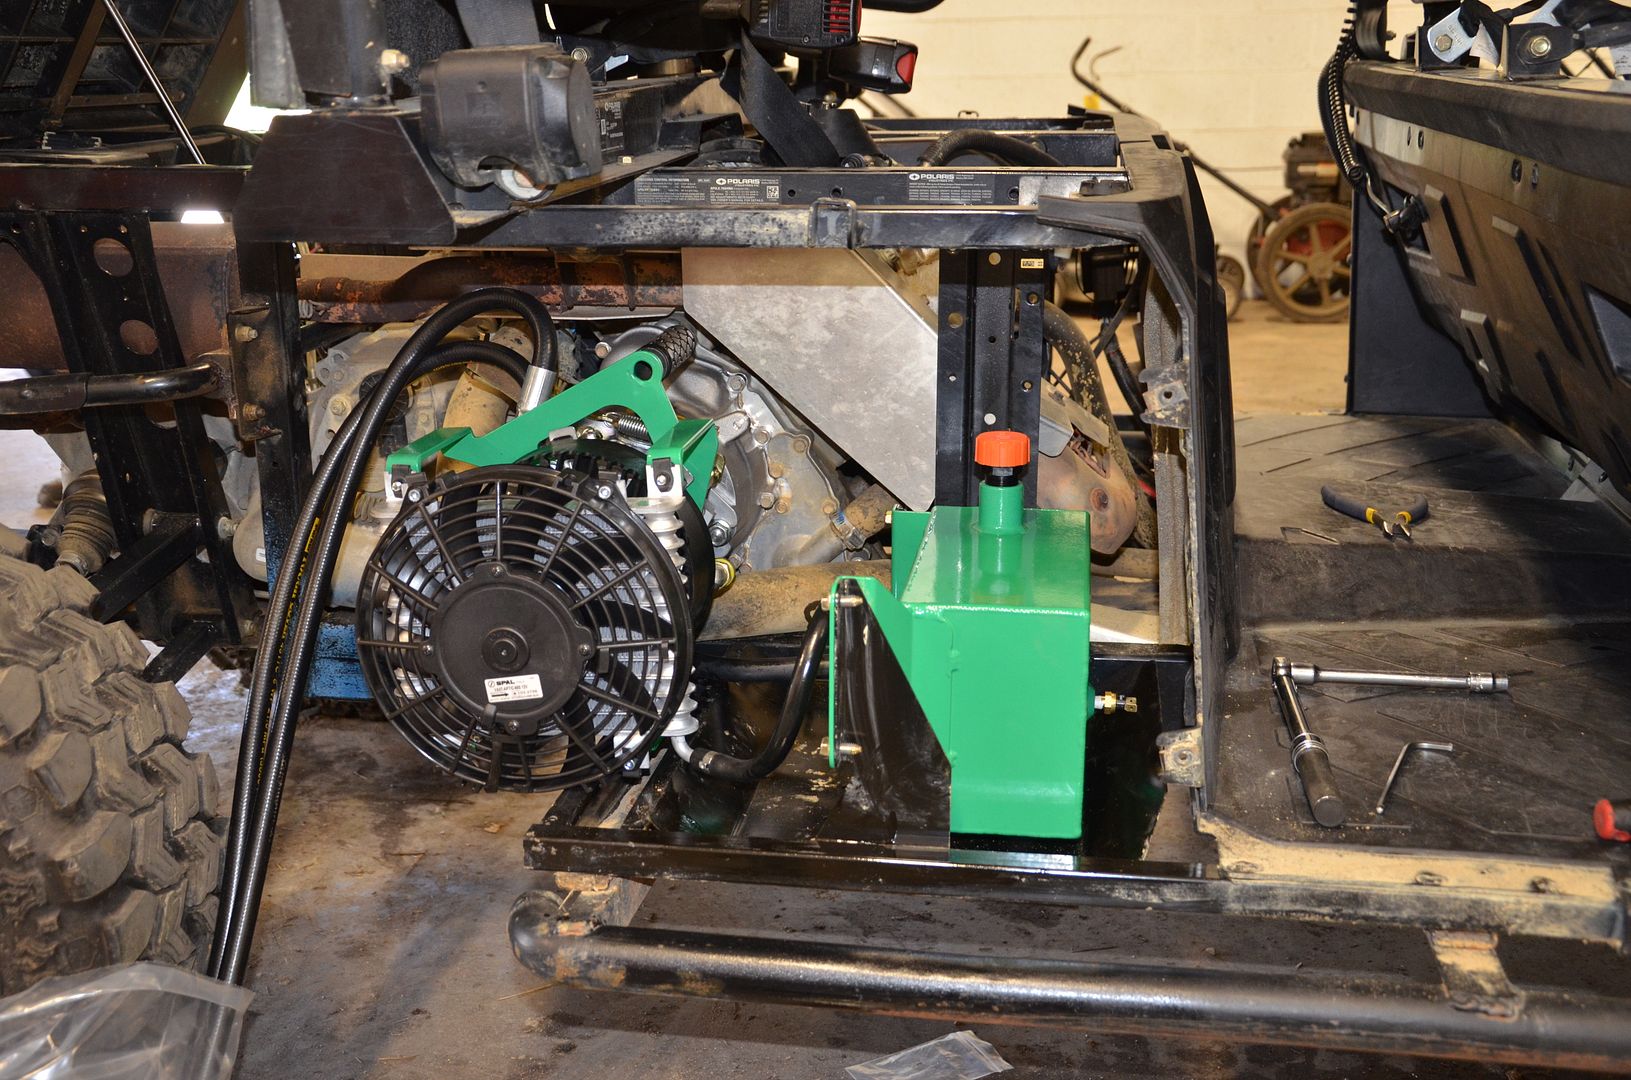
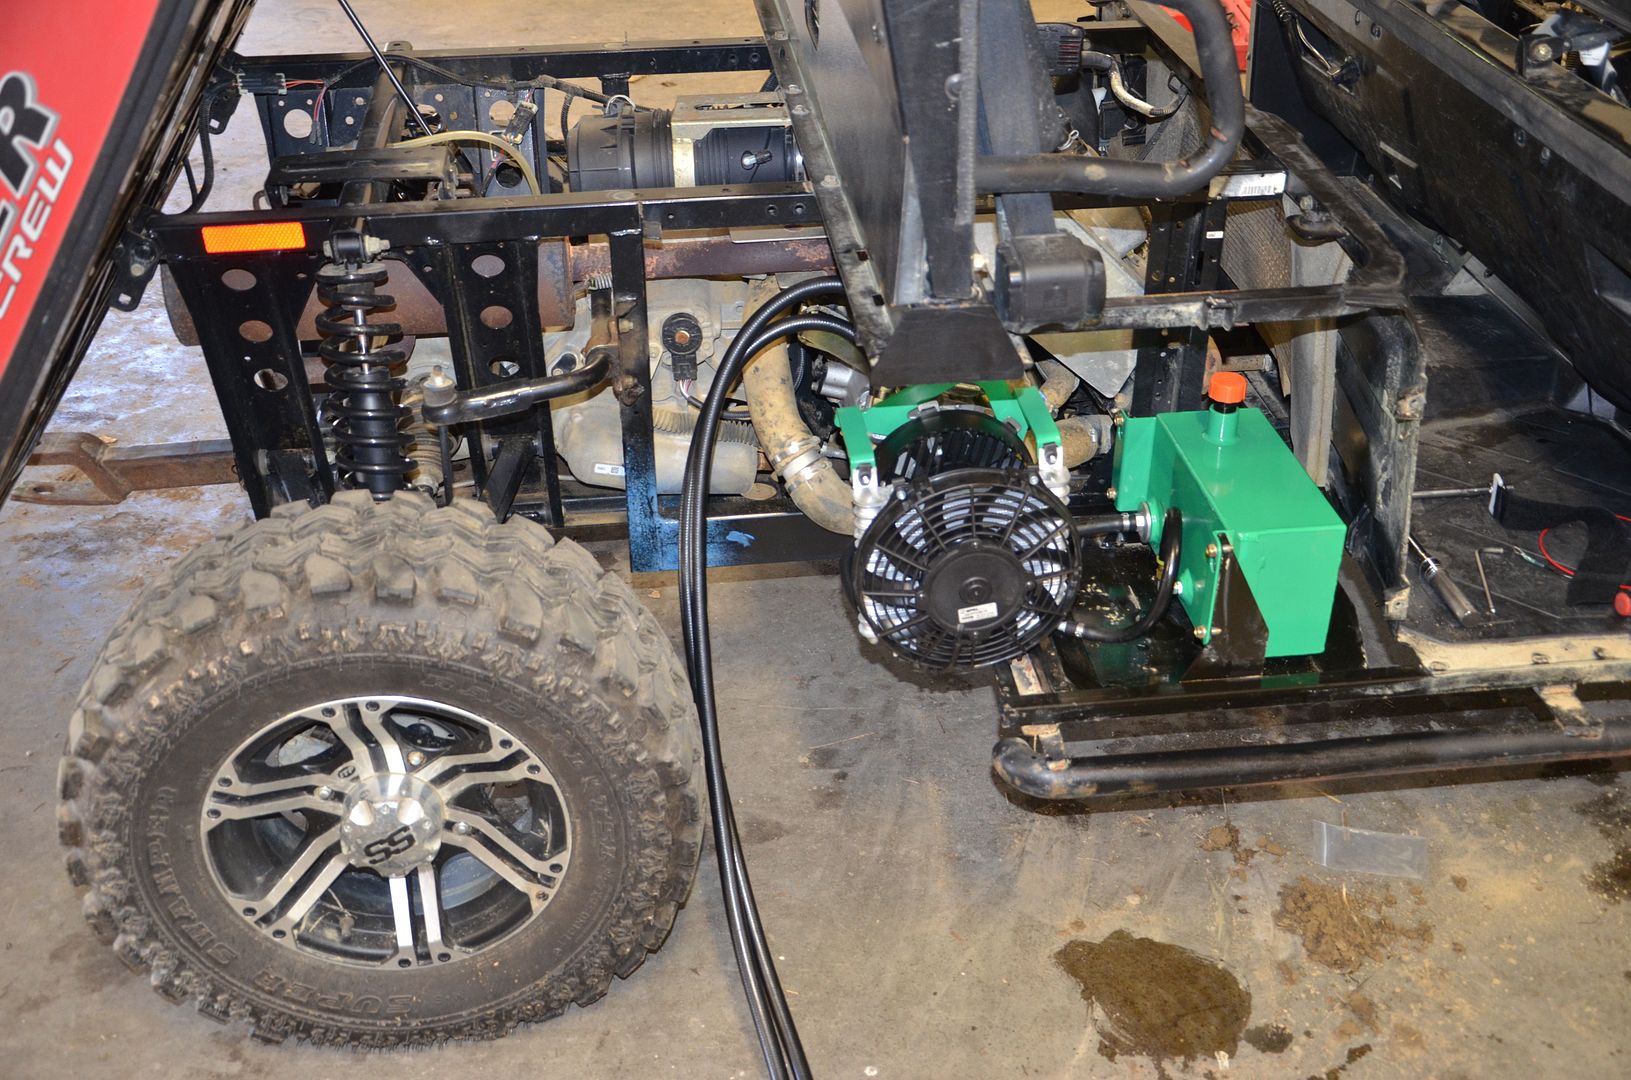
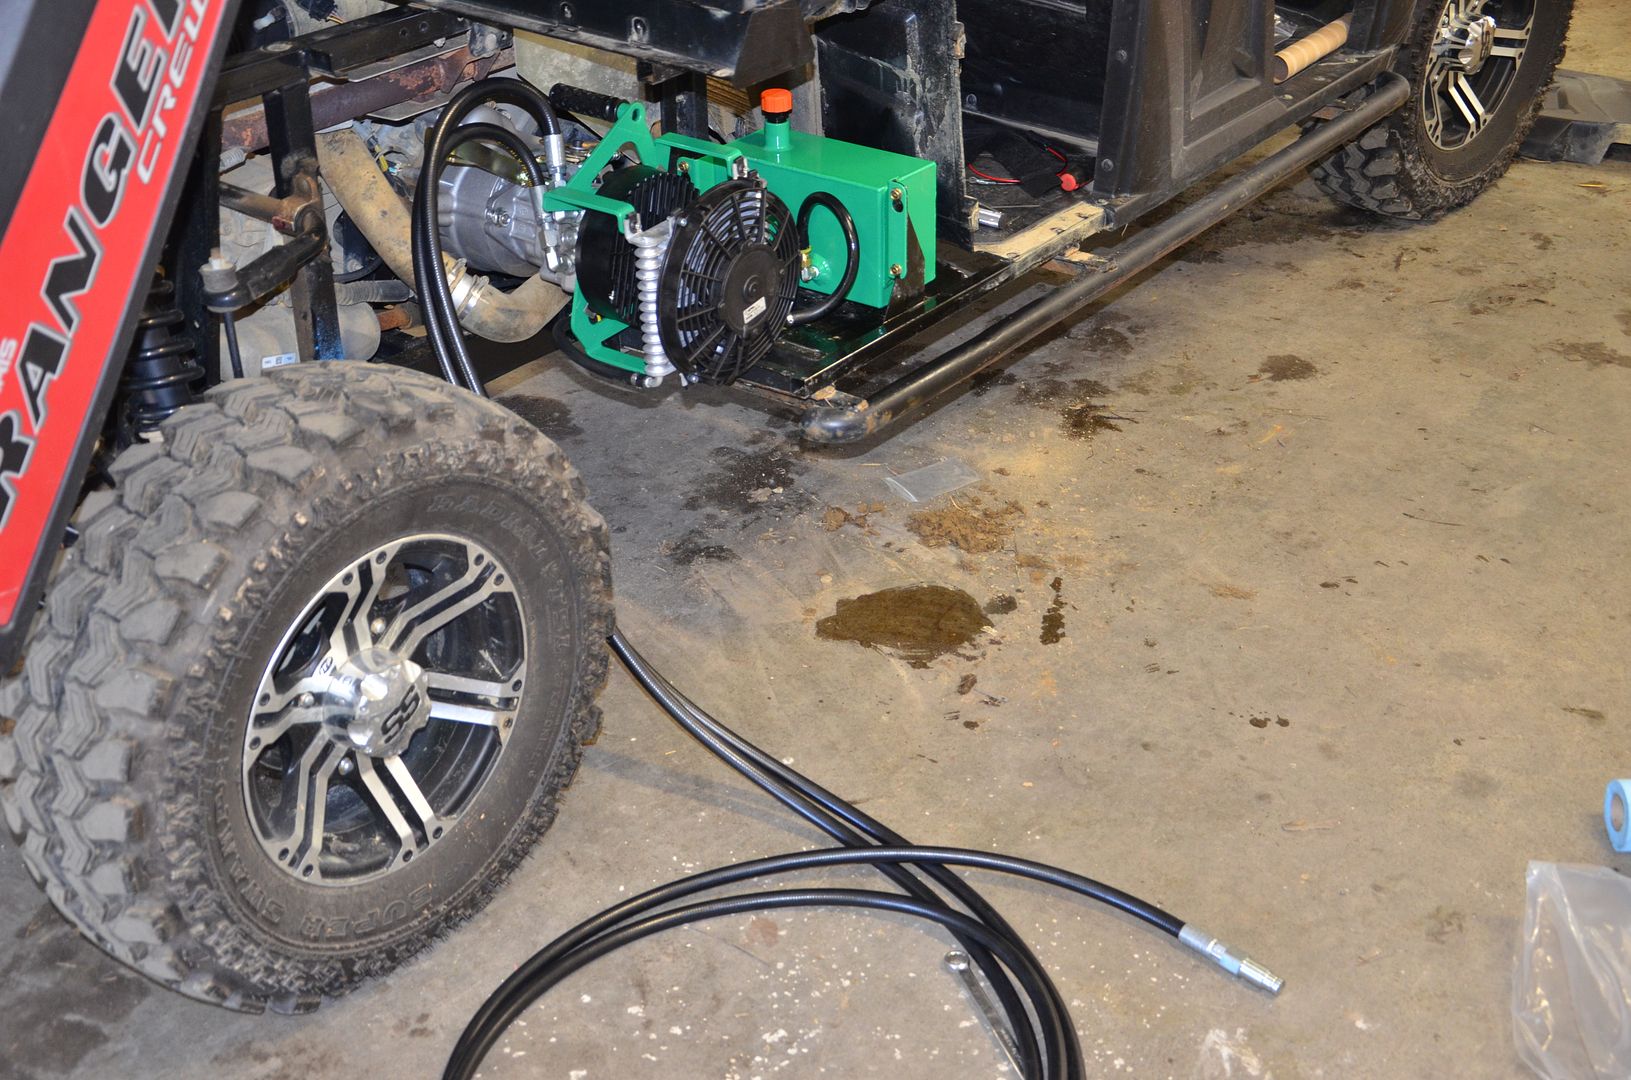
Once both the Hydraulic pump and the reservoir are installed, there are two hoses that need to be connected from the reservoir to the pump. The long hydraulic hoses that actually drive the Proman Accessories are designed to be either routed to the front or rear of the UTV or ATV. The hose can be tied up with zip ties on the underside of the machine and the extra hose can be secured at either the front or rear of the machine when accessories are not in use.
Next, it was time to install the PTO control joystick. The Joystick mounts on the front seat frame of the Ranger Crew. Once a comfortable location is determined, the mounting bracket for the joystick is installed with some carriage bolts. There is drilling required for the mounting holes.
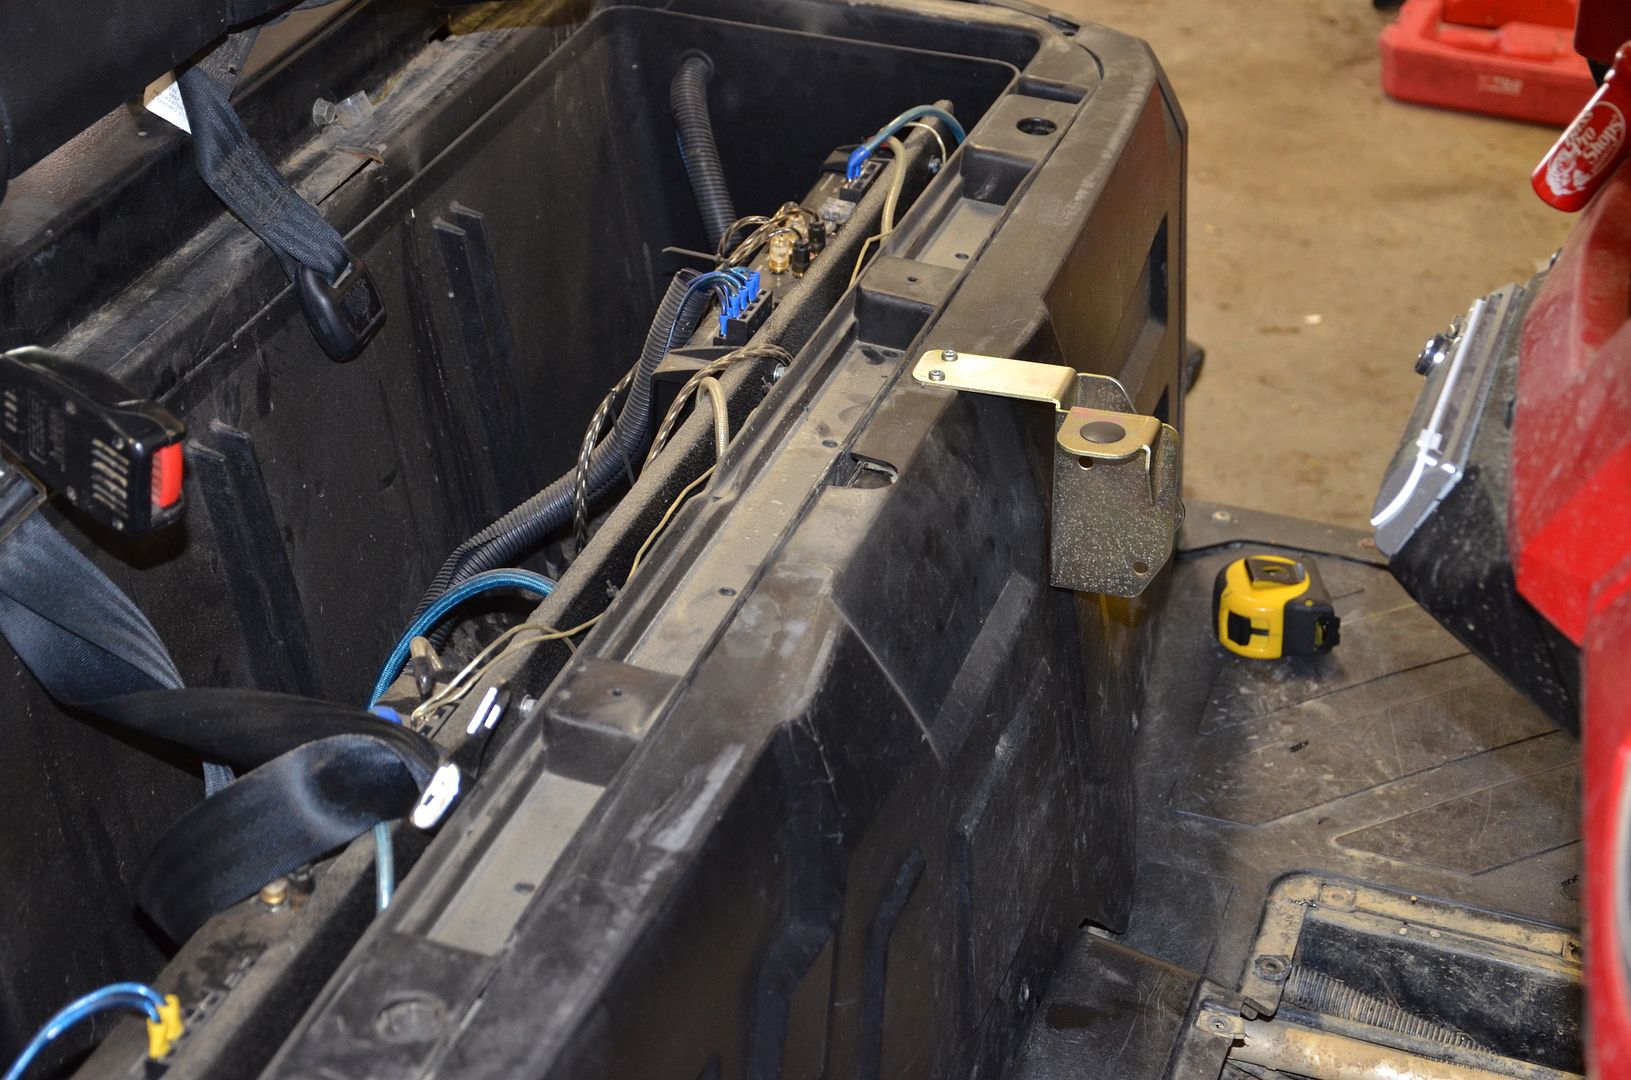
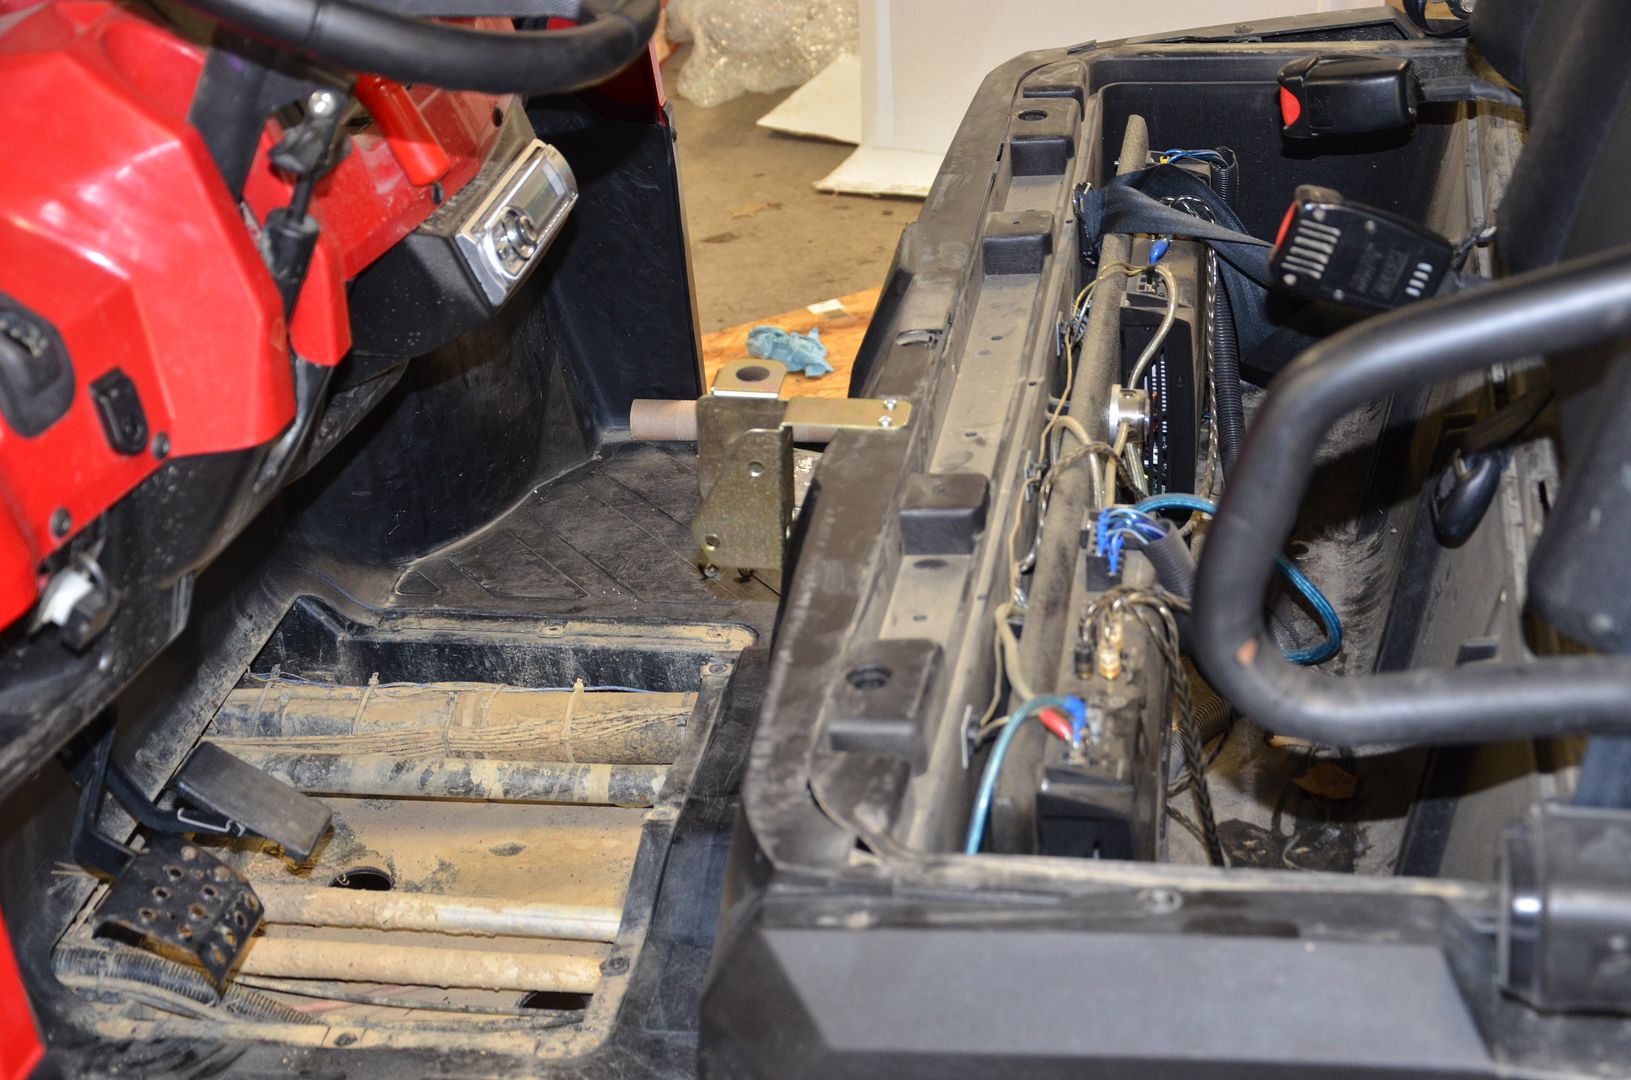
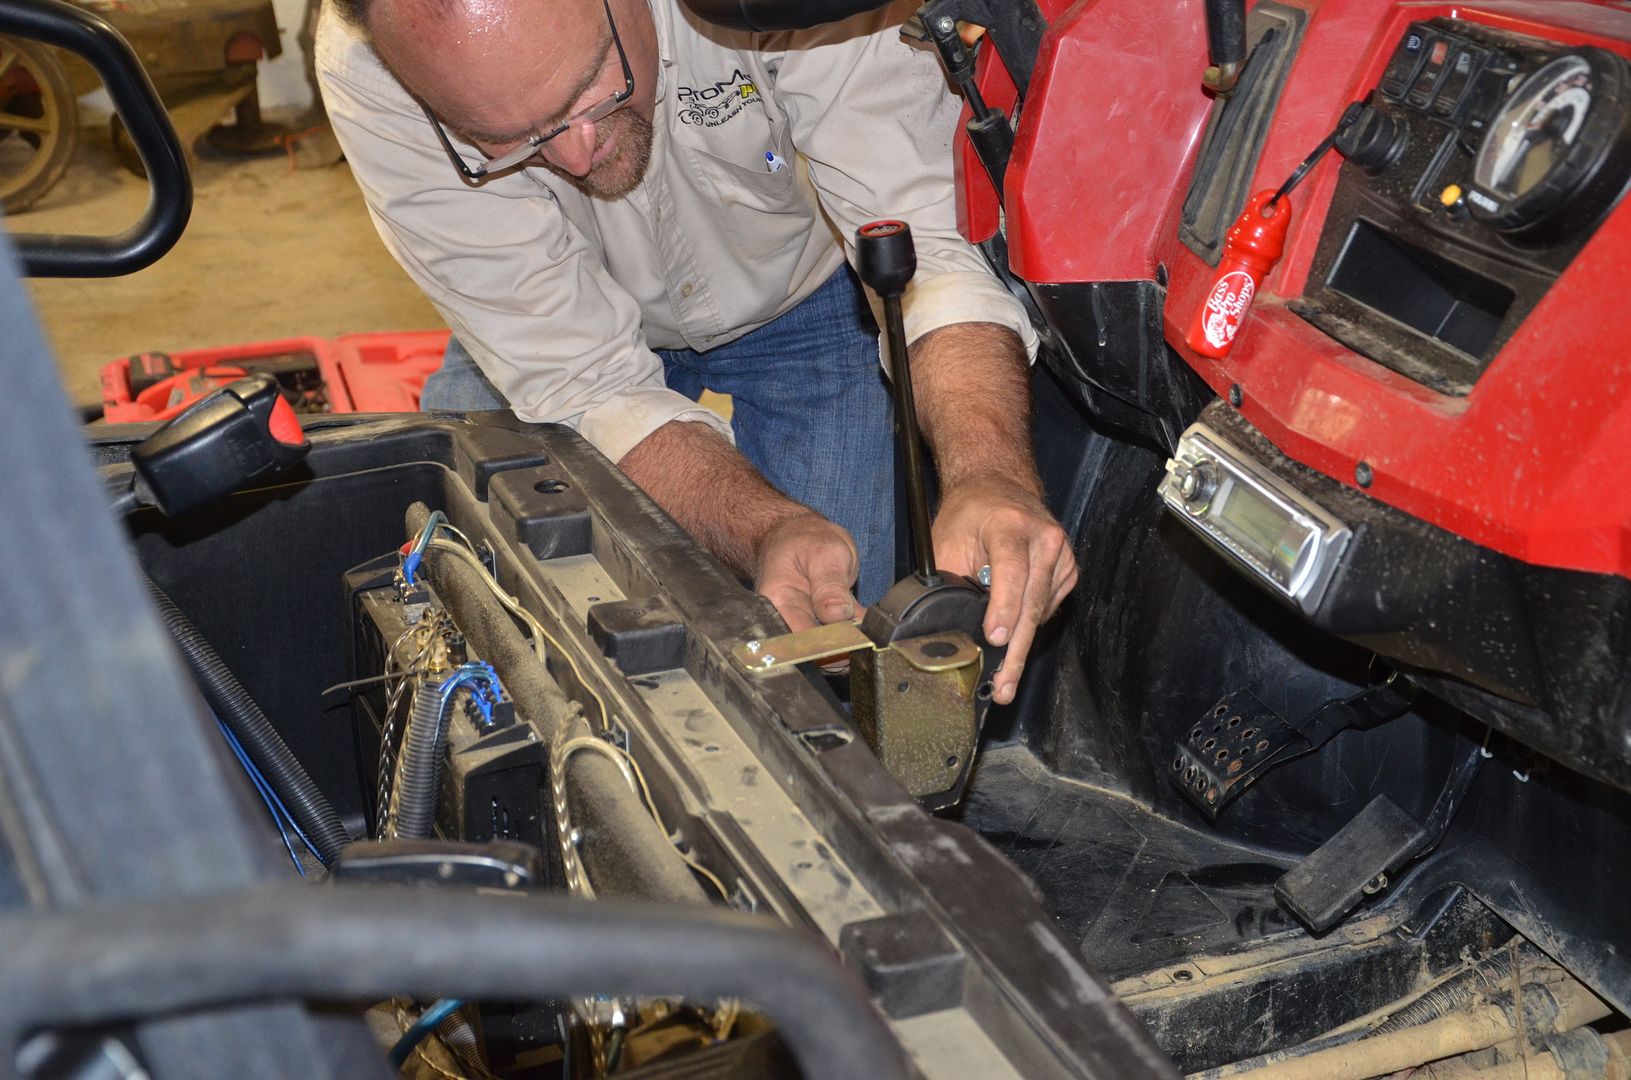

Now that the Hydraulic Control Joystick has been mounted, the control cable was run back to the hydraulic pump. The cable runs underneath the Ranger and then gently loops back from the drivers side of the Ranger to the passenger side where the pump is located.
The final step in the PTO installation was adding a power wire from keyed hot power back to the PTO wiring harness. Once this was complete it was time to reassemble the plastic panels on the sides of the Ranger as the PTO installation is complete.
Proman Accessories
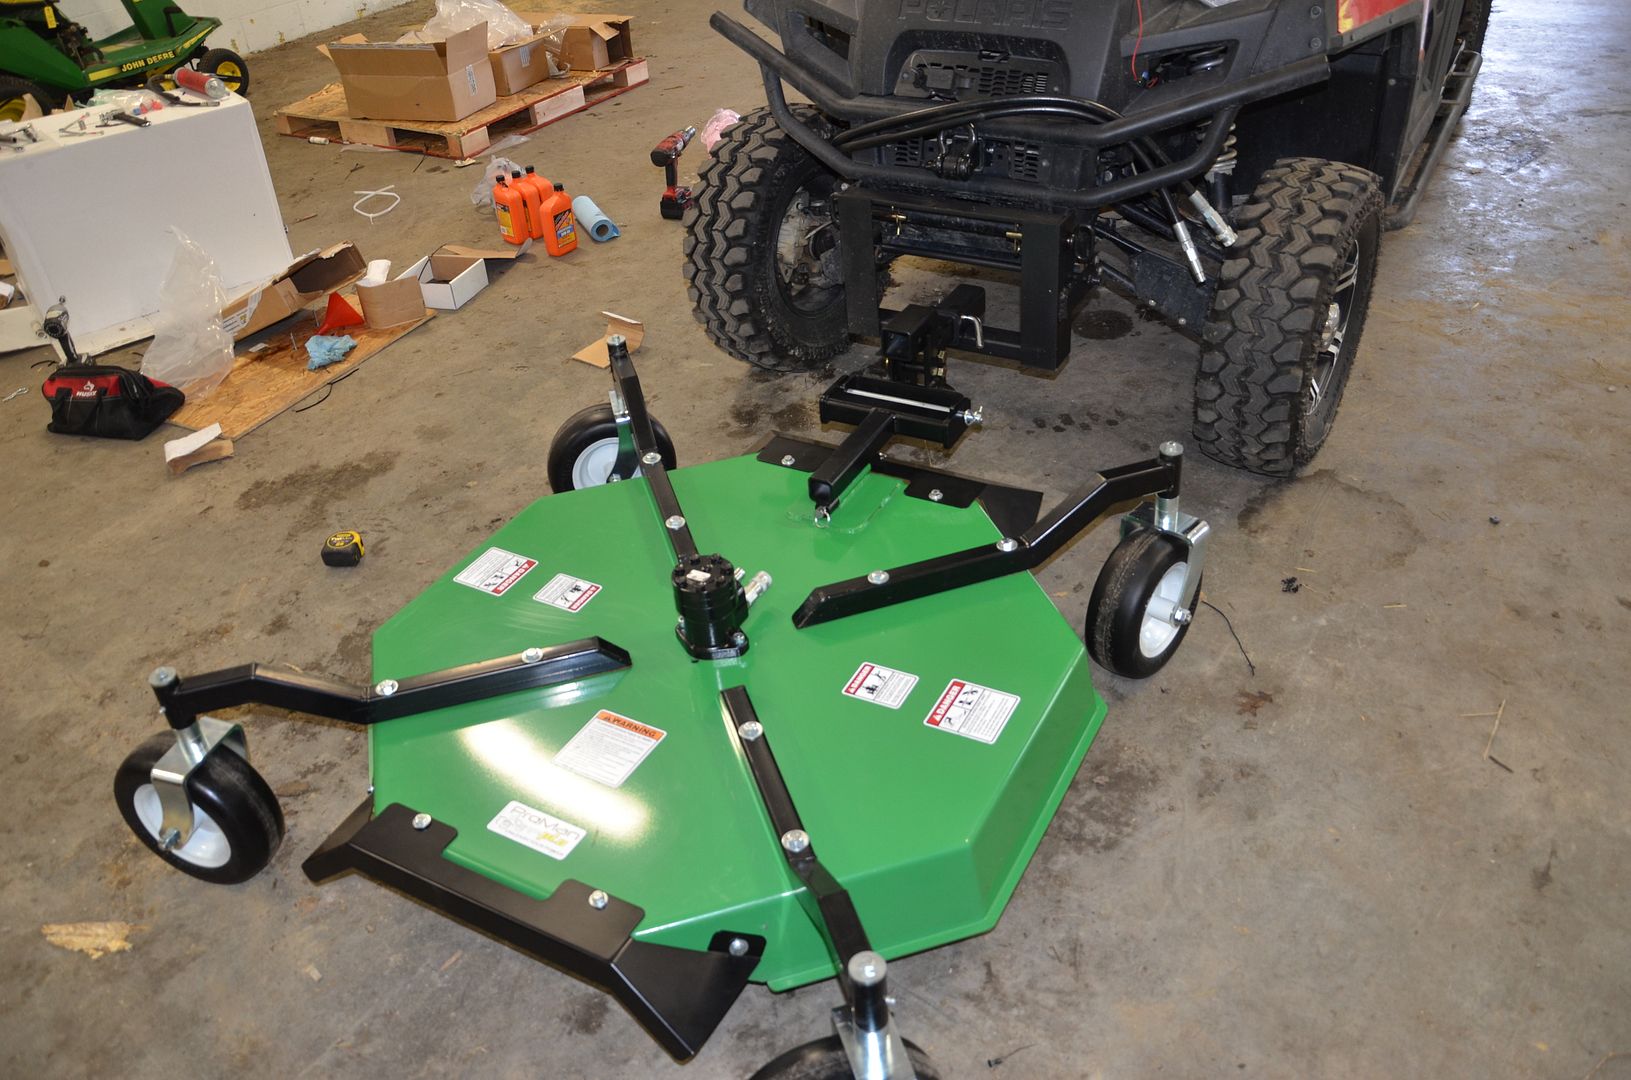
The first Proman Accessory I have is a Rough Cut Mower Deck. All I can say is WOW, this thing is pretty beefy. It is truly built like a small scale brush hog. The blades are very thick. This current brush hog is designed with bi-directional swinging blades that are sharpened on both sides. These will cut through rough brush when the PTO is running both forward and backwards.
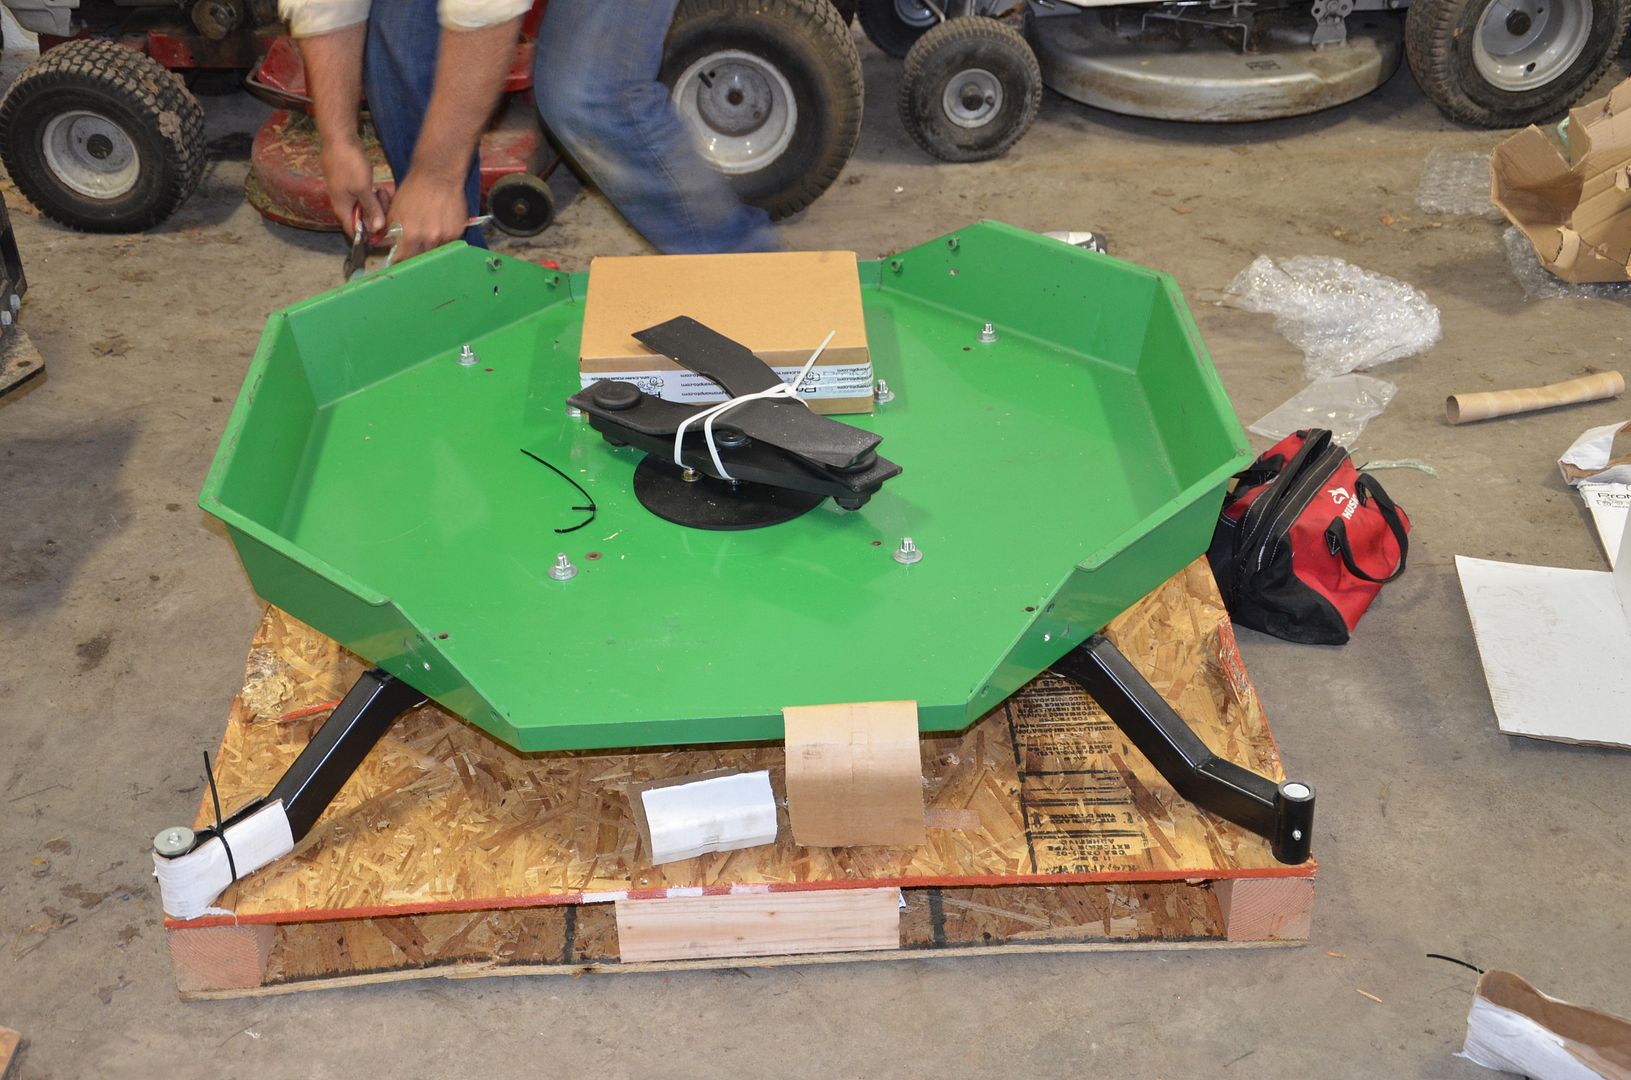
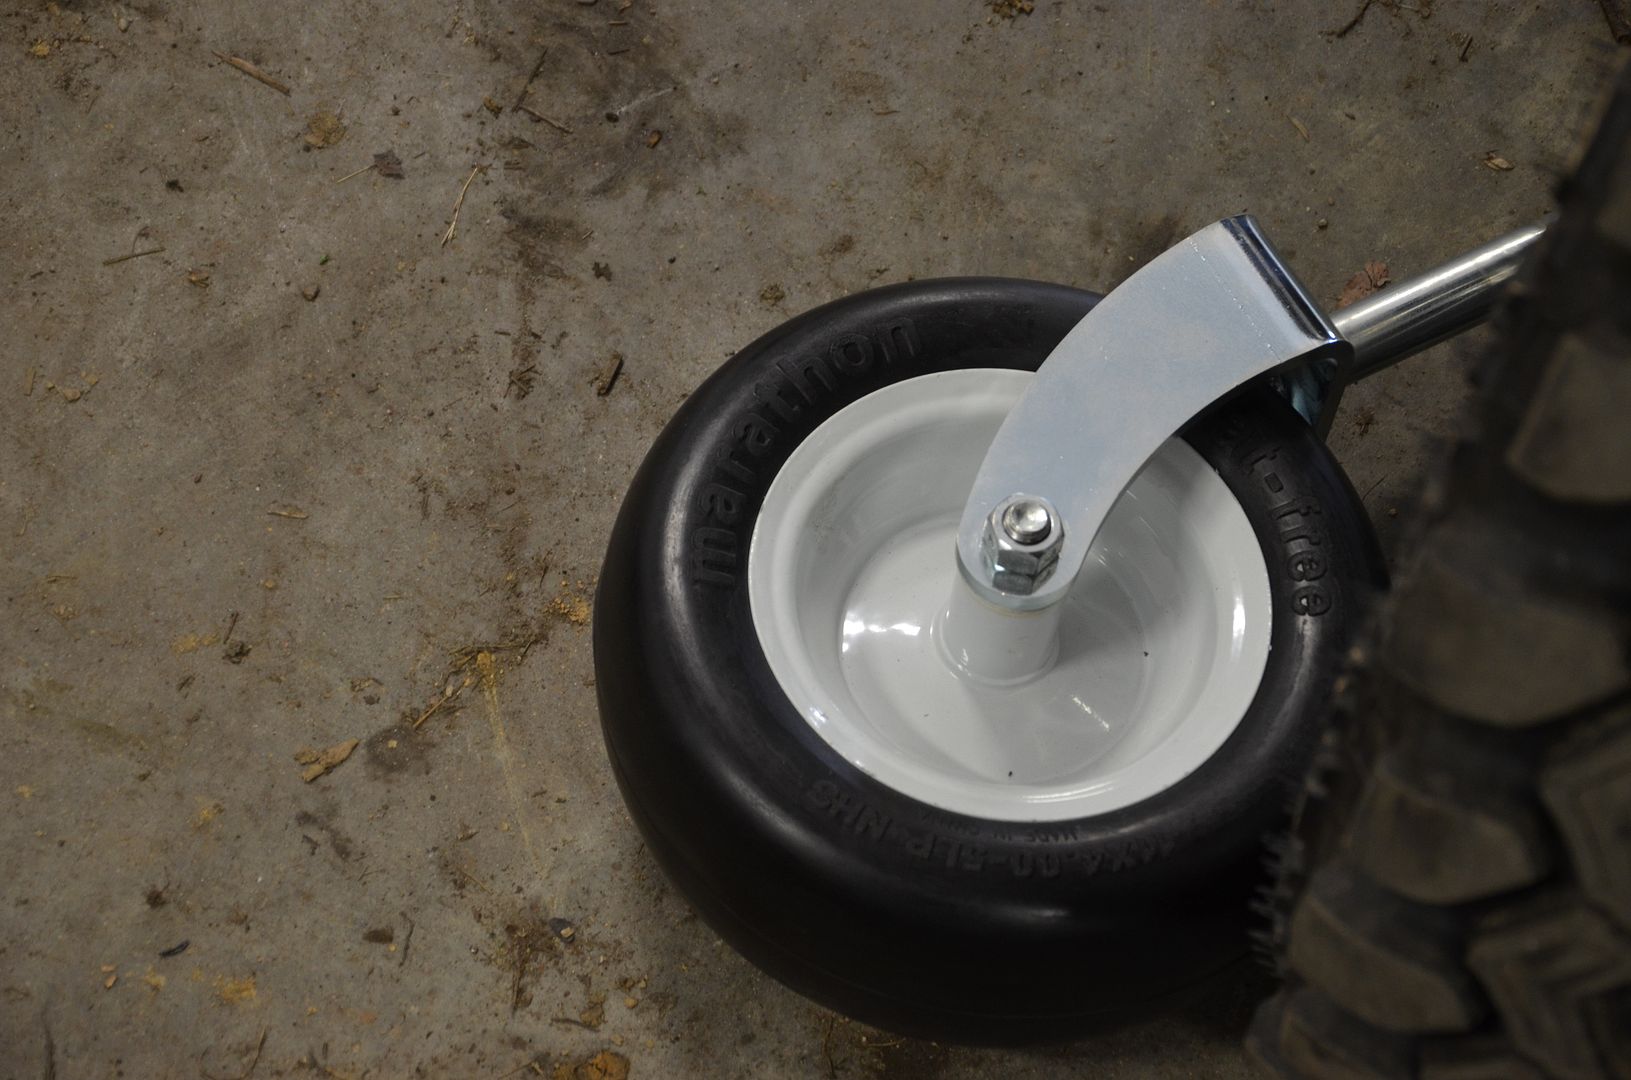
The Proman Rough Cut Mower Deck rides on (4) run-flat castor wheels. These wheels are built very heavy. In addition, the pivot housing has a grease zerk so they can be lubricated.
The Proman Mower mount allows for the mower to float both up/down/left/right. It pivots and rotates for keeping contact over uneven ground. In addition the mower deck can be mounted on either the front or rear of your ATV or UTV. This provides good versatility depending on your specific application.
Here is a pic of the unit installed on my Crew outside of Ball Equipment.
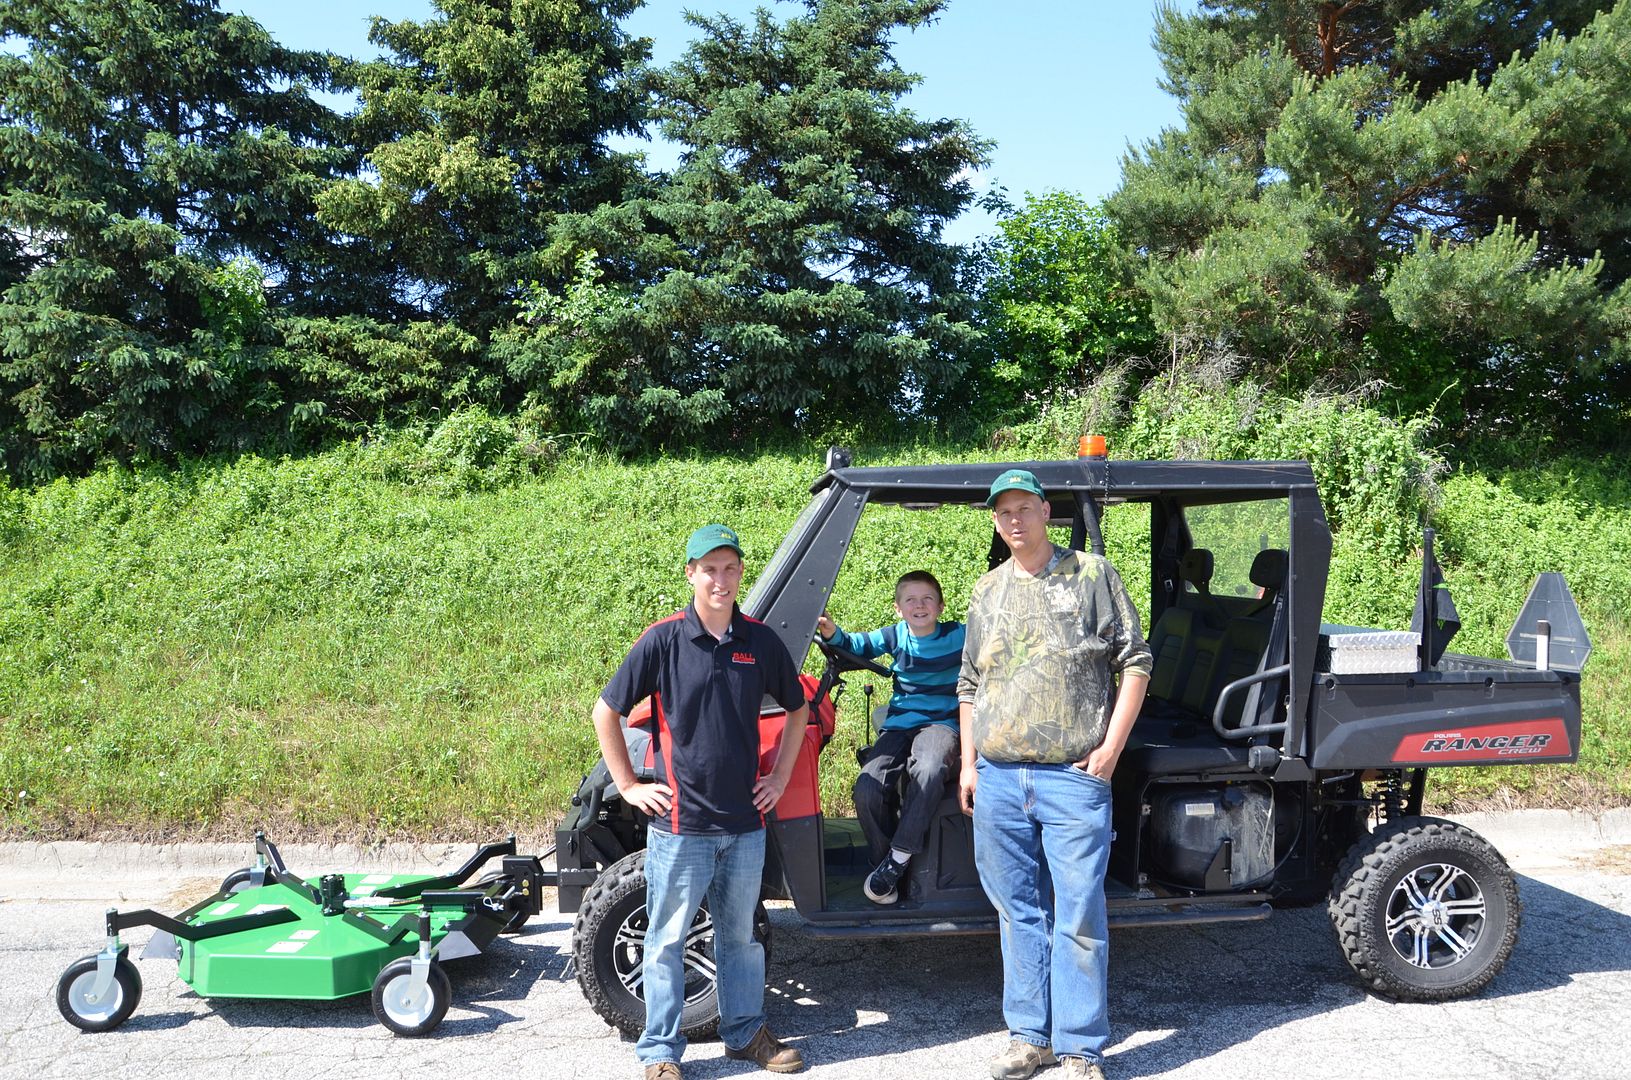
Pictured from Left-Right is Chris Ball, Ball Equipment/Fixmytoys.com/Fixmypolaris.com, my son Aidan, and myself Steve Lane.
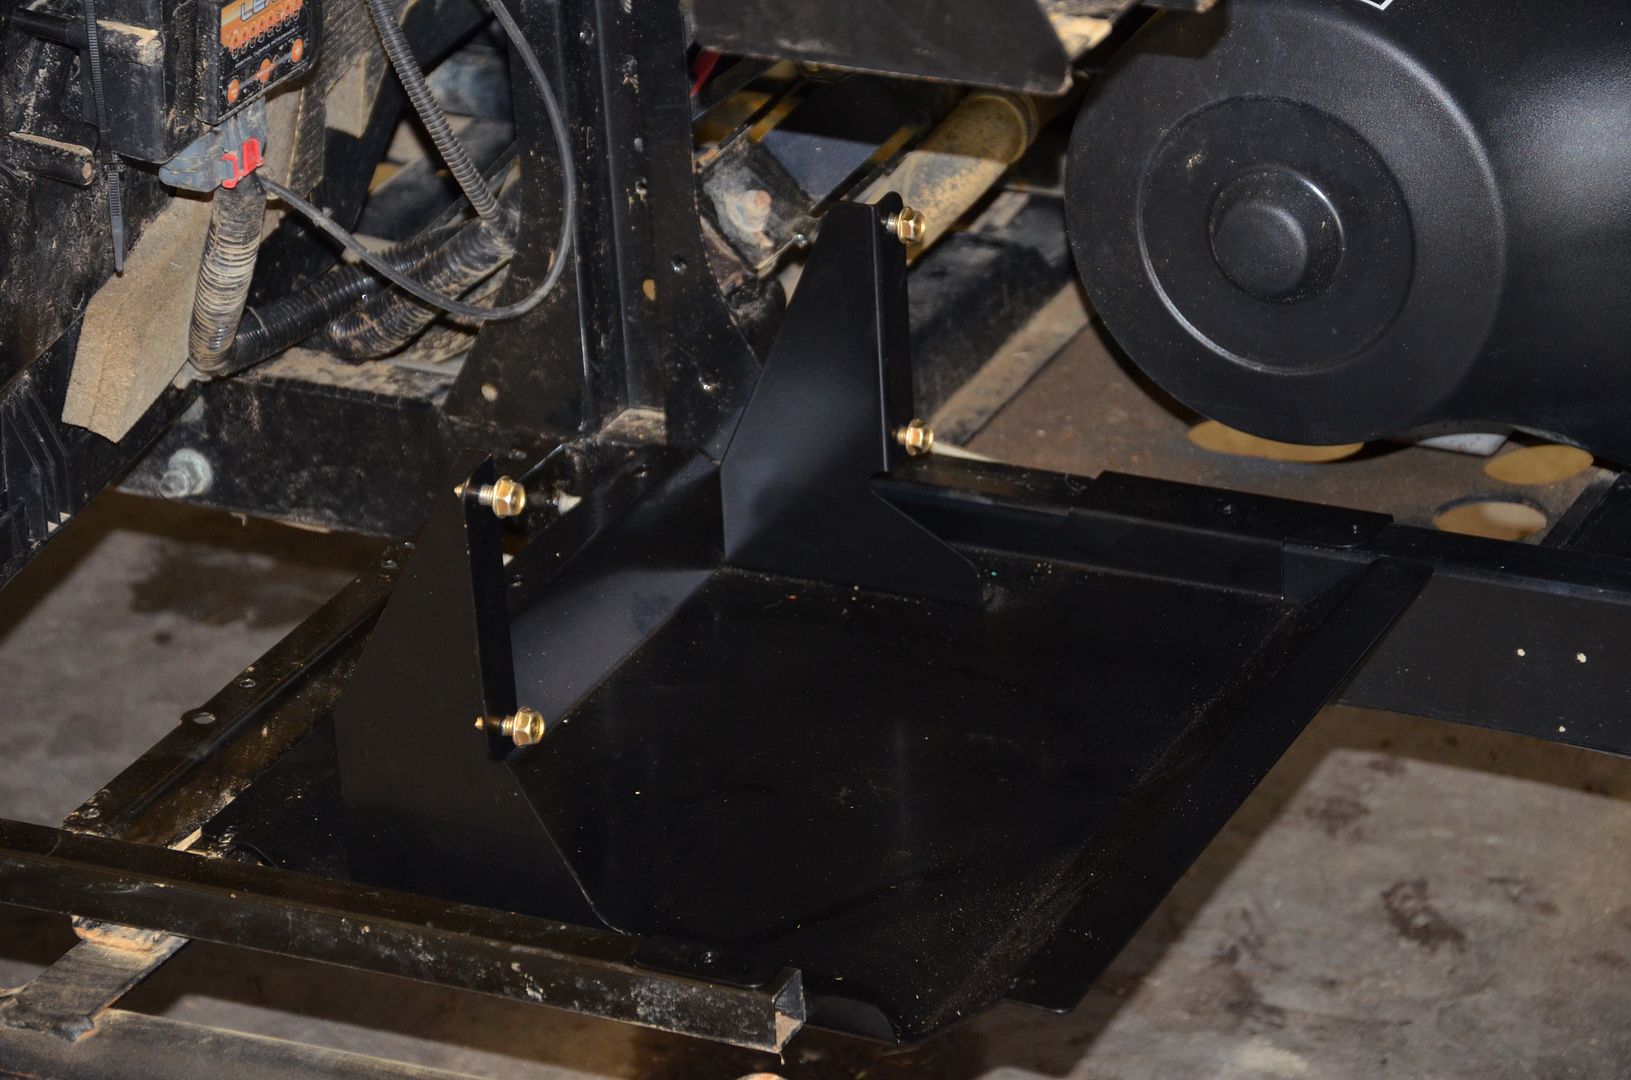
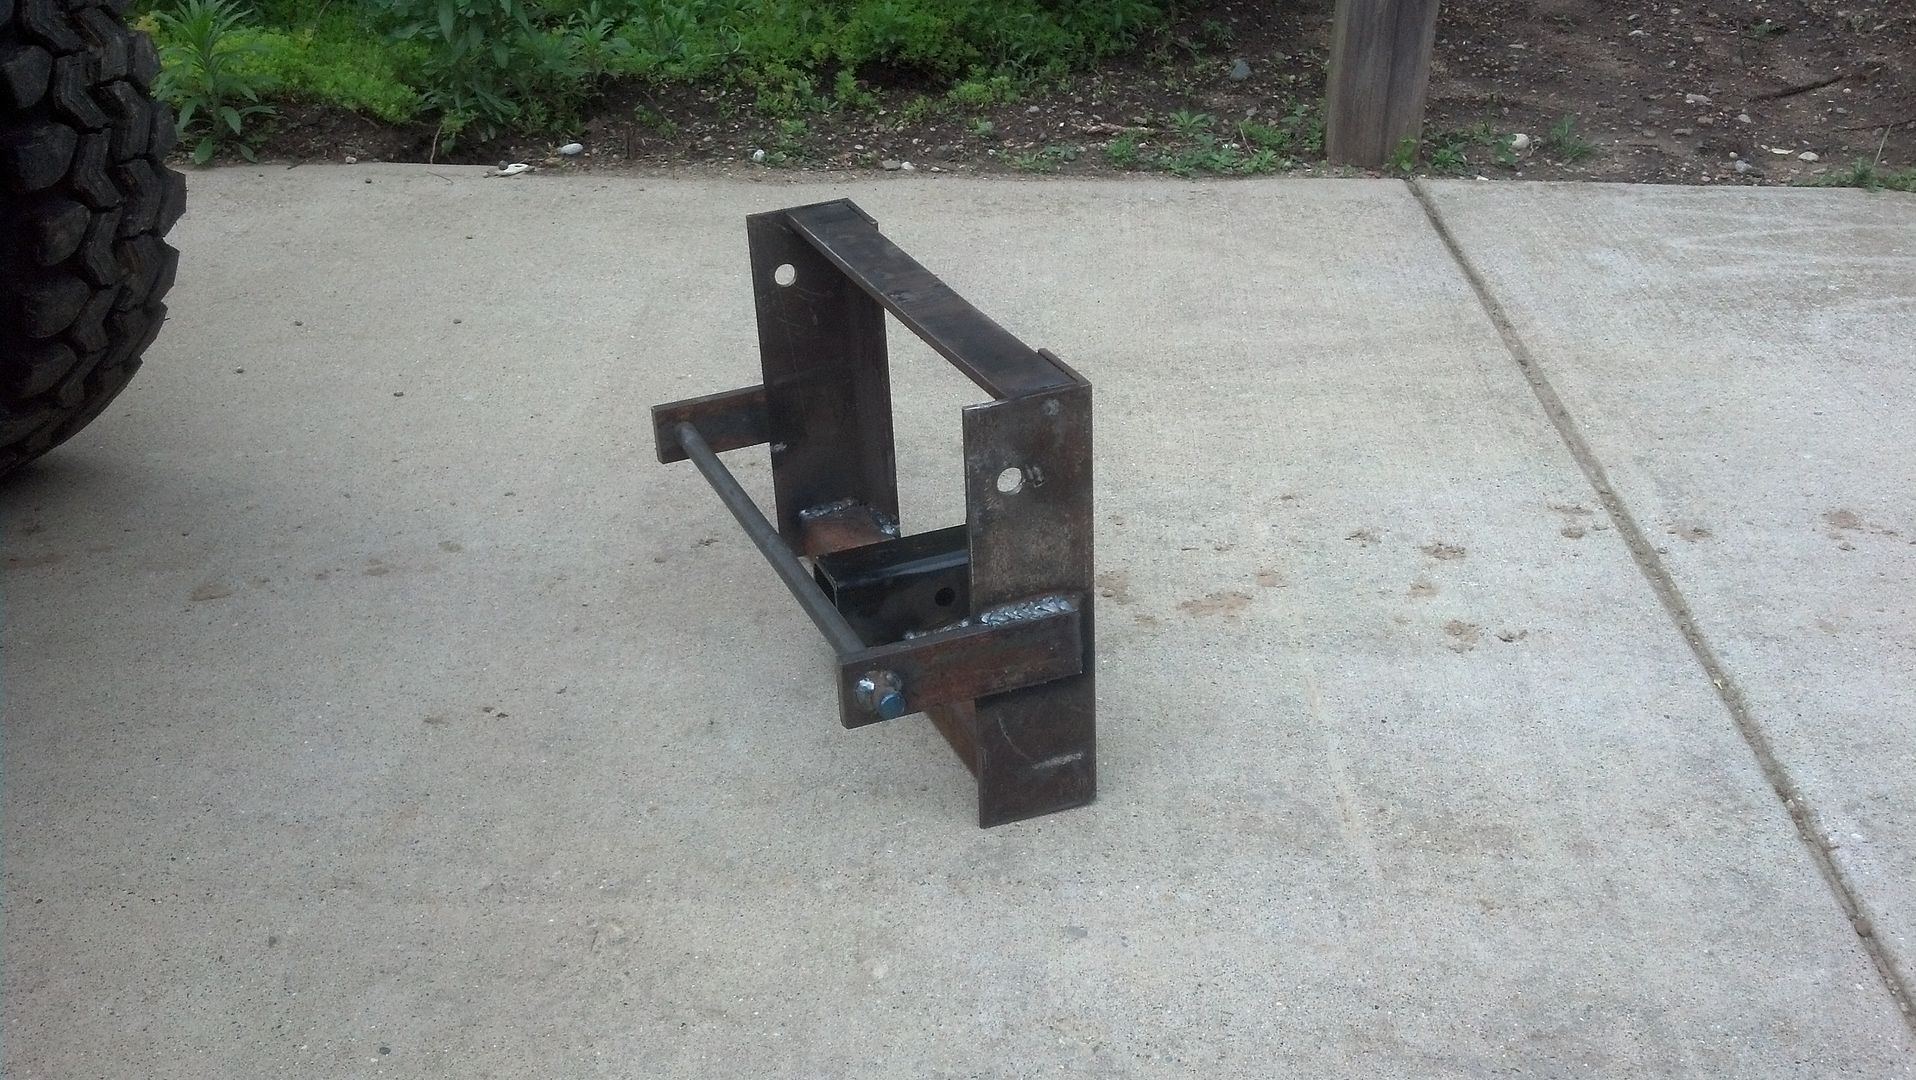
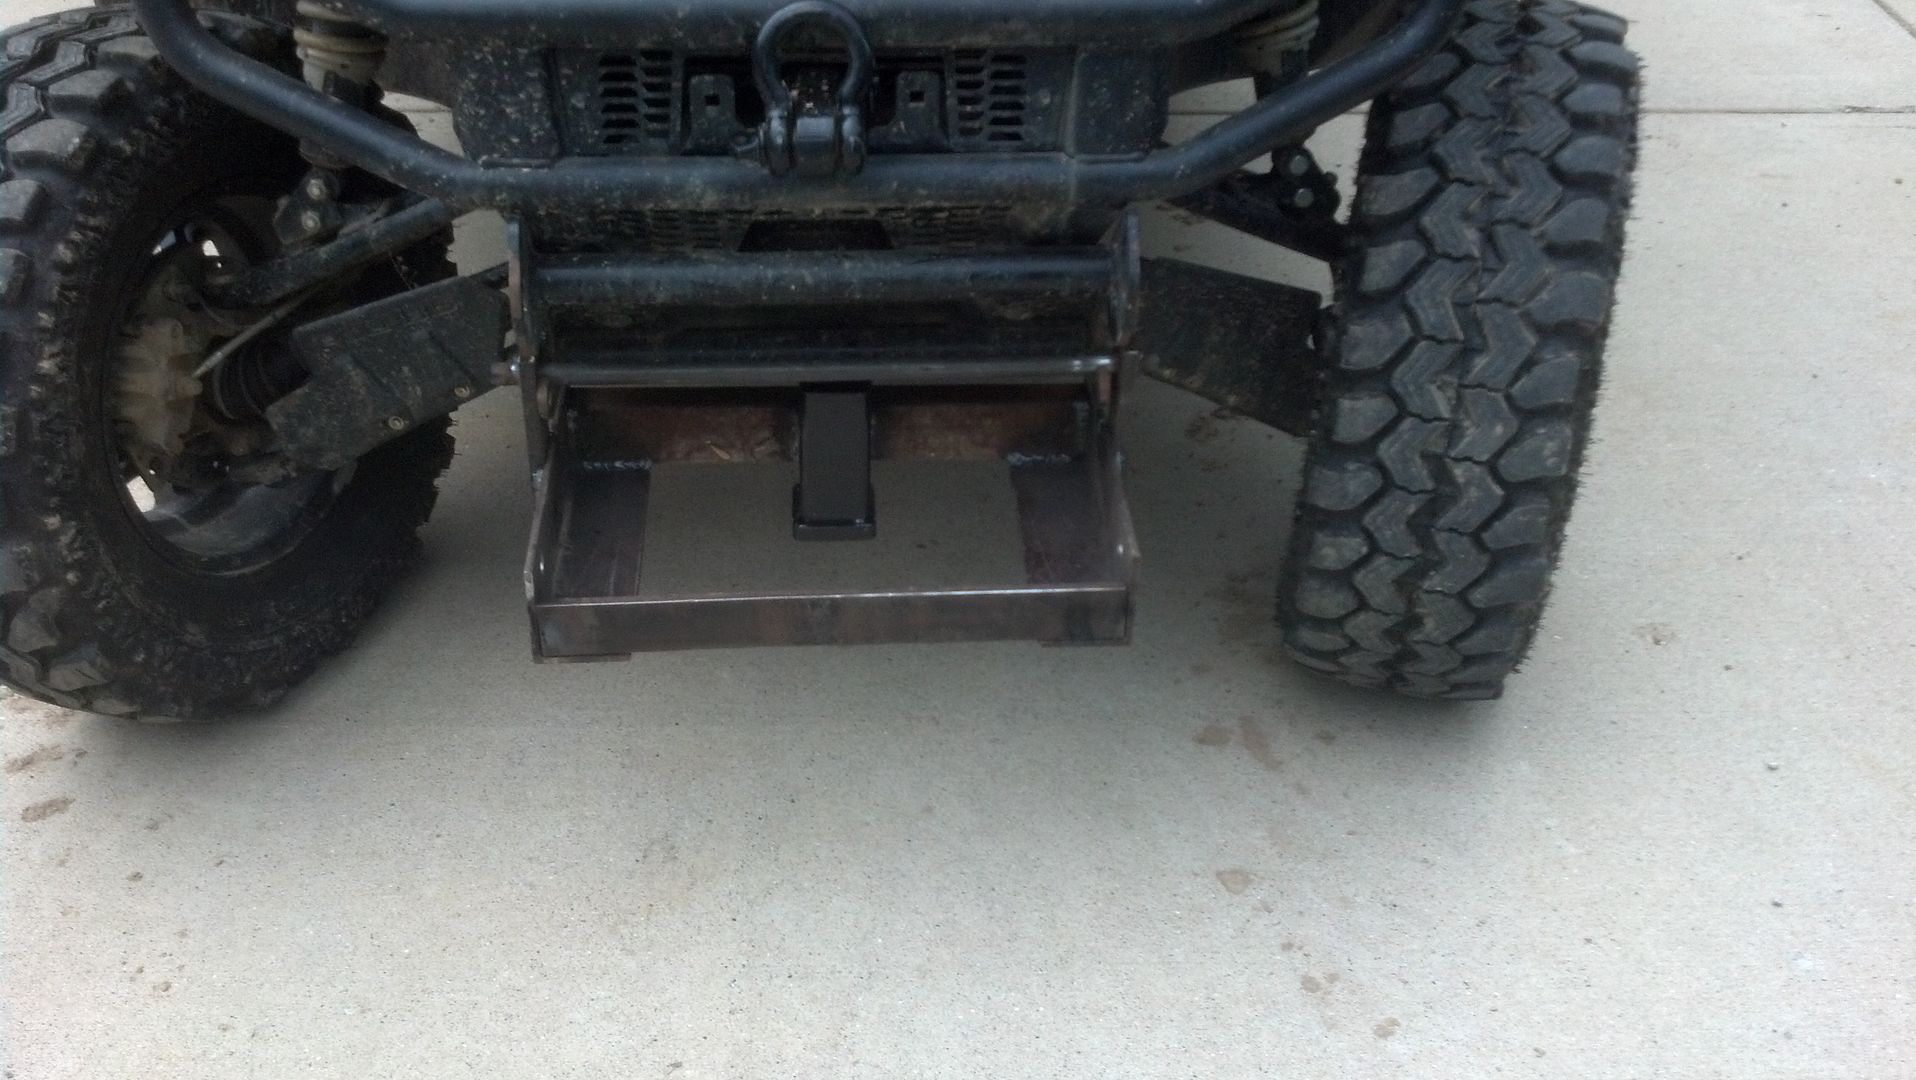
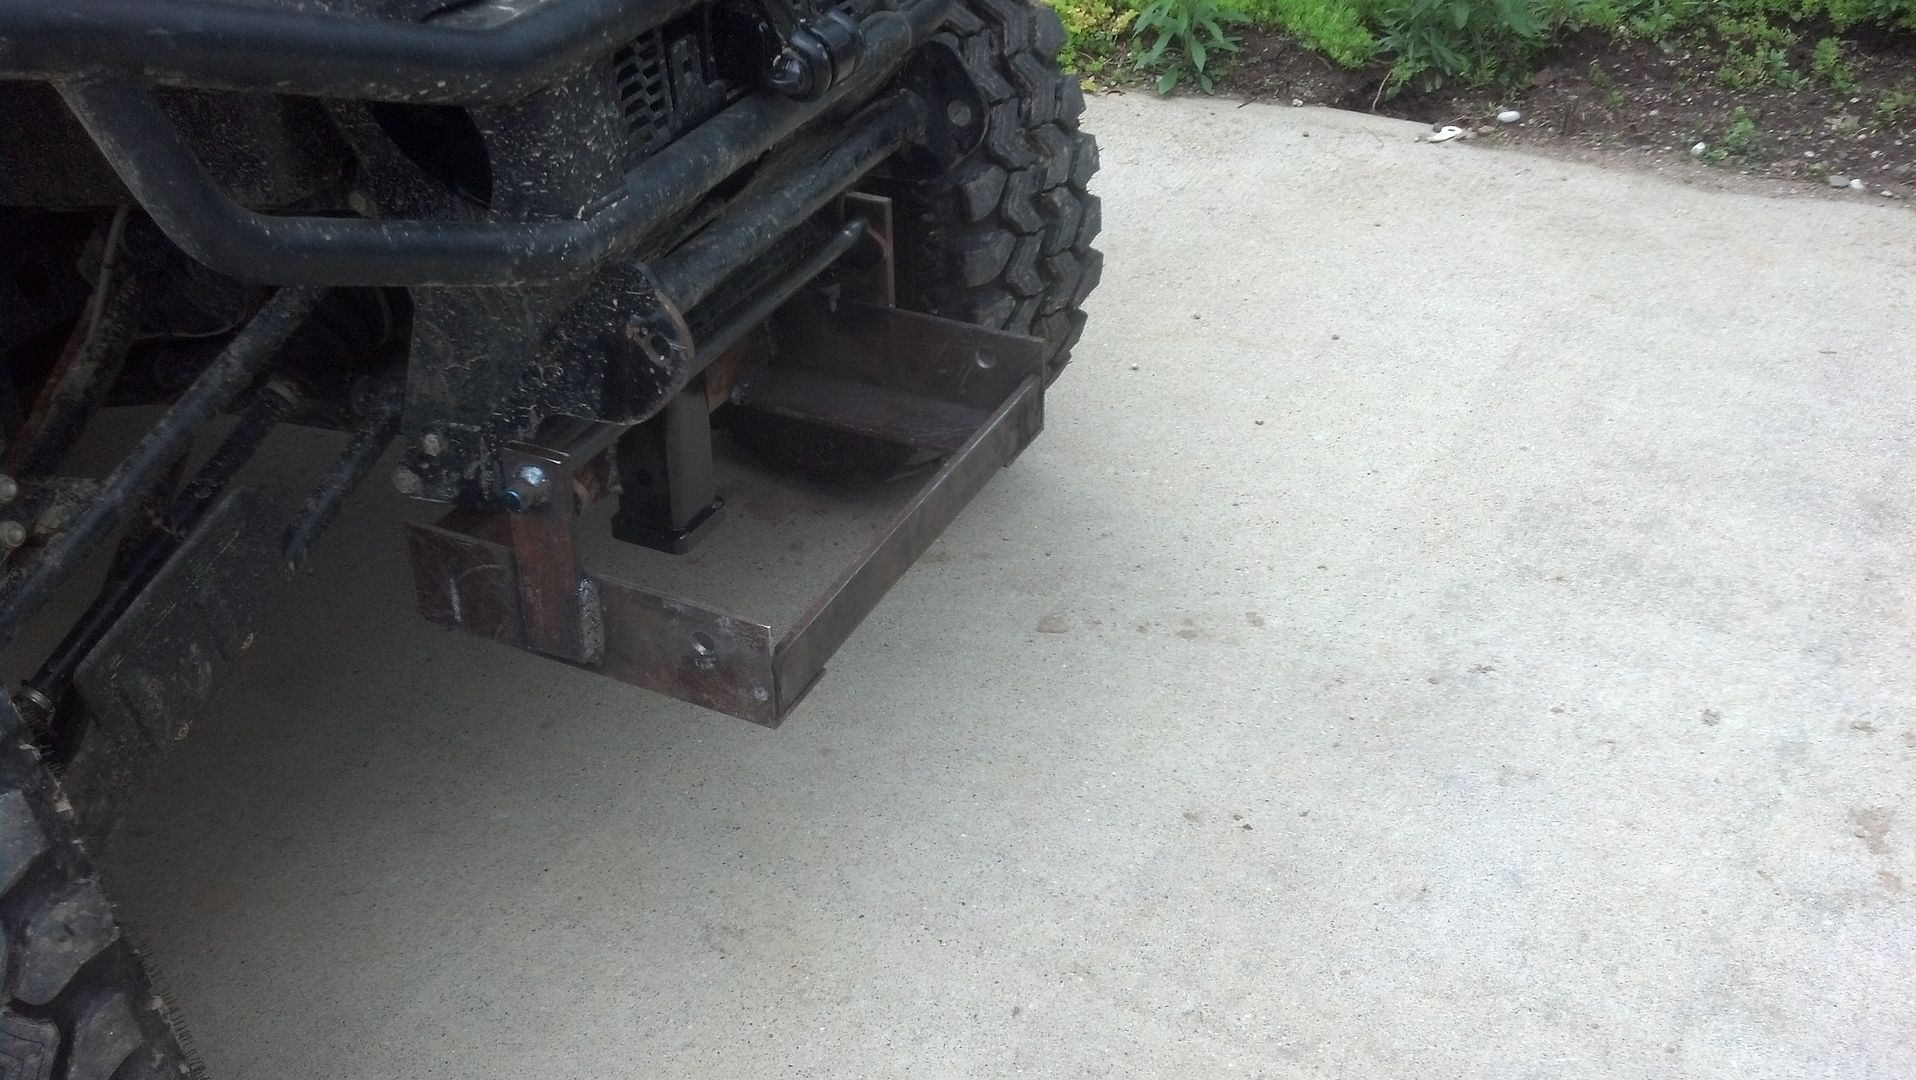
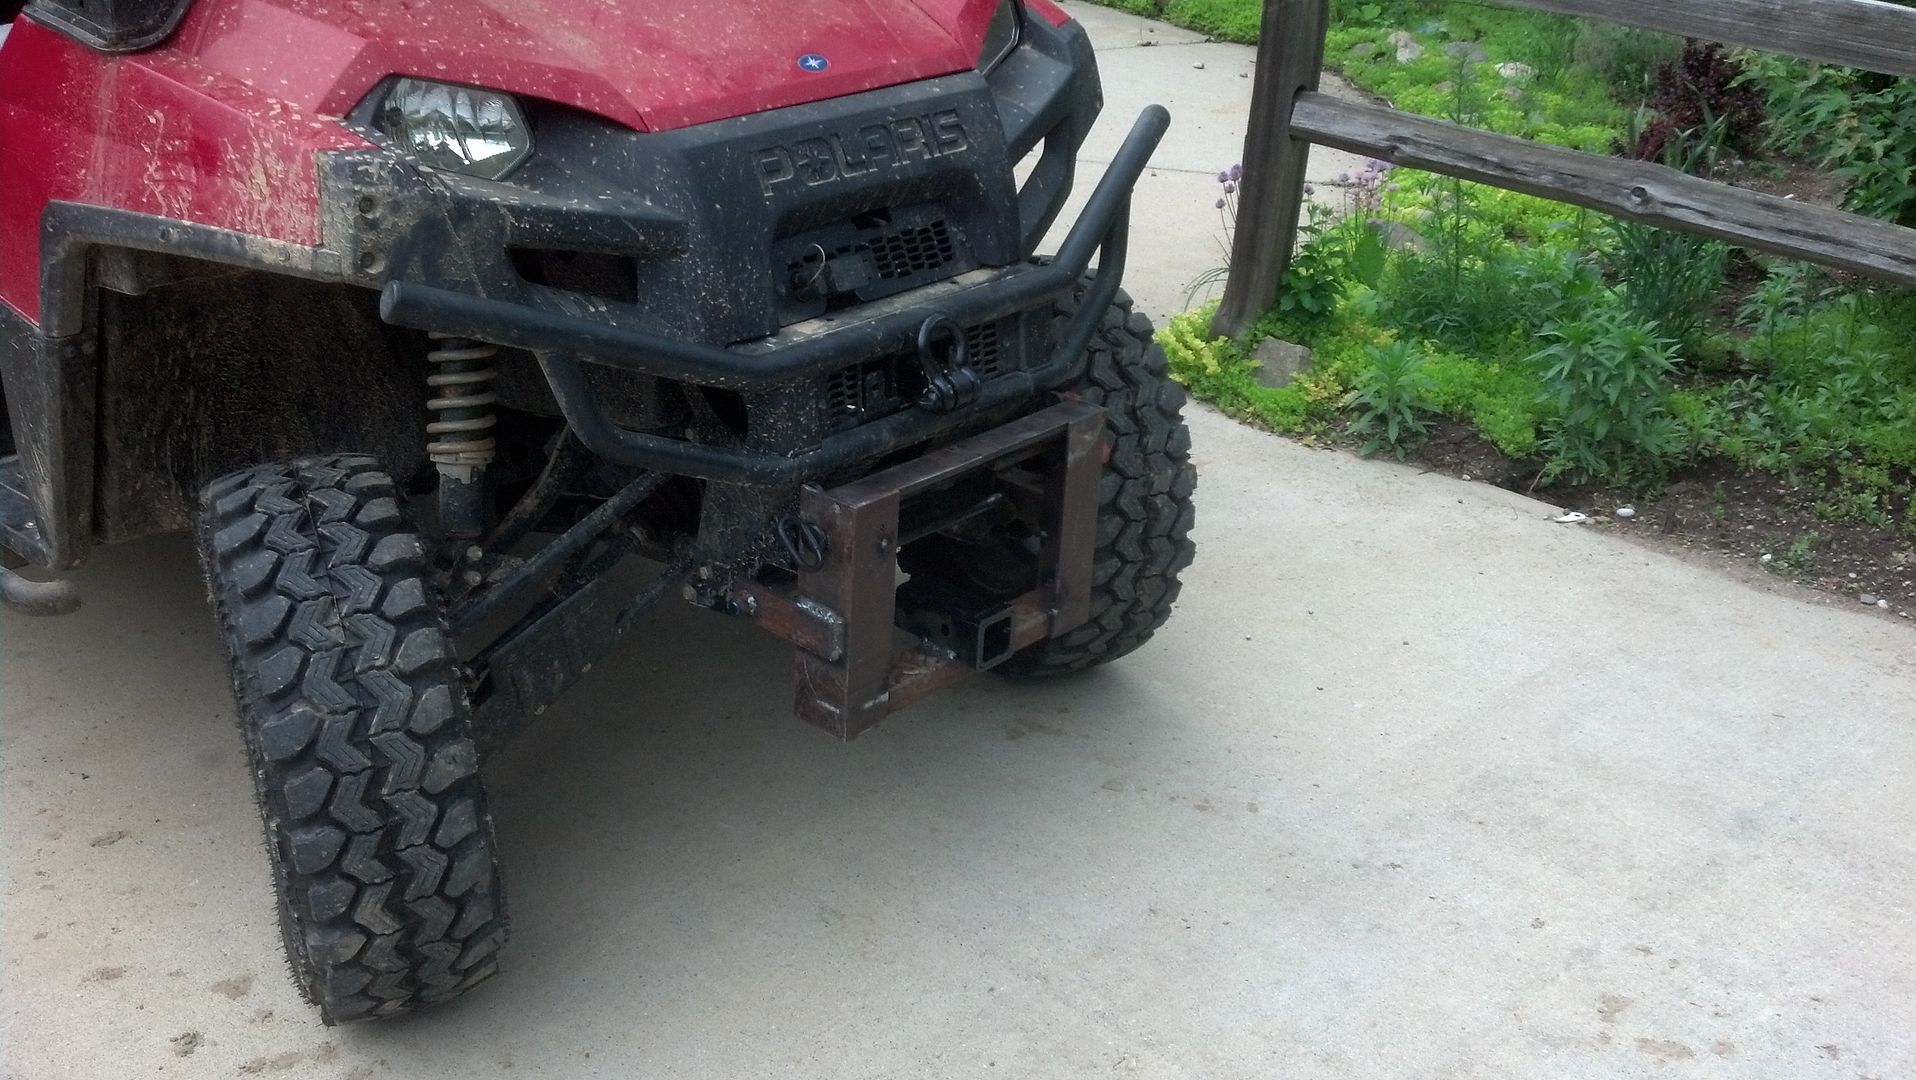
In order to mount the deck on the front of the Ranger, you are required to have a low mount 2” front receiver. I have a standard factory 2” receiver, but it is too high off of the ground. The receiver hitch height for adding Proman accessories is 15-18” off of the ground.
I am currently running a Boss Plow on my Ranger and I did not want to have to remove my plow mount to install a receiver hitch mount. So I decided to design my own low receiver hitch mount that locks into the Boss Plow Mount.
So I spent a couple of hours in the shop and built a hitch out of some scrap metal. It locks into the Boss Mount nicely and is quickly removable.
In summary, the Proman PTO is a very well designed unit. The fit and finish is top notch. It looks like a factory attachment. Kirk Jones and the staff at Proman are very friendly, and eager to help. Customer service seems top notch. This definitely seems like a very nice product to add additional “Utility” versatility to your UTV or ATV. The overall installation which may seem complicated, is not. This could easily be installed in 2 to 3 hours if you have basic mechanical knowledge and some common tools for working on your machine.
The Proman PTO is an economical way to add a hydraulic PTO to your existing ATV/UTV versus buying a new UTV that may already have hydraulics on board.
I am looking forward to trying out my Proman PTO! I am going to try to get some video of the Proman in action. Hopefully I will get that posted soon.
I have added a Proman PTO Hydraulic Power Take-Off to my 2010 Polaris Ranger Crew. The Proman PTO adds some additional “Utility” purpose to your UTV or ATV. Proman has a whole array of accessories either already developed or in the development process for UTV or ATV.
Unlike my John Deere Tractor, the benefit of a Hydraulic PTO is being able to drive attachments without a Rotating PTO shaft. I have run my PTO shaft with damaged PTO guards in the past, its dumb, but I have done it, in between PTO guard repairs.
Some of the items accessories Proman currently offers are a Rough Cut Mower Deck, Finish Mower Deck, Rotary Broom, Flail Mower, Log Splitter, etc. The Proman definitely offers the ability for your ATV or UTV to replace several other pieces of ground keeping equipment.
Polaris is now manufacturing a Pure Utility Workhorse UTV in the Brutus, which offers onboard hydraulics as well. However, for those that may be interested in a UTV with the work functionality of the Brutus, but don’t want to buy a new UTV, the addition of the Proman PTO may just be your answer.
Since I was the first Proman PTO installation by my dealer (Ball Equipment) I had the opportunity to meet Kirk Jones, the owner of Proman, who traveled to Ball Equipment to walk everyone through the installation of PTO unit.
The installation requires some basic mechanical knowledge, but it is not difficult at all. I would say that if you have enough knowledge to change your UTV clutch belt, you could install the Proman PTO. All and all it will likely take about 2 to 3 hours to install by yourself. After you have done one of them, you could probably cut the time down to 1 or 2 hours.
The big bonus is that it does not require any special tools. You just need some basic wrenches, power drill, and drill bit. Proman also includes a DVD that will walk you through the installation step by step. In my opinion a video is better than an instruction manual any day of the week.
The Proman PTO with a Rough Cut Mower Deck arrived securely packaged and strapped to a pallet.


The first step in the installation of the PTO unit was to prepare to relocate the gas tank to the opposite side of the Ranger Crew. Fortunately the underseat side of the Ranger is essentially symmetrical. So this is very easy to do.
To begin, you need to disconnect your battery to prevent any stray electrical currents while working on relocating the fuel tank. In addition, it is highly recommended to either syphon your gas out of the tank or wait until there is a fairly empty tank prior to the tank relocation. It definitely makes it easier to move if there is less fuel in the tank.
Next, the rear seat was removed, the bed dump tilted, gas cap removed and plastic body side panels removed with a Torx wrench.


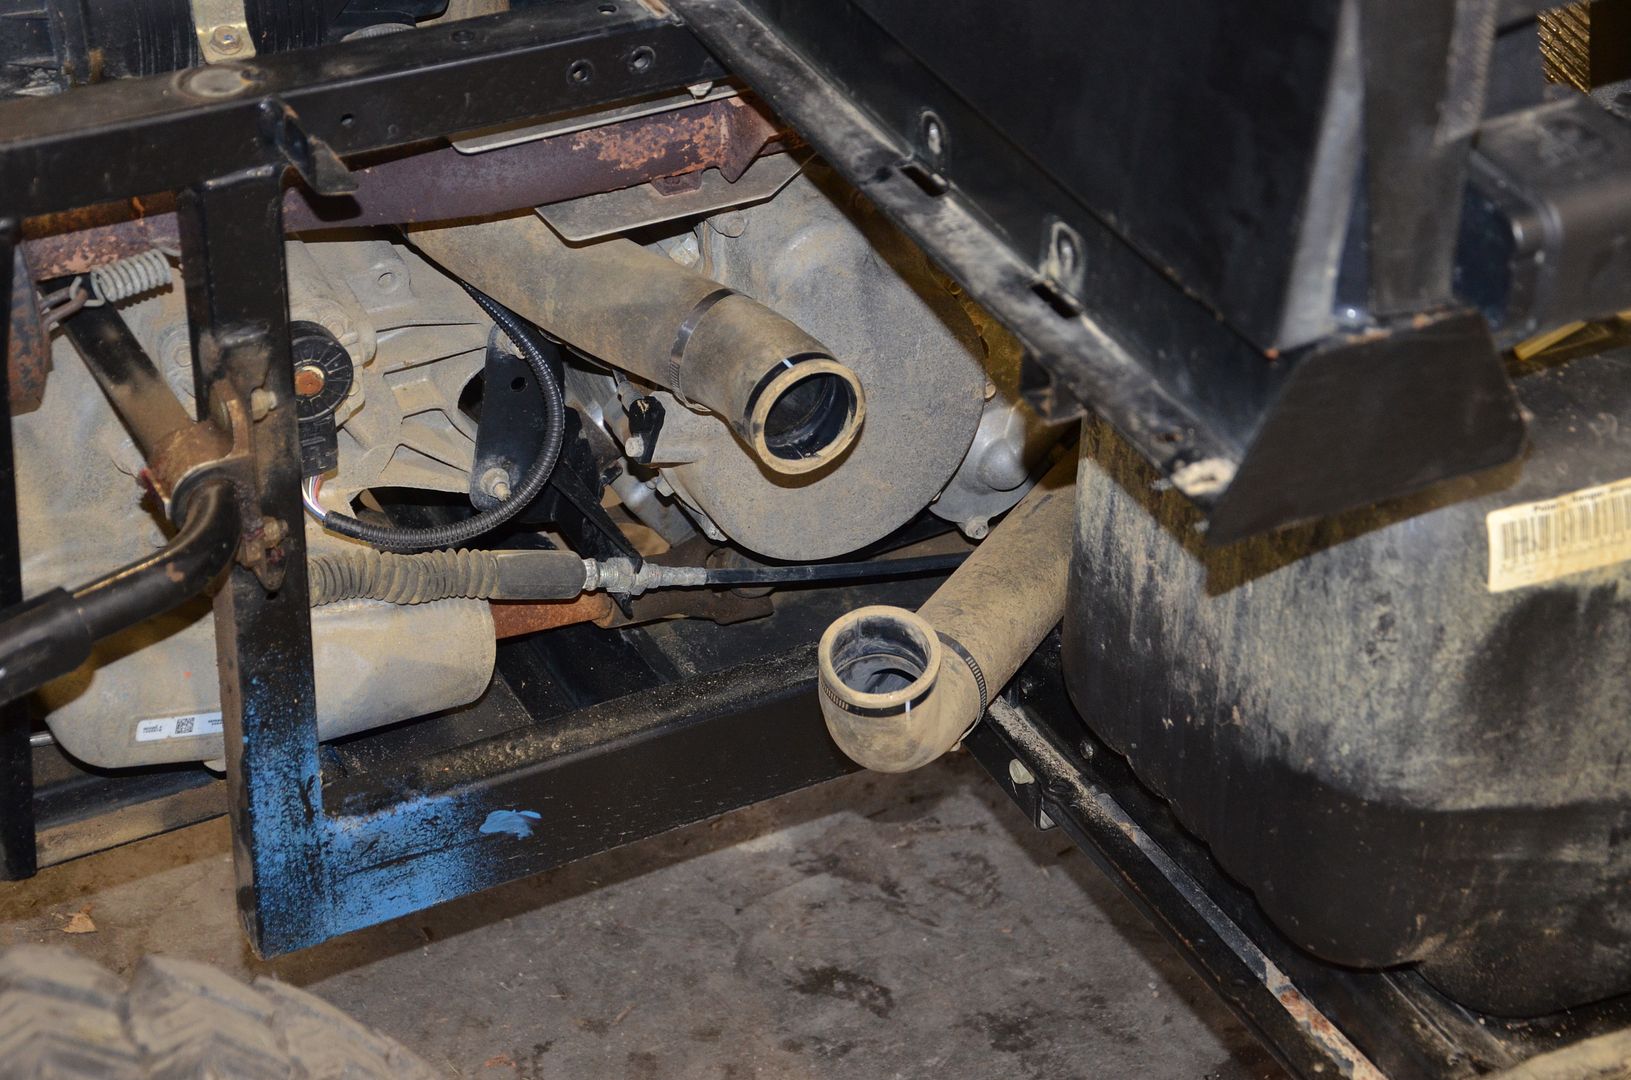
Once the plastic panels were removed, it was time to begin to remove the gas tank. However, before the gas tank was removed, the air-resonator box was removed. For my installation I chose to keep the air-resonator box removed. I just coupled the air-intake together with a metal coupler. I am not sure what the purpose of the resonator box is and don’t notice any issues without it. This could be reconnected if desired, but some additional plumbing parts would have been required.


Now that the air-resonator box has been removed, the gas tank is all set to come out. It is only held in by two screws and the fuel line connection on the fuel pump. However before physically removing the fuel tank, the drivers side of the Ranger was prepped for the tank installation.
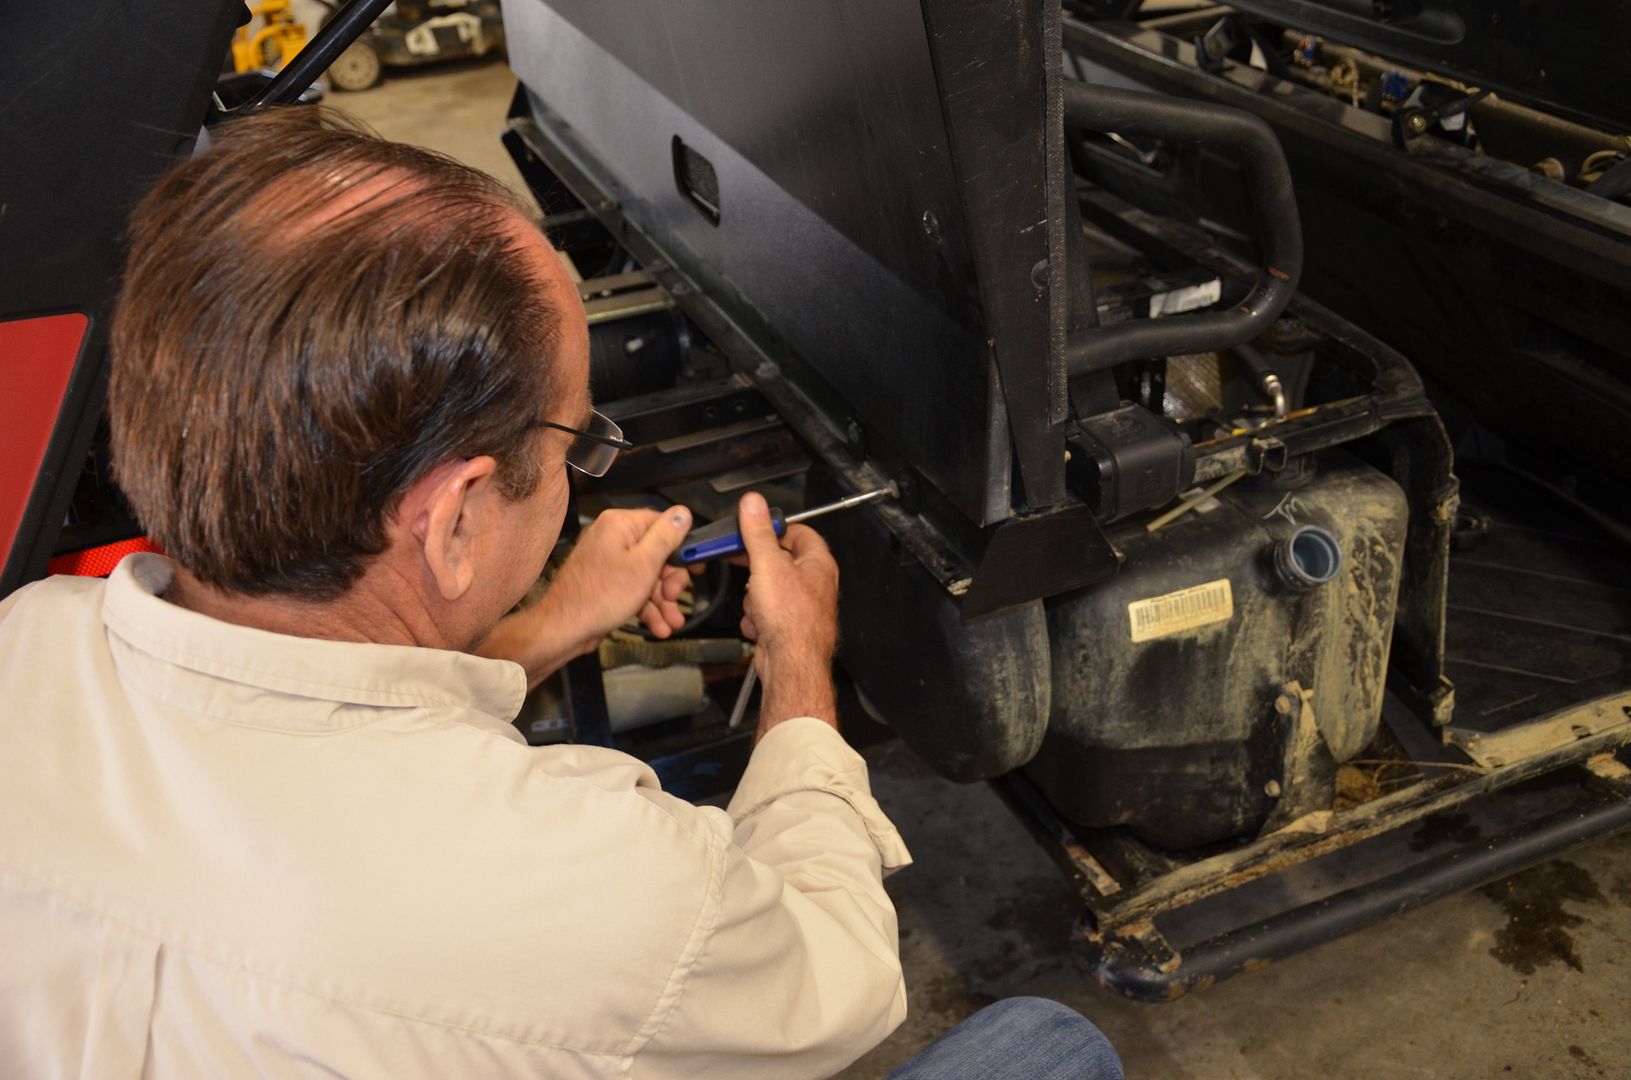
To facilitate the tank relocation, Proman provide a Fuel Tank relocation floor plate which is identical to the one in the factory tank location. The part is precision fit and drops right in like it was made from the factory.


The installation of the floor plate requires a drill, to install a self-tapping screw provided by Proman. The hardware Proman uses is the same hardware as found elsewhere on the Ranger, so it looks like it was from the factory.
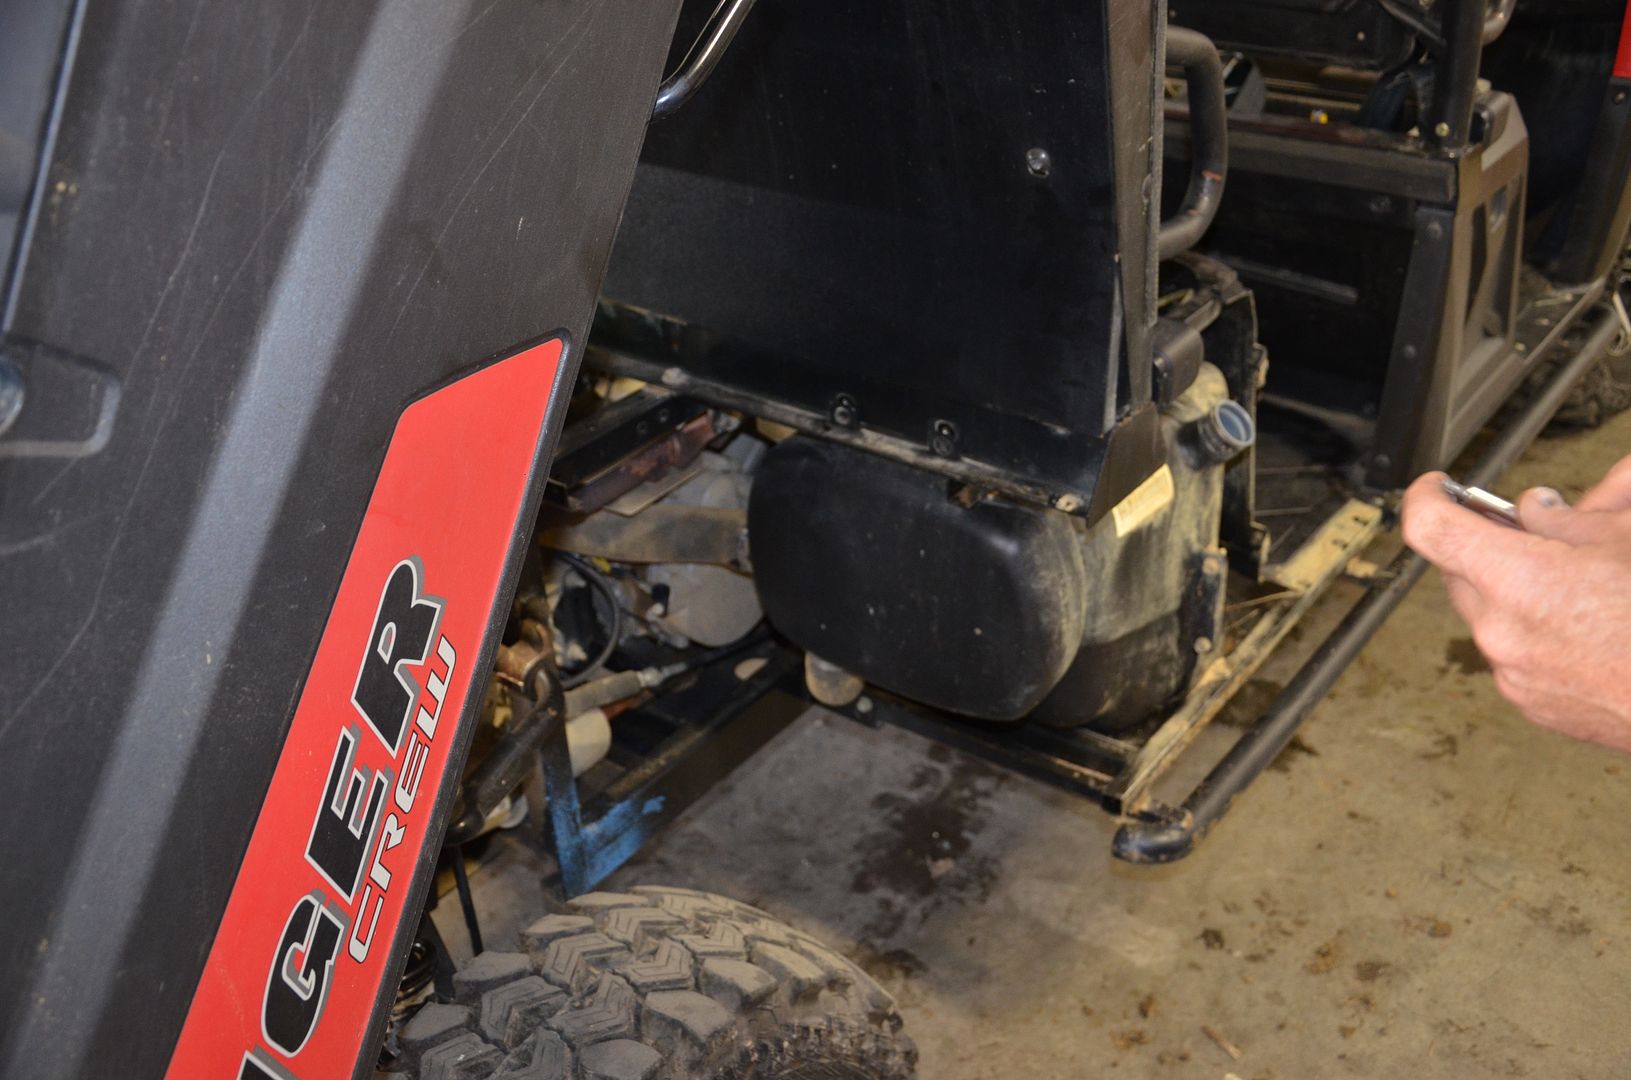
Once the floor mount is installed, the Gas tank is disconnected and relocated to the drivers side of the Ranger.


The fuel line very easily pivots to the opposite side of the Ranger which again makes relocation of the fuel tank very easy.
The down side to the tank relocation is that you have to take a 4” hole saw and drill a hole in your drivers side seat panel to accommodate access to the fuel tank. Proman does provide a plastic plug to fill the original fuel tank access hole on the passenger side of the machine.
PTO Installation
Now that the fuel tank is relocated, the PTO installation can begin.
The Proman PTO is actually driven off of the flywheel on the Ranger. In order to install the PTO Adapter Bracket, the Ranger Crankcase Cover needs to be removed and replaced with the Proman Crankcase Cover. The first step in this process is to remove the Crank Position Sensor (CPS) from the Crank Case Cover.
Once that is done the CPS is removed, the screws in the crank case cover can also be removed.


Once the Crankcase cover is removed it is time to install the Proman PTO flywheel adapter. This is a ring that attaches to the existing flywheel puller holes.


Once the Proman PTO flywheel adapter is installed, it is time to install the actual PTO coupler. The PTO coupler is a composite ring that has teeth that engage the and drive the PTO pump


Now that the PTO Adapter & Coupler have been installed on the flywheel, the Proman PTO Crank Case cover can be installed in place of the factory crank case cover. It is critical to remove the crank case cover gasket from the original crank case and re-install it on the Proman crank case cover. Once the gasket is in place, the cover is re-installed and torqued.


After the Proman Crank Case cover was installed, it was time to reconnect/splice together the air intake line. Proman provides a metal coupler for doing this. If it is desired to use the factory air resonator box that was removed, some additional plumbing fittings would be required.


Once the air intake is reconnected, the Proman PTO Hydraulic Pump is all set to be mounted. The actual Pump unit itself is designed to be quick removable should you desire to take it off of your ATV or UTV. There are two nuts that secure the pump unit to the Proman crank case mounting bracket. In the event that you want to run your Ranger with the Pump Removed, there is a cover plate that fits over the opening on the crank case cover and is secured by the two nuts. The cover is also gasketed so it has a tight seal.

The hydraulic fluid reservoir is also installed in front of the hydraulic pump.


Once both the Hydraulic pump and the reservoir are installed, there are two hoses that need to be connected from the reservoir to the pump. The long hydraulic hoses that actually drive the Proman Accessories are designed to be either routed to the front or rear of the UTV or ATV. The hose can be tied up with zip ties on the underside of the machine and the extra hose can be secured at either the front or rear of the machine when accessories are not in use.
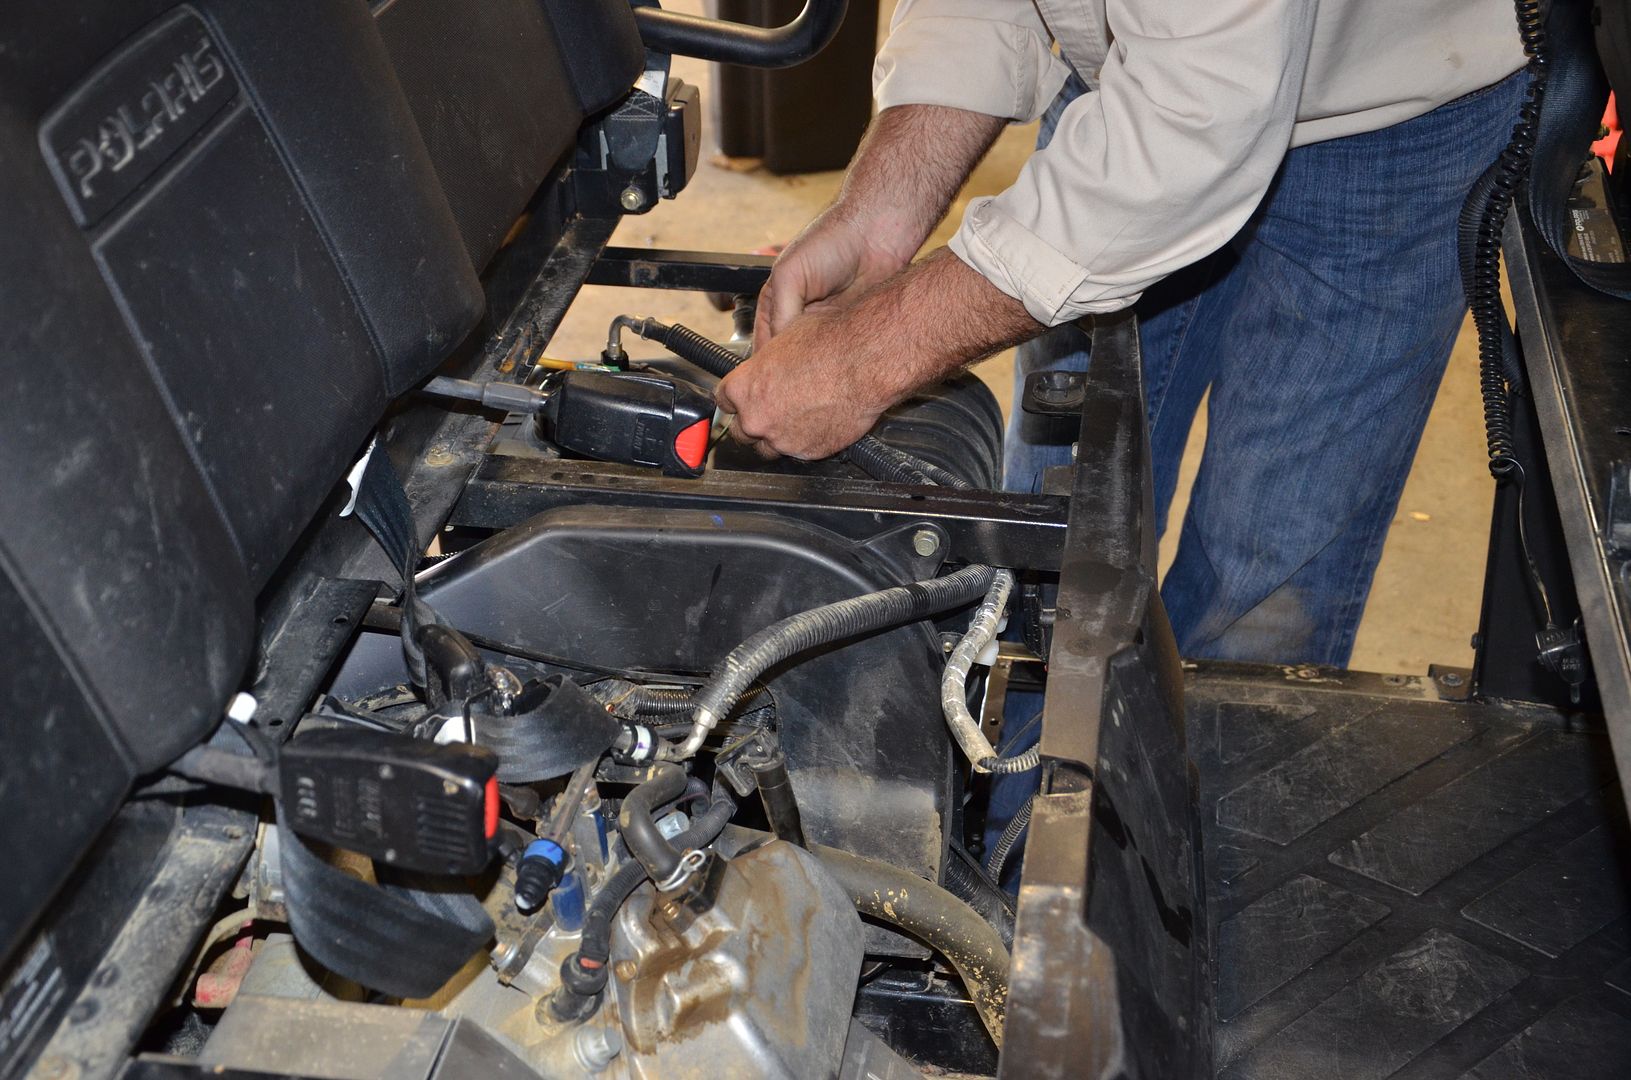
Next, it was time to install the PTO control joystick. The Joystick mounts on the front seat frame of the Ranger Crew. Once a comfortable location is determined, the mounting bracket for the joystick is installed with some carriage bolts. There is drilling required for the mounting holes.


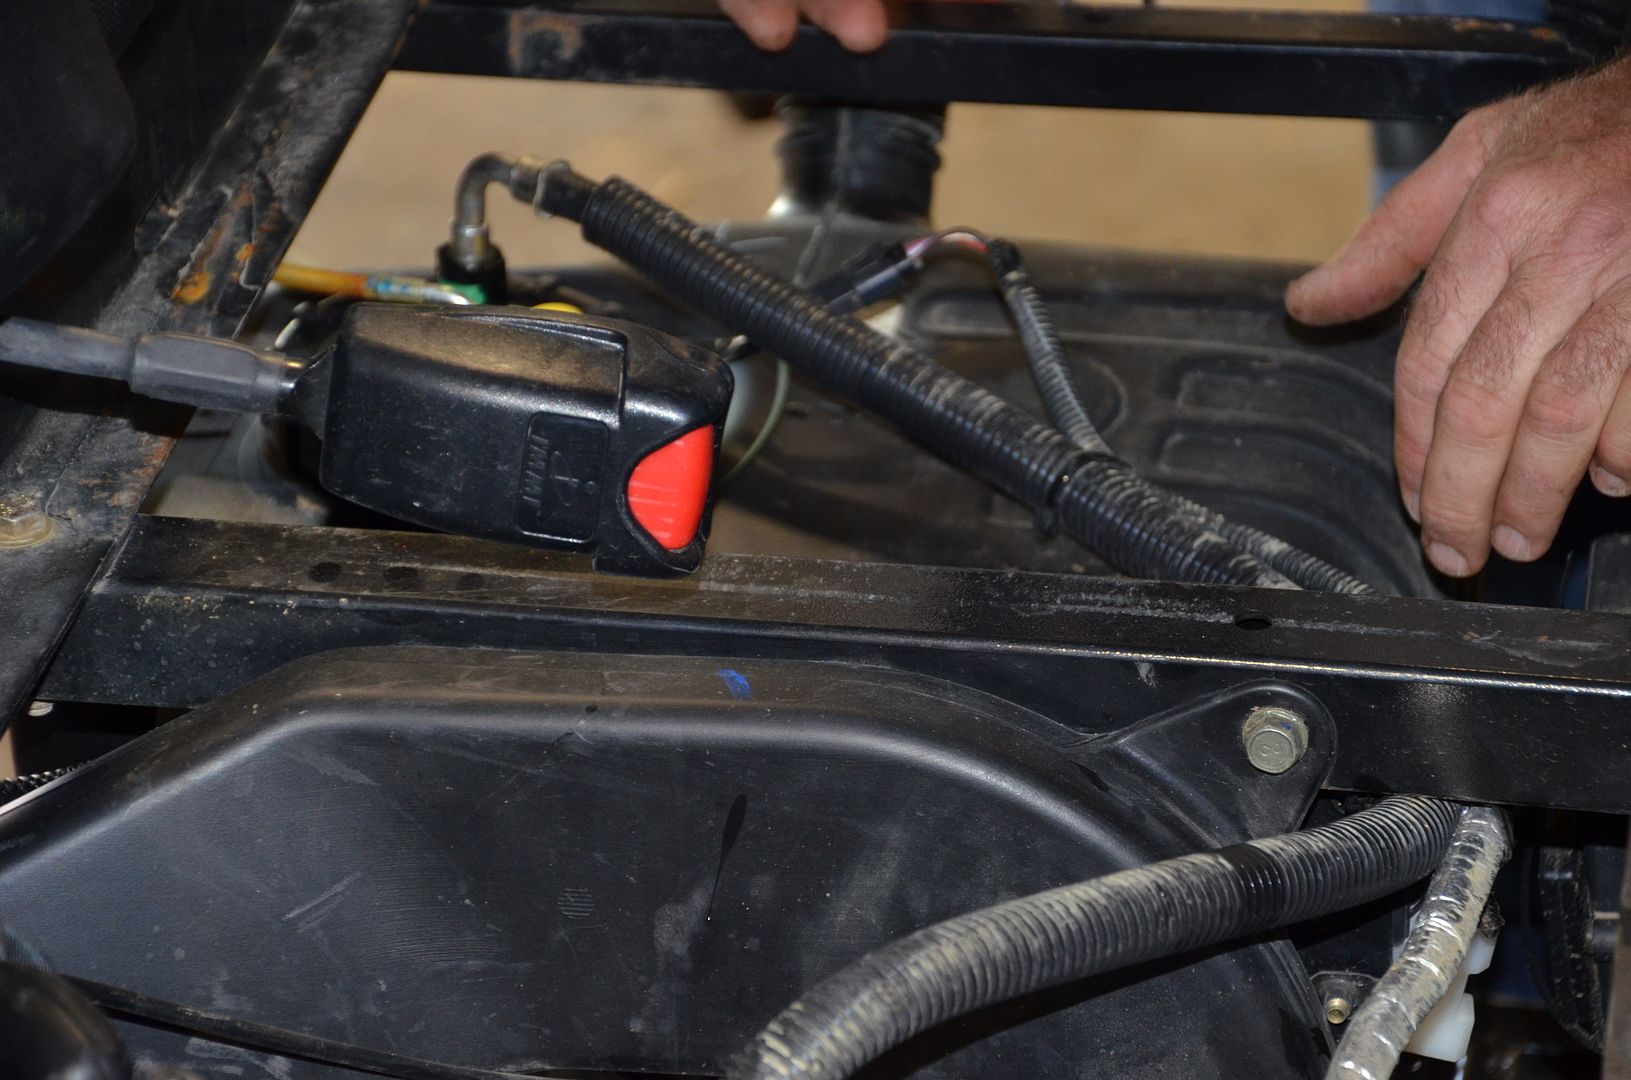
Now that the Hydraulic Control Joystick has been mounted, the control cable was run back to the hydraulic pump. The cable runs underneath the Ranger and then gently loops back from the drivers side of the Ranger to the passenger side where the pump is located.


The final step in the PTO installation was adding a power wire from keyed hot power back to the PTO wiring harness. Once this was complete it was time to reassemble the plastic panels on the sides of the Ranger as the PTO installation is complete.
Proman Accessories
The first Proman Accessory I have is a Rough Cut Mower Deck. All I can say is WOW, this thing is pretty beefy. It is truly built like a small scale brush hog. The blades are very thick. This current brush hog is designed with bi-directional swinging blades that are sharpened on both sides. These will cut through rough brush when the PTO is running both forward and backwards.

The Proman Rough Cut Mower Deck rides on (4) run-flat castor wheels. These wheels are built very heavy. In addition, the pivot housing has a grease zerk so they can be lubricated.

The Proman Mower mount allows for the mower to float both up/down/left/right. It pivots and rotates for keeping contact over uneven ground. In addition the mower deck can be mounted on either the front or rear of your ATV or UTV. This provides good versatility depending on your specific application.


Here is a pic of the unit installed on my Crew outside of Ball Equipment.

Pictured from Left-Right is Chris Ball, Ball Equipment/Fixmytoys.com/Fixmypolaris.com, my son Aidan, and myself Steve Lane.
In order to mount the deck on the front of the Ranger, you are required to have a low mount 2” front receiver. I have a standard factory 2” receiver, but it is too high off of the ground. The receiver hitch height for adding Proman accessories is 15-18” off of the ground.
I am currently running a Boss Plow on my Ranger and I did not want to have to remove my plow mount to install a receiver hitch mount. So I decided to design my own low receiver hitch mount that locks into the Boss Plow Mount.
So I spent a couple of hours in the shop and built a hitch out of some scrap metal. It locks into the Boss Mount nicely and is quickly removable.


In summary, the Proman PTO is a very well designed unit. The fit and finish is top notch. It looks like a factory attachment. Kirk Jones and the staff at Proman are very friendly, and eager to help. Customer service seems top notch. This definitely seems like a very nice product to add additional “Utility” versatility to your UTV or ATV. The overall installation which may seem complicated, is not. This could easily be installed in 2 to 3 hours if you have basic mechanical knowledge and some common tools for working on your machine.
The Proman PTO is an economical way to add a hydraulic PTO to your existing ATV/UTV versus buying a new UTV that may already have hydraulics on board.
I am looking forward to trying out my Proman PTO! I am going to try to get some video of the Proman in action. Hopefully I will get that posted soon.


